Superset Pyramid Time Challenge Workout (Week 4)

Four down, one week to go! Of the superset pyramids we’ve done this month, today’s went by the quickest for me. It would make for a great workout finisher or is the perfect option on those days you “don’t have time” to workout.

Superset Pyramid Time Challenge Workout (Week 4)

Equipment I Used

  • Sliders
  • Exercise mat

For this workout, you’ll have two exercises that you’ll go through in a pyramid structure. You’ll do 10 reps of each, then 9 reps, then 8, 7 … finishing with 1 rep of each. The goal is to complete the pyramid of reps as fast as you can without sacrificing proper form. In the video, I go over ways to modify the two exercises to make it suitable for all levels. Be sure to warm up beforehand.
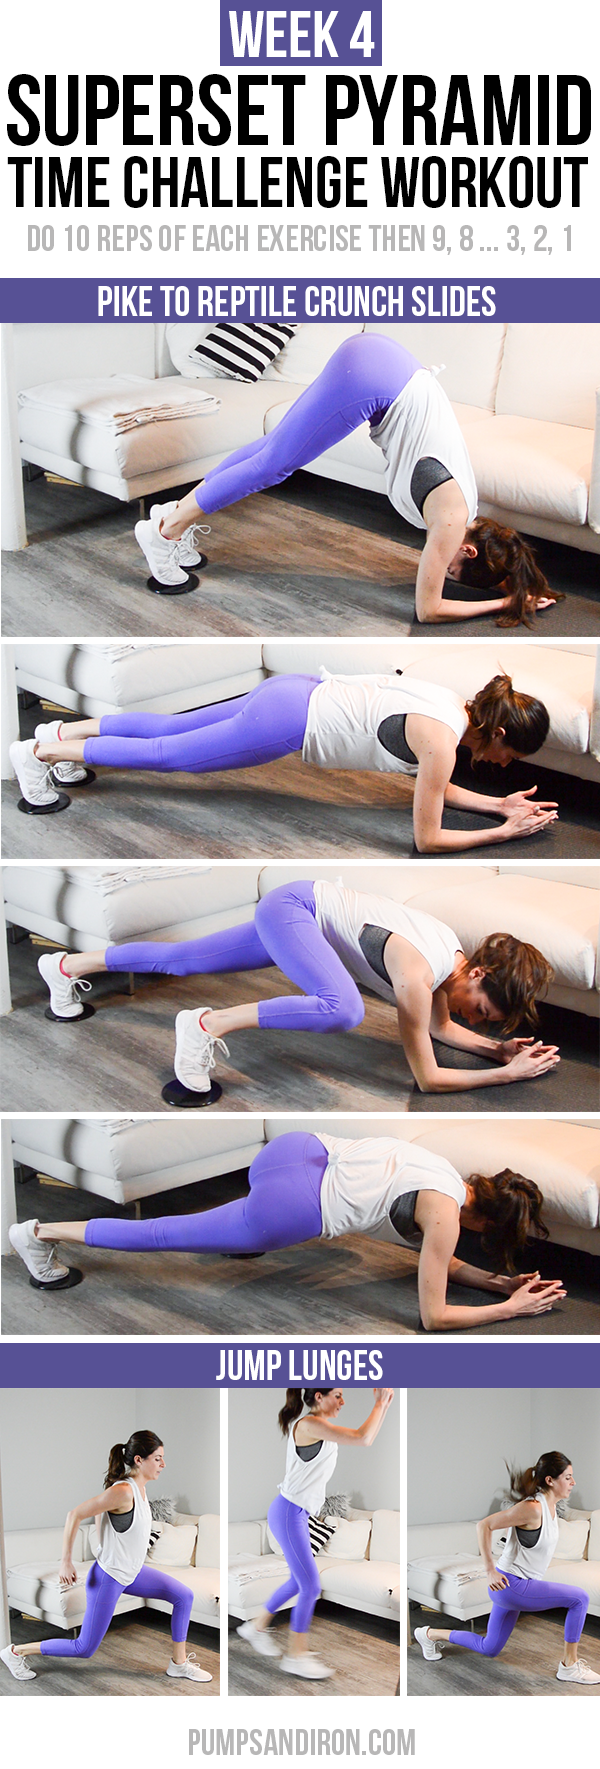
Forearm Plank to Pike to Reptile Crunch Slides | Start in a forearm plank with feet on sliders. Keeping your legs straight, pike your hips up into the air as high as you can, sliding your body into an upside-down “v” shape. Return your hips back down to plank position and then do a reptile crunch to each side, sliding your right knee in towards your right triceps and then left knee into left triceps. That’s one rep.

Jump Lunges (each set = 1 rep) | Start in a split-stance lunge position with one foot in front and the ball of the other foot planted behind you. Front knee is at a 90-degree bend with knee stacked over heel. Jump up, switching feet in midair and landing back in a split-stance lunge with the other foot in front. Repeat back to starting position. That’s one rep.

WEARING | Lululemon leggings (old but you can shop their current selection or check out these adidas leggings in a very similar shade of purple) // Puppies Make Me Happy tank (they have a Rescue Puppies collection that supports animal shelters!) // Adidas neo sneakers // Cory Vines sports bra

PSA

Every time I wear the above Lululemon leggings on the blog, I get questions about them and I always have to give the bad news that they’re old and no longer carried by Lulu. Well I just saw that Lululemon brought them back by popular demand!! I think I’m going to get another pair in the blue because they really are the best. Super high waist, supportive material, and the look is just so cool.

Some outfit and equipment detail links are affiliate.

Apple Cinnamon Baked Oatmeal Cups

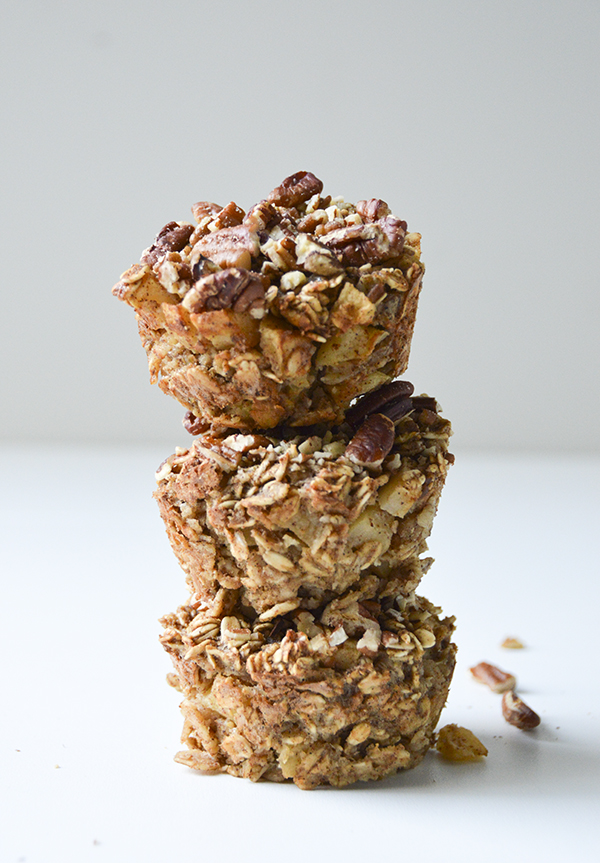
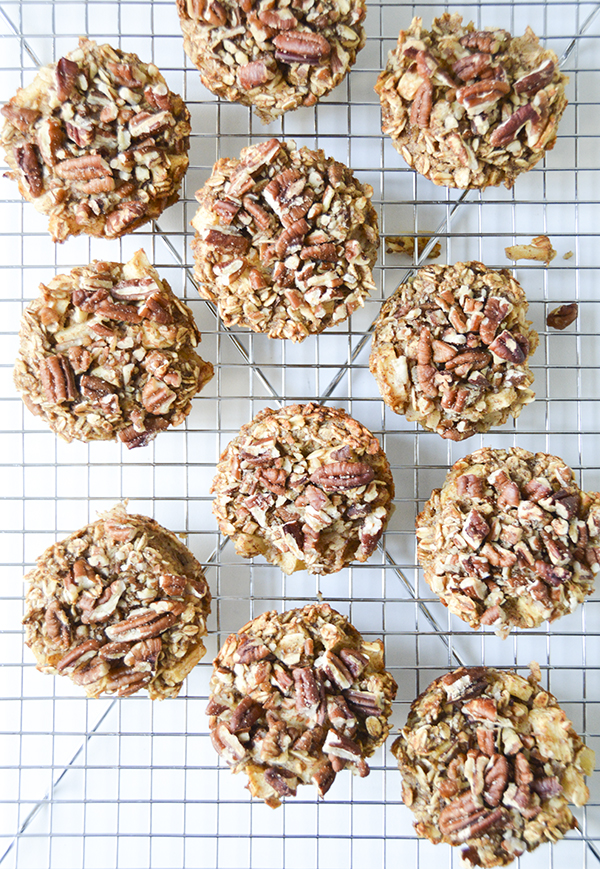
Hi friends! It’s about time I published a non-workout post (I think this is the first one in January–what the what?!). Baked oatmeal cups are a great option if you’re looking to prep a breakfast that you can have on hand to eat all week (these never last a whole week in my apartment though–Joe eats like 6 a day haha). Apple + cinnamon is one of my favorite oatmeal flavor combos and I just love how the soft, baked apples in these contrast with the crunch of the toasted pecans on top. You can totally omit the nuts though if that’s not your thing.

Apple Cinnamon Baked Oatmeal Cups

Yield: 12 cups

Apple Cinnamon Baked Oatmeal Cups

Ingredients

  • 3 cups old fashioned rolled oats
  • 2 tsp cinnamon
  • 1/8 tsp nutmeg
  • 1 tsp baking powder
  • 1/4 tsp salt
  • 1 cup almond milk
  • 1/4 cup apple sauce
  • 1/4 cup maple syrup
  • 2 eggs
  • 2 apples, peeled and chopped
  • (optional) Crushed pecans for topping -- you can also use almonds

Instructions

  1. Place 1 cup of the oats in a food processor or blender until you have an oat flour. This step is optional but I find the texture of the cups is less crumbly when you do this.
  2. Mix together the dry ingredients in a big bowl (oats, cinnamon, nutmeg, salt, baking powder). Stir in the almond milk and set the bowl aside to soak for 20-30 minutes.
  3. Preheat oven to 350 degrees Fahrenheit.
  4. Peel, core and chop the apples. In a small bowl, whisk together the eggs, maple syrup and apple sauce.
  5. Once the oats have soaked, mix in the wet ingredients and apples.
  6. Spoon the mixture into a lightly greased muffin tin (I spray with olive oil). 1/4 cup per cup is perfect. Press crushed pecans on top of each if you're going to add the nuts.
  7. Bake for 30 minutes. Remove from oven and let cool for a couple minutes before transferring to a wire cooling rack.

Notes

With the leftovers, I store them in an airtight container and when I want to enjoy one, I'll reheat in a toaster oven instead of the microwave. I recommend cutting them in half first and then heating so that they warm all the way through. My boyfriend enjoys eating them cold though so test it out!

https://pumpsandiron.com/2017/01/22/apple-cinnamon-baked-oatmeal-cups/

And before I end this post and send you off to enjoy what’s left of your weekend, I wanted to highlight an old recipe that I recently gave a little photography makeover. This Apple Feta Quinoa Salad is great on its own or as a healthy side dish (add a filet of your favorite fish on top and voila!).

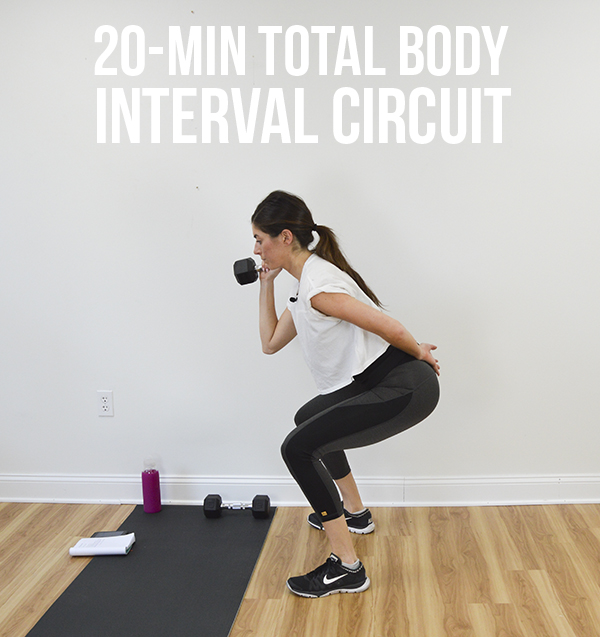
20-Minute Total Body Circuit Workout with Dumbbells

All I’ve been posting lately is workouts! I’ll get some variety on here ASAP but for anyone not feeling the pyramid superset workouts I’ve been posting each Monday, I wanted to throw another structure into the mix. This workout will be as hard as you make it (depends on how heavy you go with the weights) so it’s great for most fitness levels.

20-Minute Total Body Circuit Workout with Dumbbells

Equipment I Used

  • Set of 10-lb dumbbells
  • Interval timer
  • Exercise mat (I use this reversible mat from Gaiam–great for strength/cardio workouts but not grippy enough for yoga in my opinion)

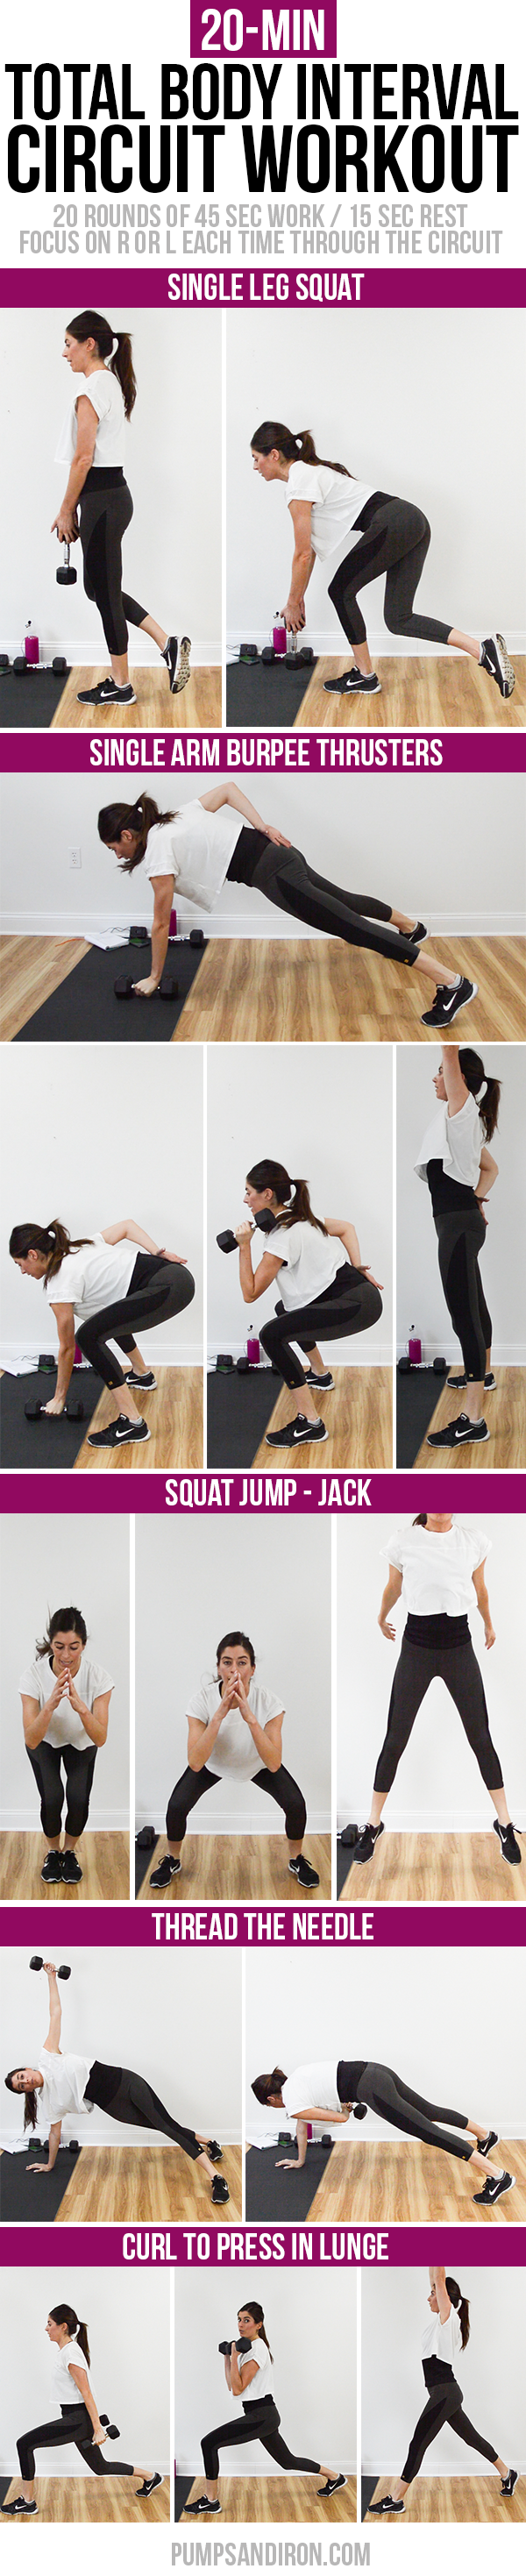
Set an interval timer for 20 rounds of 45 seconds work / 15 seconds rest. You’ll go through the following circuit of exercises four times. Focus on one side (right/left) each time through the circuit. In other words, do all the one-sided exercises on the right then left then right then left.

Single-Leg Squat | As far as upper body goes, I want you to think “deadlift.” Lower body, think “single-leg squat/curtsy lunge.” Start standing on your right leg holding the weight in both hands in front of your body. Start to squat down on your right side, sending the left leg behind you into a hover. Make sure your right knee doesn’t jut out farther than your toes by thinking about sending your hips and butt back and down. Weight should be in your right heel at the bottom of your squat. Lower until the weight lightly taps the ground (or hovers) and then stand back up. As you do this, make sure you’re engaging your abs to avoid undue stress on the lower back.

Single-Arm Burpee with Thrust | Start standing with one dumbbell in your right hand at your shoulder and the other hand behind your back (you won’t use it at all). Squat down. Bring the dumbbell to the floor. Jump your feet back into a single-arm plank. Jump the feet back up, bring the weight to your shoulder and then stand up, thrusting the weight up overhead as you do.

Squat Jump-Jacks | Start in a low squat position with feet a little wider than hips width apart. Staying low in the squat, jump your feet in together and then back out wide. From there, do a squat jump, straightening your legs as you jump straight up in the air and then landing softly back down in your starting position.

Thread the Needle Plank to Side Plank Rotation | Start in a plank position with hands underneath shoulders, right hand gripping the dumbbell. Once you start the movement, you won’t return to this position (dumbbell won’t touch floor again). Rotate your body open to the right, dropping your heels so that you’re on the edges of your feet in a staggered side plank position. As you do reach the dumbbell up to the ceiling. Twist back to center plank, rolling back to the balls of your feet and squaring your hips as you wrap the dumbbell through the space between the floor and your chest, reaching it across your body to the left side of the room (like you’re giving yourself a one-arm hug). Reverse the movement, rotating back open into side plank, extending the weight back up to the ceiling.

This one will work both sides of your obliques (right as you twist through center threading the needle), left as you twist open and support your bottom sidebody. I always feel it more in the side holding the weight though.

Curl to Press in Lunge | Start in a low lunge position, right foot forward, ball of the left foot planted behind you (you want your back knee bent, too). Hold a weight in each hand down by your sides. From here, do a biceps curl, rotating the palms towards your body as you curl them up to your shoulders. Then do a shoulder press, rotating the weights as you press them above your head so that palms face forward. As you do the shoulder press, straighten your legs, rising out of your low lunge. Reverse the movement back down to starting position.

WEARING | Mindfulness cropped leggings c/o Aurum // H&M crop tee (old but American Apparel has a similar one) // Nike TR Flex Supreme sneakers

If you haven’t already, make sure to subscribe to me on YouTube so you won’t miss any workouts! 🙂