8-Minute Abs 2.0

8-Minute Abs 2.0 workout

UPDATED 6/27/17: This workout is still one of my most popular on Pinterest so I thought it was worth filming a video version of it. Revisiting old workouts is a great way to track progress, and I was pleased to find I could complete it with ease this time around (when I originally made it back in 2013 I distinctly remember being sore the next day). Maybe it’s time to make a 3.0 to follow up this 8-minute abs 2.0 workout …

Below is the original blog post with the addition of the new video.

__________________________

We’ve all heard of 8-minute abs, but have you guys ever watched the original workout video? It’s…well, it’s special. And by that I mean it was filmed in the late 80s/early 90s, the spandex is on a whole new level of not OK, and the instructor’s commentary is pricelessly cheesy. Lots of “hang in there, gang!”

That being said, it’s not a bad ab workout, and I’ve done it countless times. The problem is, if you don’t switch up your workout routine, any fixed sequence is going to eventually stop being challenging. 8-minute abs quickly became an easy joke of a workout for me, and it was time to give it a serious makeover. Not just regarding the wardrobe (c’mon man, the bright blue spandex shorts with tube socks combo should be illegal), but with the exercises as well. I kept the structure of the workout the same, and switched up most of the ab movements. The result was an 8-minute abs 2.0 workout that actually challenged me again.

And before we get to the workout breakdown, how sick are the Nike running leggings I’m wearing?? I’m obsessed and trying to wear them as much as possible before summer hits—think they’d pass as Casual Friday-appropriate? I may test that boundary…

8-Minute Abs 2.0 workout

8-Minute Abs 2.0


Equipment I Used:

You’ll do each move for 45 seconds and move immediately on to the next without taking a break. The last move (elbow plank) is only held for 30 seconds. I just set my Gymboss Interval Timer for 11 rounds of 45 seconds of work and 0 seconds of rest and then watched the timer on the last round to end it at 30.

8-Minute Abs 2.0 workout

  • Leg Lifts: Laying on your back with hands under your bum for support, lift legs off the ground and up, perpendicular to the ground (keeping them straight the whole time). Lower.
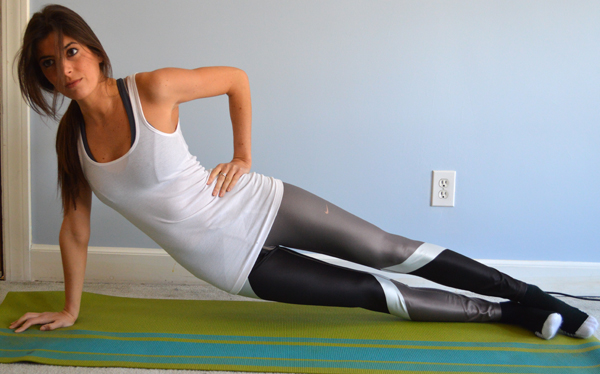
  • Side V Crunches (Right): Start laying on your side with bottom arm stretched outwards on the ground for support. Do a side crunch, lifting your legs up and crunching them in to meet your elbow and raised torso.
  • Side V Crunches (Left)
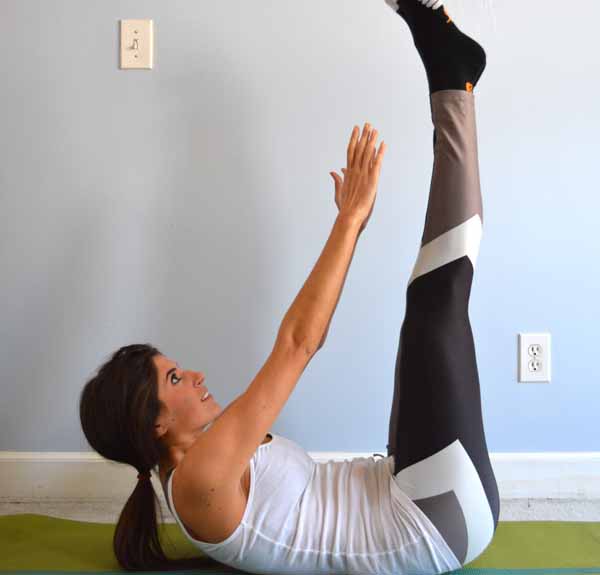
  • Toe Touch Crunches: Lay on back with legs lifted perpendicular to the ground. Crunch up, reaching your hands towards your toes (you don’t actually have to touch them—I can’t, anyway haha)
  • Cheek-to-Cheek Plank: Start in an elbow plank position. Keeping shoulders level, twist your torso to lower your right hip to the floor. Return to plank position and then twist the other way, lowering your right hip to the floor.
  • Side Plank Lifts (Right): Start in a side plank position. Lower your hips towards the ground, and then lift upwards, crunching into an arch passed your original straight plank position. Continue lowering and raising.
  • Side Plank Lifts (Left)
  • Seated Leg Scissors: Sit with hands lightly on ground by your sides for support, lean back slightly and lift legs off the ground. Crisscross them back and forth keeping toes pointed, left over right then right over left, and so on.
  • Butt Lifts: Lay on back with legs lifted perpendicular to the ground. Lift butt straight off the ground, reaching toes towards ceiling, and then lower. Try not to rock back and forth too much (the momentum makes the exercise easier, but you’ll get a better workout from slow, controlled lifting and lowering).
  • Windshield Wipers: Lay on back, legs perpendicular to the ground and arms outstretched for support. Lower your legs to the right, twisting your hips, until they are just hovering above the ground. Lift back to starting position and over to the left side. Continue back and forth in a windshield-wiper motion.
  • Elbow Plank (30-sec): You know the drill!

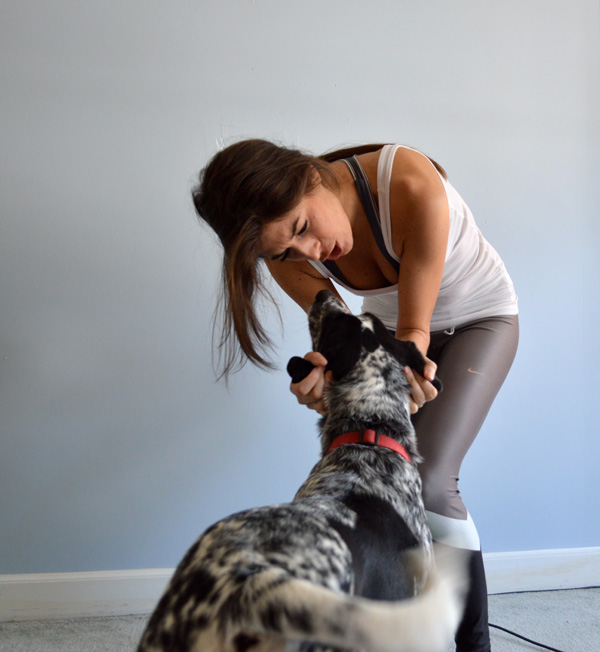
My parents’ dog Ginny was visiting while I shot this workout and between high-fiving me in the face with her paw and running in front of the camera every 5 seconds, I would say she definitely is not a proponent of fitness. Had to give her a little loving scolding: 🙂

8-Minute Abs 2.0 workout

Stay tuned for 8-minute abs 3.0—I’m sure after a few months, my muscles will have mastered and become bored of this one as well!
signature

15-Minute Towel Core Workout

15-Minute Towel Core Workout - a mix of sliding plank work and kneeling core exercises

Today’s workout is a mix of sliding plank work and kneeling core exercises. It’s broken up into blocks so that the upper body gets relief here and there from holding a plank position. The structure admittedly looks confusing, but I promise it’s not. And that’s the beauty of this whole YouTube thing–just follow along with me as I do it!

If you’re a megaformer lover, this workout has your name written all over it.

As with all workouts, make sure to warm up beforehand. Always listen to your body and modify when needed.

Towel Core Workout


So I messed up right and left a little in the video (rookie mistake!). The whole straight-on mirror image vs. profile view screwed me up so just make sure to do as I say not as I do (only the case during Block 3).

15-Minute Towel Core Workout - a mix of sliding plank work and kneeling core exercises

Block 1

Do each of the three exercises for 30 seconds. Do that twice, resting for 15 seconds in between.

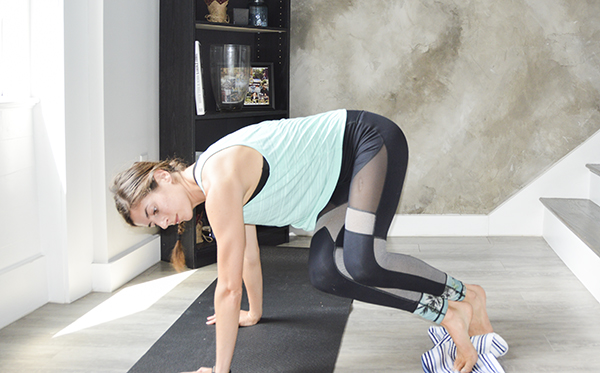
Bear | Start in a plank position with your feet on a towel. Keeping your hips level with your shoulders, back flat, slide your feet forward, bending your knees in towards your elbows. Slide feet back out, straightening your legs into plank position.

Plank to Pike | Start in a plank position with your feet on a towel. Keeping your legs straight, pike your hips up into the air, bringing your body into an upside down “v” shape. Try to keep your heels lifted as you do this, sliding on the balls of your feet. Once you hit your peak (if you have tight hamstrings, you may not be able to get your hips up very high—that’s ok!), slowly lower back down into plank position.

Combo Bear + Pike on Forearms | Combo the two moves down on your forearms.

Block 2 (right)

Do each of the three exercises for 30 seconds. 

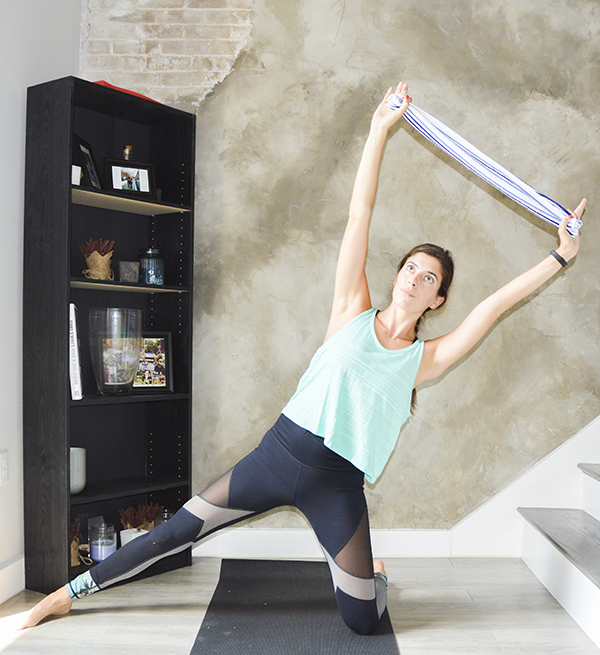
Mermaid | Come to a kneeling position with your left knee down and your right leg extended straight out to the side. You want your left hip stacked over the left knee. Grab the towel by it’s ends and extend your arms straight up overhead. From here, lean over to the left, lowering your torso so that it forms a diagonal line with your right leg–if you can comfortably go lower, do so. Lift back up by contracting the right side obliques.

Mermaid Twist | Same position as the previous exercise, you’re just going to bend the elbows out wide, bringing the towel behind your head so it’s out of the way (you could also just ditch it–not important here). Lowering your torso so that it makes a diagonal line with your outstretched leg, twist towards the floor and then back to face forward. You stay low as you twist, wringing out your waist like a wet washcloth.

Mermaid Pulses | In the same position as the previous two moves, extend your top arm up towards the ceiling, hold your torso at that low diagonal and pulse up an inch and down an inch.

Block 3 (right)

Do each of the three exercises for 30 seconds. Do that twice, resting for 15 seconds in between.

Twisted Bear | In a plank position, feet on a towel, hands stacked under shoulders on an exercise mat, cross your right foot in front of the left with toes pointing towards the left. You’ll twist through the waist, slightly lowering your right hip to do so. This is your starting position. From here, start bending your knees in towards your left elbow, sliding your feet forward. When you’re in as far as you can go, slide the feet back out, straightening your knees back into your starting position. As you do these, try to keep your hips level with your shoulders (don’t sit your bum onto your heels as you slide the feet in; engage your right sidebody to keep them lifted).

Twisted Pike | In a plank position, feet on a towel, hands stacked under shoulders on an exercise mat, cross your right foot in front of the left and drop your heels so that you’re heel-to-toe with toes pointing towards the left. You’ll twist through the waist, slightly lowering your right hip to do so. This is your starting position. Maintaining this leg position and keeping your knees straight, pike your hips slowly up into the air. When you’ve reached your peak, slowly lower back down to that twisted plank starting position. 

Combo Twisted Bear + Pike on Forearms | Combo the two previous moves down in a forearm plank position (right foot still crossed in front of left).

Block 2 (left)

Block 3 (left)

Finisher

One move, 30 seconds. The purpose is to center the core work and stabilize (I hate ending on one side of the body!).

Over-Under Towel Crunch | Start sitting on your tailbone holding the towel by its ends outstretched in front of you. Legs are extended out straight and hovering a few inches off the floor, torso is leaning back at an angle. Crunch your knees and chest up and in towards each other and as you do, scoop the towel under your feet. Extend back out to starting position, now with the towel under your legs. Continue crunching, bringing the towel over and under your legs as you go.

15-Minute Towel Core Workout - a mix of sliding plank work and kneeling core exercises

WEARING | leggings c/o Sweaty Betty (old but shop current selection here) // Lucy tank (old but shop current selection here)

Since this workout is like a megaformer ab series without the megaformer (kinda?), I figured I’d share my teaching schedule next week for any local readers/Btoners–I’m subbing a ton!

TUES 5:45 AM / 6:40 AM / 7:35 AM / 12 PM North End

WED 6 AM / 6:55 AM / 7:50 AM Back Bay

THURS 6 AM / 6:55 AM Back Bay + 6:20 PM / 7:15 PM North End

FRI 6 AM / 6:55AM North End

SAT 8 AM / 9 AM Back Bay

Sign up for a class HERE! And no one text me after 8:30 pm next week … I’ll be sleeping. 😉

signature

Standing Core Workout

Standing Core Workout - this 20-minute workout will challenge your core stability with standing ab exercises

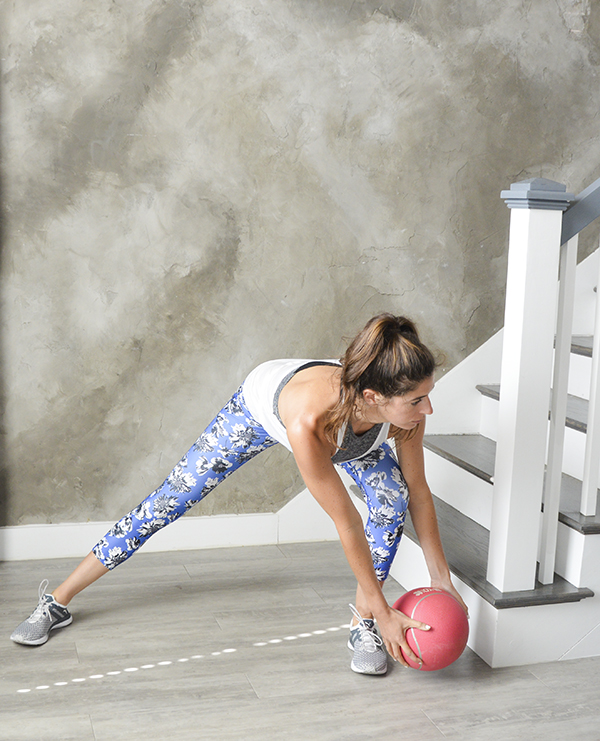
I’m using a medicine ball for today’s workout, but you could use a dumbbell or other weighted object if you don’t have one. I’m calling this a core workout, but your arms and legs will be feeling it as well–especially if you use a heavier weight. There are two bodyweight exercises thrown into the circuit purposely to give your arms a little breather in the event upper body fatigue is hindering the core work.

While I wouldn’t say this workout is “easy” (the first two sets especially are tough!), I’d consider it easier than some of the other core workouts I’ve shared. It’s a good one if you’re a beginner (just chose a light med ball or even just bodyweight) or have mobility impairments preventing you from comfortably getting down to the floor for crunches and other supine ab exercises.

20-Minute Standing Core Workout


Equipment I Used:

  • Medicine ball (I shot the workout with a 6-lb med ball because it’s all I have at home but would have liked to challenge myself with a 10-lb–next time!)

The structure of this workout is a time pyramid. Each time you go through the circuit you’ll stay on the exercises for less time. Here’s the breakdown:

60 seconds each exercise
60 seconds rest
45 seconds each exercise
45 seconds rest
30 seconds each exercise
30 seconds rest
15 seconds each exercise

Try not to rest in between exercises. Only rest as specified above (after a full set). In total, this workout will take you 20 minutes to complete. The goal is to complete as many reps of the exercise as possible in the specified time interval. That being said, never sacrifice proper form for the sake of speed!

As with all workouts, make sure to warm up beforehand. Always listen to your body and modify when needed.

Standing Core Workout - this 20-minute workout will challenge your core stability with standing ab exercises (follow-along video included!)

Marching Front Chop | Start standing with arms straight, med ball held overhead. Keeping your arms straight, you’re going to chop the ball down in front of you as you lift one knee up towards it (as if you were going to spike the ball off your knee). Raise the ball back overhead as you lower the foot back to the floor and repeat on the other side.

Crossbody Woodchop RIGHT | You want a wide stance for this one with both feet pointing forward. With the lower body, I want you to think side lunge; with the upper body think of tracing a diagonal line with the medicine ball.. Start with the legs straight, med ball held in straight arms up and overhead to the left (you want your torso twisted so that you’re facing the left side of the room). Keeping the arms straight, chop the med ball down towards your right foot as you bend into the right knee (remember, think side lunge) and twist to face the right side of the floor. Reverse the movement back to the starting position.

Crossbody Woodchop LEFT

Standing Bicycle Crunch | Start standing with feet a little wider than hip’s width apart, chest open, fingertips behind the ears and elbows out wide. From this starting position, you’re going to crunch the right elbow down and across your body to touch the opposite knee, which you’ll bend and lift up towards it, squeezing your low abs. Don’t worry if you can’t make physical contact between the knee and elbow; focus on pulling your core in tight and just get them as close as possible. Return to starting position and repeat to the other side.

Torso Twist to Front Chop in Lunge RIGHT | Start in a lunge position with your right foot forward; ball of the left foot planted behind you. Feet should be hip’s width apart (you’re not walking on a tight rope–you want a stable base!). If joint mobility allows, you want to find a 90-degree bend with the front knee. Hold the med ball at chest height, arms straight in front of you. Keeping the arms straight, twist towards the right side of the room so that the ball twists over the front leg. Twist back to center and then chop the ball down towards your back knee, crunching through the core to lower it. Rise back to starting position and repeat.

Torso Twist to Front Chop in Lunge LEFT

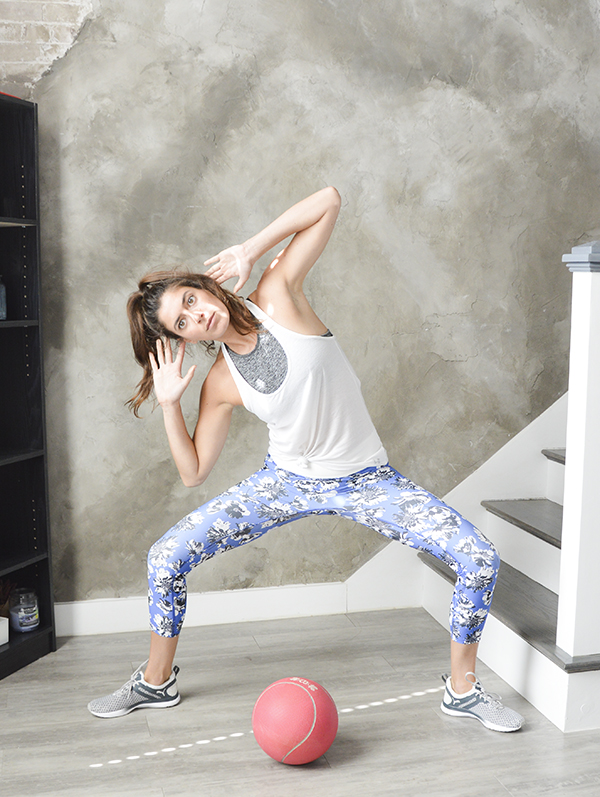
Sumo Squat Obliques Crunches | You’ll be in a wide sumo squat position the entire time with the lower body. You want a wide squat stance with your toes pointing outward; knees track in line with the toes. Chest open, have your fingertips lightly behind your head or hovering by the ears, elbows bent out wide to the side. From here, dip your right elbow towards your right knee, contracting the right side obliques. Lift upright and over to the left. As you crunch down side to side, think of staying in a single plane of motion; don’t lean forward as you dip to the side. So picture your torso is sandwiched between two walls, one against your back and one against your chest. Stay between the walls.

Side note: Every time I do this exercise I can’t help singing “I’m a little teapot short and stout…” in my head. Please tell me someone else’s mind goes to that when doing side bend motions?? 🙂

Standing Core Workout - this 20-minute workout will challenge your core stability with standing ab exercises

WEARING | leggings c/o PRISM Sport (30% off with code ACTPERRY) // shoes c/o Puma // bra c/o Forever 21 (old but shop current selection here)

It is such a game changer living in a space that’s well lit enough to shoot videos!! I’m sad I’m only here for the summer but plan on taking full advantage of that conveniently placed concrete wall next to the windows. Let’s see how many workouts I can shoot before August 31st… 😉

signature