10 or 20-Minute Med Ball Full-Body Circuit Workout

Full-Body Medicine Ball Circuit WorkoutI’ve got a full-body workout for you today that will take 10 or 20 minutes to complete, depending on how much time you have. I originally planned this as a 20-minute circuit and then got a request for a 10-minute workout and figured I’d let you guys decide! If you’re following along with the video, just go through it twice for the 20 minutes.

I’m using a medicine ball but all the exercises could be done with just your bodyweight or a dumbbell/sandbag so don’t let the equipment throw you off–improvise as needed!

Med Ball Full-Body Circuit Workout


Equipment I Used:

  • Medicine ball (I’m using a 6-lb ball because it’s all I have at home but it’s a bit too light for me — hope that helps you guage what weight is best for you!)
  • Interval timer

Set an interval timer for 10 or 20 rounds of 45 seconds of work and 15 seconds of rest. There are five exercises in the circuit and you’ll go through them two or four times. So here’s what it looks like:

45 sec exercise 1
15 sec rest
45 sec exercise 2
15 sec rest

And so on and so on for the 10 or 20 minutes.

Full-Body Medicine Ball Circuit Workout

Soccer Drill | This is kinda like high knees. Run in place, lifting the feet in front of you one at a time and tapping the medicine ball. These should get your heart rate up so keep it quick! Try to make contact with the ball every time without kicking it–little love taps. It’s harder to actually touch the ball than it is to just hover the foot over it.

Jump Lunge to Torso Twist | Start in a lunge position holding the med ball in both hands at chest height, arms held straight in front of you. Both knees should be bent to opposing 90-degree angles. Holding this low lunge, twist your torso to the right or left (if right foot is in front, twist to the right), keeping arms straight as you do. You want your whole upper half moving as one unit on this—imagine your waist is a wet towel that you’re wringing out as you twist. Reverse the sequence, twisting back to center and bringing the med ball in tight to your chest. Do a jump lunge, landing with the opposite foot in front. Repeat.

Chest-to-Floor Burpees with Lateral Hop over Ball | This is a traditional chest-to-floor burpee but instead of jumping straight up with arms overhead at the top, you jump laterally (to the side) over the medicine ball. So one burpee to the right of the ball, one burpee to the left of the ball, hopping side to side.

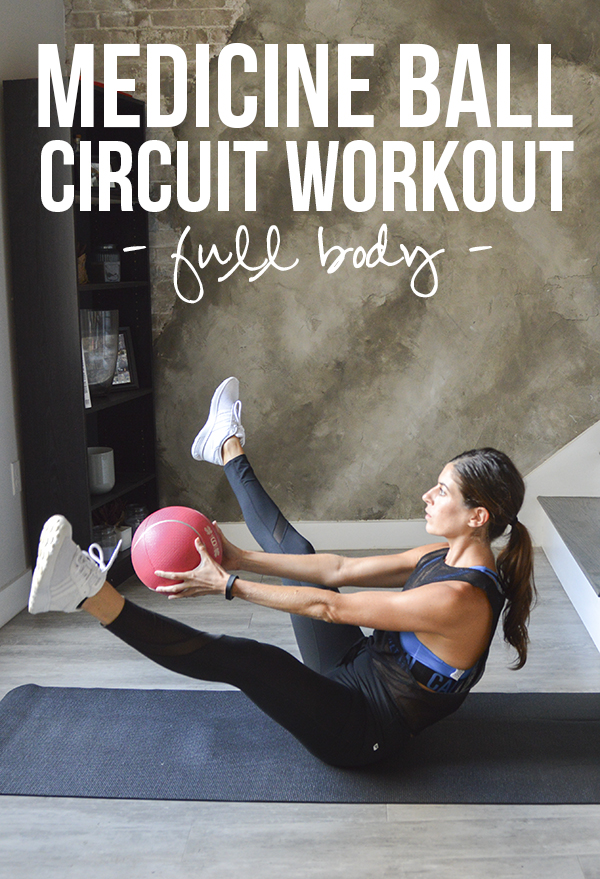
V-Up Crunch Spreads | Start on your back with arms stretched overhead holding the med ball at a hover and legs hovering just slightly above the ground. Pull your abs in tight and press your low back to the ground. You’ll then crunch up, lifting your legs straight up and separating them out wide as you bring the med ball overhead and through the legs. Lower back down to starting position. If possible, your feet and the med ball should never touch the ground between reps.

Squat Slam Stops | Start standing holding the medicine ball overhead. From here, you’re going to explosively drop down into a low squat as you swing the med ball down in front of your body as if you were going to slam it on the floor. You want to build momentum as you do this so really put some oomph into it. Just as the med ball is nearing the floor, stop the movement, catching it hovering over the floor, arms extended out in front of you. Pause in this low position and then just as explosively power back up to the starting position, pressing through your heels to stand as you swoop the med ball back overhead.

The more power you use to swing the ball down, the harder your muscles will have to work to stop the momentum. If you’re a beginner, start with a slow motion and work your way to a more explosive downward swing.
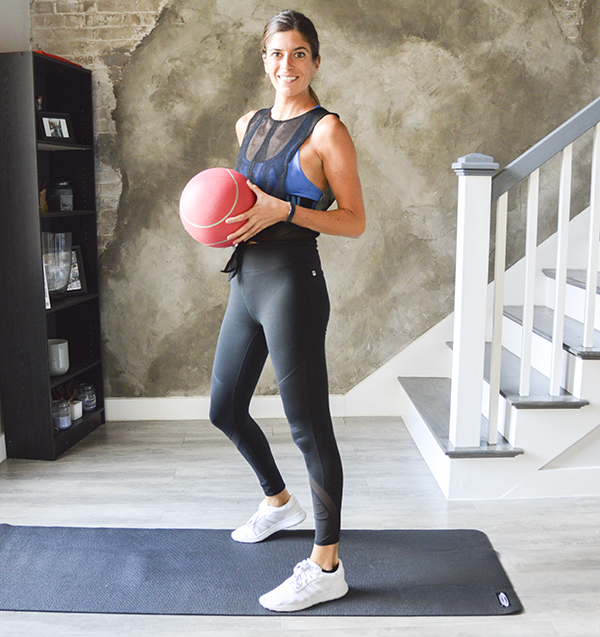
Full-Body Medicine Ball Circuit Workout

WEARING | Free People Movement Dharma Tank c/o Shopbop // Calvin Klein Intense Power Racerback Bralette c/o Shopbop // Fabletics leggings (<–currently doing a Labor Day sale and giving you your first outfit for only $15!) // adidas NEO sneakers

signature

Links to outfit details are affiliate–I appreciate your support! 
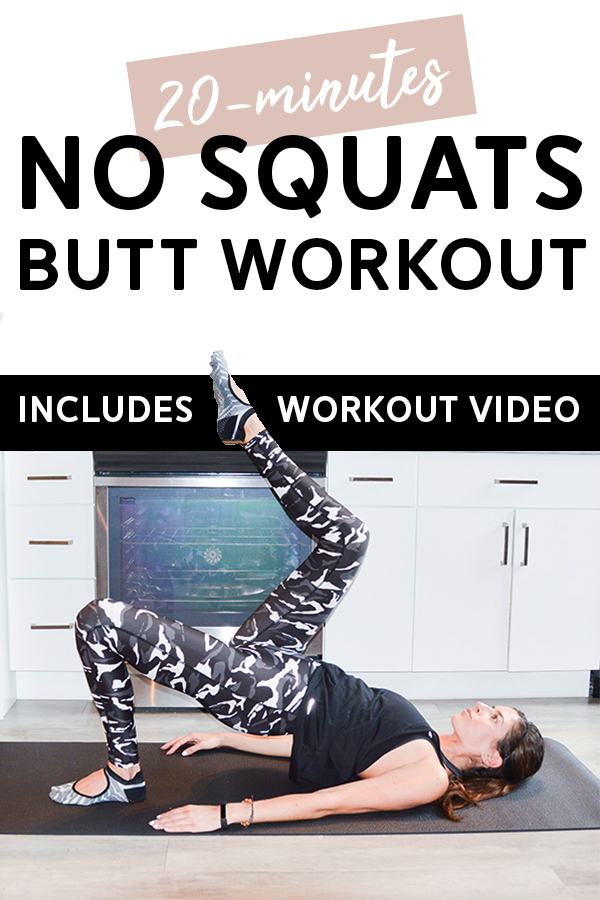
 

No-Squat Butt Workout (20 Minutes)

No Squat Butt Workout - This 20-minute workout will target your glutes without doing a single squat! Video included. #glutes #workout #buttworkout #athomeworkout #glutesworkout

Hopefully you all aren’t sick of bodyweight workouts because just about all my equipment is in storage for the summer. 😉 Today’s is going to focus on the glutes, and while I love squats, we’re seeking alternative ways to reach that booty burn. This no squat butt workout will target your glutes without a single squat.

I wasn’t able to shoot the video until later in the day yesterday because it rained all morning (=terrible lighting in my apartment) so I still have some editing to do. I’ll update the post later today with the video so check back here or my YouTube channel if you’d rather follow along than use the pictorial.

No Squat Butt Workout

As you can see in the pictures, I’m not using any equipment for this workout. That being said, if you are advanced, wear ankle weights. I wished I had worn mine for the tabletop exercises.

No squat butt workout breakdown:

  • 20 minutes long, 10 minutes per side
  • 3 circuits (each 3 minutes long)
  • For each circuit: 20 sec per exercise x3
  • Rest for 30 seconds between circuits
  • Do each circuit on the right side and then repeat the three circuits on the left. If you’re a beginner, you might want to alternate instead (Circuit 1 Right, Circuit 1 Left, Circuit 2 Right, etc.).
No Squat Butt Workout - This 20-minute workout will target your glutes without doing a single squat! Video included. #glutes #workout #buttworkout #athomeworkout #glutesworkout

Circuit 1

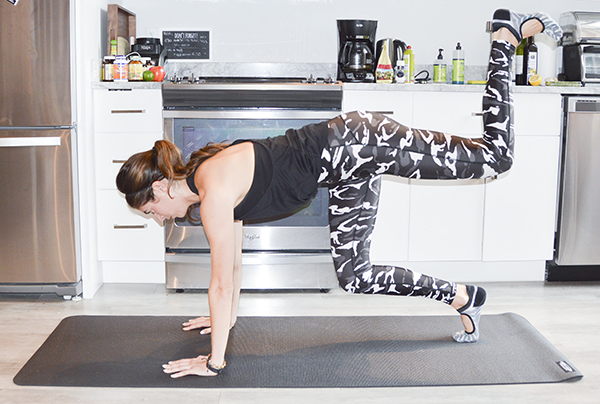
  • Donkey Kicks | Start on all fours: knees stacked under hips, hands stacked under shoulders. From here, you’re going to press the bottom of your right foot up towards the ceiling, squeezing that right butt cheek. Pause at the top and then lower down most of the way. Don’t let the right knee come to rest on the floor. As you do these, keep a straight spine by engaging your abs, pulling the belly button in towards the spine. This will protect your low back.
  • Donkey Kick Pulses | Hold the top of your donkey kick and pulse. This is a small movement. Instead of pressing the foot up, think of just making a fist with your right butt check. That contraction creates the tiny upward pulse of the leg.
  • Dynamic Donkey Kick Extensions | With your right leg, you’re going to continue to do a donkey kick, as described above. The difference is we’re going to bring the left leg into the picture as well. Tuck your left toes and hover your left knee off the ground in a table top position. As you do the donkey kick on the right, straighten your left leg, extending up into the air. Bend the left knee back to a hover as you bring the right knee down as well. You’ll be working your right glutes still but also that left quad.

Circuit 2

  • Single-Leg Hip Bridge Lifts | Lay on your back, arms flat on the ground by your side for support, knees bent and feet flat on the floor. From here, squeeze your glutes and lift your hips a couple inches off the ground so that your butt is hovering. Lift the left foot into the air as well. Leg can be straight or knee bent at an angle (my preference because I have tight hammies). This is your starting position. From here, lower your hips to a hover and then thrust them back up into your bridge. Squeezing your glutes as you do, driving through the right heel.
  • Single-Leg Hip Bridge Pulses | Hold the top of your bridge and pulse the hips up an inch and down an inch. Create this tiny movement by squeezing into the base of your seat. Picture you’re making a fist with the right butt cheek. To modify, cross your left ankle of the right knee in a figure four as you do these. I had to take this modification almost every time!
  • Single-Leg Hip Bridge Hold with Toe Tap | Hold the top of your bridge position. Holding the hips high, tap your left toes to the floor and lift them back up (knee bent as you do this).

Circuit 3

  • Fire Hydrants | Start on your hands and knees in a tabletop position, hands stacked under shoulders, knees stacked under hips. Keeping your right leg in that 90-degree angle, lift that knee out and up in a wing motion (like a dog lifting to take a pee), opening up at the hip. Bring it back in close to the starting position, but try not to fully rest the knee back on the floor. As you do these, try not to lean over towards the left. Press a little extra weight into that right hand to help keep your body centered as the right hip opens.
  • Hydrant Crunches | If you have tight hips like me, you’ll be in a stacked/open tabletop position for this one. To set up, get onto all fours and then lower onto your left elbow. Open up your right hip like a dog peeing on a fire hydrant so that your hips are stacked and you’re facing the side of the room rather than the floor. From here, you’re going to crunch the right knee in towards the right shoulder. Extend it back out straight, squeezing into the base of your seat as you straighten. These can be done on two straight arms with chest square to the floor but it is MUCH harder to hold the hip open when you opt for this alignment.
  • Hydrant Circles | Think donkey kick meets fire hydrant. Picture tracing a big circle with your right knee. Up, out, down and around. Watch the video—it’s hard to describe in words. 🙂
No Squat Butt Workout - This 20-minute workout will target your glutes without doing a single squat! Video included. #glutes #workout #buttworkout #athomeworkout #glutesworkout

If you like this no squat butt workout, check out these other videos targeting the glutes. No squatting in these, either!

xo Nicole

15-Minute Towel Core Workout

15-Minute Towel Core Workout - a mix of sliding plank work and kneeling core exercises

Today’s workout is a mix of sliding plank work and kneeling core exercises. It’s broken up into blocks so that the upper body gets relief here and there from holding a plank position. The structure admittedly looks confusing, but I promise it’s not. And that’s the beauty of this whole YouTube thing–just follow along with me as I do it!

If you’re a megaformer lover, this workout has your name written all over it.

As with all workouts, make sure to warm up beforehand. Always listen to your body and modify when needed.

Towel Core Workout


So I messed up right and left a little in the video (rookie mistake!). The whole straight-on mirror image vs. profile view screwed me up so just make sure to do as I say not as I do (only the case during Block 3).

15-Minute Towel Core Workout - a mix of sliding plank work and kneeling core exercises

Block 1

Do each of the three exercises for 30 seconds. Do that twice, resting for 15 seconds in between.

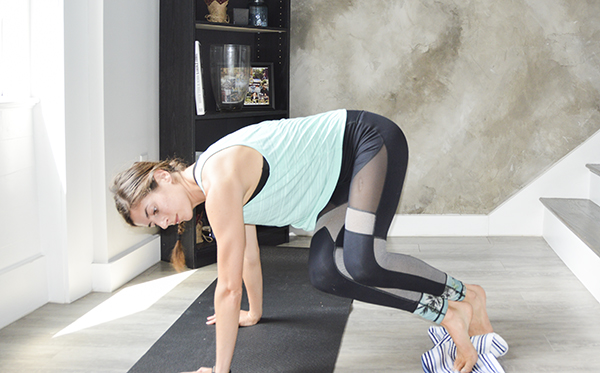
Bear | Start in a plank position with your feet on a towel. Keeping your hips level with your shoulders, back flat, slide your feet forward, bending your knees in towards your elbows. Slide feet back out, straightening your legs into plank position.

Plank to Pike | Start in a plank position with your feet on a towel. Keeping your legs straight, pike your hips up into the air, bringing your body into an upside down “v” shape. Try to keep your heels lifted as you do this, sliding on the balls of your feet. Once you hit your peak (if you have tight hamstrings, you may not be able to get your hips up very high—that’s ok!), slowly lower back down into plank position.

Combo Bear + Pike on Forearms | Combo the two moves down on your forearms.

Block 2 (right)

Do each of the three exercises for 30 seconds. 

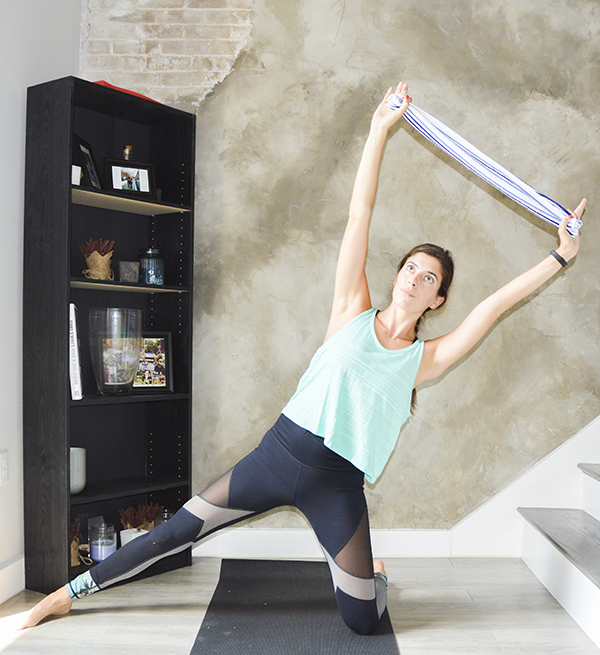
Mermaid | Come to a kneeling position with your left knee down and your right leg extended straight out to the side. You want your left hip stacked over the left knee. Grab the towel by it’s ends and extend your arms straight up overhead. From here, lean over to the left, lowering your torso so that it forms a diagonal line with your right leg–if you can comfortably go lower, do so. Lift back up by contracting the right side obliques.

Mermaid Twist | Same position as the previous exercise, you’re just going to bend the elbows out wide, bringing the towel behind your head so it’s out of the way (you could also just ditch it–not important here). Lowering your torso so that it makes a diagonal line with your outstretched leg, twist towards the floor and then back to face forward. You stay low as you twist, wringing out your waist like a wet washcloth.

Mermaid Pulses | In the same position as the previous two moves, extend your top arm up towards the ceiling, hold your torso at that low diagonal and pulse up an inch and down an inch.

Block 3 (right)

Do each of the three exercises for 30 seconds. Do that twice, resting for 15 seconds in between.

Twisted Bear | In a plank position, feet on a towel, hands stacked under shoulders on an exercise mat, cross your right foot in front of the left with toes pointing towards the left. You’ll twist through the waist, slightly lowering your right hip to do so. This is your starting position. From here, start bending your knees in towards your left elbow, sliding your feet forward. When you’re in as far as you can go, slide the feet back out, straightening your knees back into your starting position. As you do these, try to keep your hips level with your shoulders (don’t sit your bum onto your heels as you slide the feet in; engage your right sidebody to keep them lifted).

Twisted Pike | In a plank position, feet on a towel, hands stacked under shoulders on an exercise mat, cross your right foot in front of the left and drop your heels so that you’re heel-to-toe with toes pointing towards the left. You’ll twist through the waist, slightly lowering your right hip to do so. This is your starting position. Maintaining this leg position and keeping your knees straight, pike your hips slowly up into the air. When you’ve reached your peak, slowly lower back down to that twisted plank starting position. 

Combo Twisted Bear + Pike on Forearms | Combo the two previous moves down in a forearm plank position (right foot still crossed in front of left).

Block 2 (left)

Block 3 (left)

Finisher

One move, 30 seconds. The purpose is to center the core work and stabilize (I hate ending on one side of the body!).

Over-Under Towel Crunch | Start sitting on your tailbone holding the towel by its ends outstretched in front of you. Legs are extended out straight and hovering a few inches off the floor, torso is leaning back at an angle. Crunch your knees and chest up and in towards each other and as you do, scoop the towel under your feet. Extend back out to starting position, now with the towel under your legs. Continue crunching, bringing the towel over and under your legs as you go.

15-Minute Towel Core Workout - a mix of sliding plank work and kneeling core exercises

WEARING | leggings c/o Sweaty Betty (old but shop current selection here) // Lucy tank (old but shop current selection here)

Since this workout is like a megaformer ab series without the megaformer (kinda?), I figured I’d share my teaching schedule next week for any local readers/Btoners–I’m subbing a ton!

TUES 5:45 AM / 6:40 AM / 7:35 AM / 12 PM North End

WED 6 AM / 6:55 AM / 7:50 AM Back Bay

THURS 6 AM / 6:55 AM Back Bay + 6:20 PM / 7:15 PM North End

FRI 6 AM / 6:55AM North End

SAT 8 AM / 9 AM Back Bay

Sign up for a class HERE! And no one text me after 8:30 pm next week … I’ll be sleeping. 😉

signature