12-Minute Bodyweight Tabata Workout Series: Upper Body (Chest, Arms, Core)

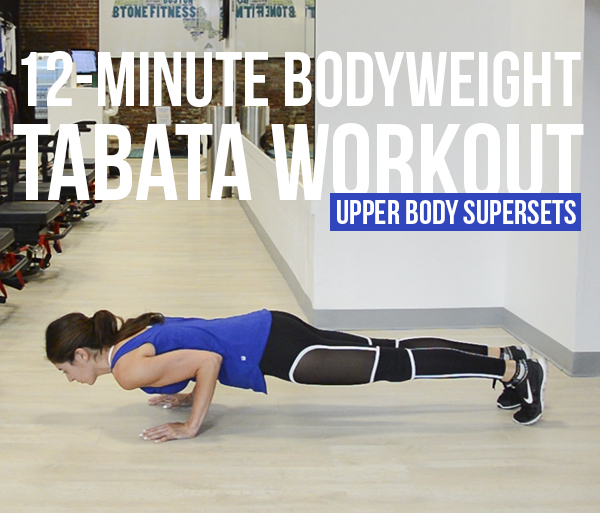
12-Minute Tabata Workout: 3 tabata supersets focusing on upper body - no equipment needed!

Today’s is upper-body focused, but you’ll get a good dose of core and cardio work as well.

12-Minute Bodyweight Tabata Workout Series: Upper Body (Chest, Arms, Core)


This workout is made up of three tabata supersets. For each tabata superset, set an interval timer for 8 rounds of 20 seconds of work and 10 seconds of rest. During the work intervals, you’ll alternate between the two exercises. In other words: 20 seconds Exercise 1 / 10 seconds rest / 20 seconds Exercise 2 / 10 seconds rest and so on. Rest as needed between tabata supersets, but try to limit it to 60 seconds if possible. 12-Minute Tabata Workout: 3 tabata supersets focusing on upper body - no equipment needed!

Tabata Superset 1

Chest-to-Floor Burpees | Squat down, bringing your hands to the floor. As you do, hop your feet back out in a plank position, simultaneously lowering your chest to the floor with control (like a push up all the way down). Press yourself back up to straight arms, jumping your feet forward back to squat and then jumping straight up overhead.

Low Push Up Hold | For this, I want your hands close into the sides of your body (tricep push up). To get into the hold with proper alignment, start in a plank position with your hands stacked underneath your shoulders. From here, roll forward slightly onto your toes so that your hands are now a little further back, aligned with your ribs (this will allow you to bend elbows to 90 degrees). Keeping your elbows close to your body, lower down to a low push up position and hold there with your body hovering off the ground, abs held in tight.

Modify by holding the push up from your knees. Just make sure your hips are still lowered so that your butt isn’t sticking up into the air. Think of lowering from your knees rather than your hips to achieve this.

I’m going to call myself out a little on these as it’s a good demo of what not to do with form. Notice the difference in shoulder height between the first five seconds of the hold and the last five seconds: low-push-up-hold
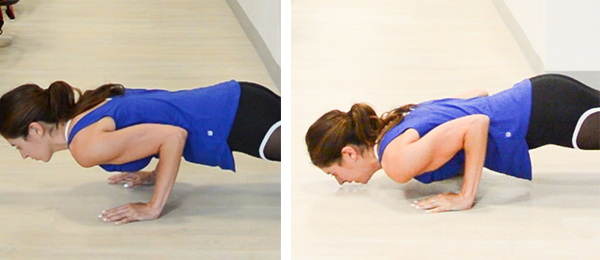
As my arms fatigue, I’m compensating by sinking into my shoulders. Don’t do this. If you notice your shoulders start to dip down (usually accompanied by your bum sticking up into the air), just modify the hold with proper form from your knees. 🙂

Tabata Superset 2

Triceps Dips | Use a chair, coffee table or bench for these. Start with your hands gripping the edge of a chair (bench, etc.) and your legs outstretched with your heels on the ground. Keeping your bum and back close to the edge of the chair, bend your elbows to 90 degrees as you lower your body towards the ground. Make sure your elbows don’t bow out in a diamond shape as you lower. From the bottom, press through your hands to straighten your arms back to the starting position. Imagine there’s a heavy weight sitting in your lap as you do these—don’t trust up through the hips and legs to rise up; use your arms! You’ll do three like this and on the fourth, lower down and hold at the bottom for about three seconds before starting back at the top. Beginners: To make these easier, bend your knees and keep your feet flat on the ground.

Alternating Crab Kicks with Triceps Pulse | Start in a crab position: feet on ground, knees bent, hands on ground underneath your shoulders, body facing upwards. Lift one foot into the air, straightening that leg. This is your starting position. From here, you’re going to alternate kicking one leg into the air and then the next, switching feet in midair so that there’s never more than one foot on the ground at a time. Your whole body will be working during these but focus on the softening of the elbows (like a triceps dip pulse) as you prep for the jump kick. Push through the hands, thrusting the pelvis upward as you straighten the arms and switch feet midair before landing.

Tabata Superset 3

Shoulder Tap Push Ups | Start in a plank position. I’m doing these with my hands slightly wider than shoulder-width apart because my triceps were fried after tabata set 2! 🙂 Keeping your hips level to the floor, tap your left shoulder with your right hand then the right shoulder with your left hand. Do a push up. To modify, perform from your knees.

Marching Plank | You’re essentially just moving from low plank to high plank, up and down. Starting in a forearm plank position, press up into a high plank, one hand at a time. Reverse the movement when you’re in a high plank, lowering onto one forearm at a time. Important form notes:

  • Hands under shoulders, not in front. As you do these, think about keeping your shoulders stacked directly over whatever joint is on the floor (wrist in high plank, elbow in forearm plank). As you fatigue, the tendency is to have your hands far in front of your shoulders so that it’s easier to get back down to your forearms—don’t do this!
  • Hold your hips level. Instead of shifting your body weight and rocking the hips to the forearm side as you move up and down, stabilize through the core and hold the hips level. To do this, the arms need to work harder, elbows bending deeper (like when you do a push up).
  • Alternate your lead hand. Your body will want your dominate side to lead on this (from forearm plank: right hand presses up, left hand comes up, right forearm lowers down, left forearm comes down). Switch it up next time through so that your left side then leads the way.
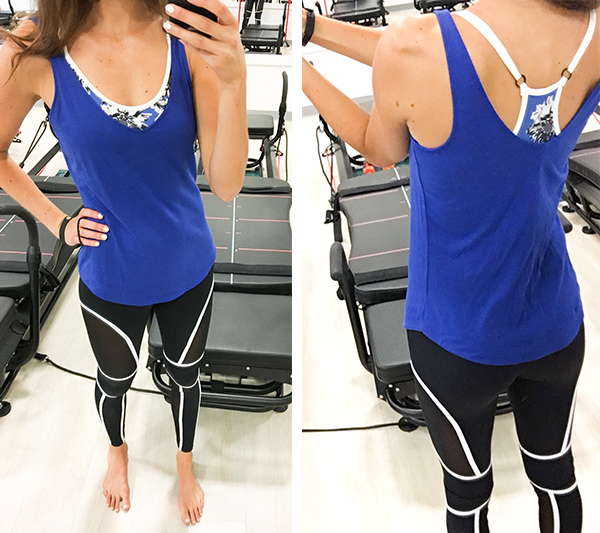
workout-outfit-ootd

WEARING | leggings c/o Tully Lou // tank c/o Fabletics //  bra c/o PRISM Sport (use code ACTPERRY to get 30% off)

Enjoy! Phew this one was tough for me. My upper body is definitely weaker than my low body and core so this was a challenge!

signature

Bodyweight Pyramid Workout Targeting Obliques

Bodyweight Pyramid Workout Targeting the Obliques

You may have seen another post (unfinished, without pictures) pop on here this morning about a BOSU ball workout–sorry about that! I messed up my scheduling and a draft got published.

It’s a gloomy, rainy day here in Boston, but no complaints–I’ll be in sunny southern California soon enough! On Thursday I’m heading out to LA and then Friday through Sunday will be spent in Palm Springs for a bachelorette party. It’s the first time all my college BFFs and I will be together in years (after graduation we all seemed to move to different corners of the country) so I feel like a little kid waiting for Christmas. I’ll do a blog post about the weekend in case any of you are thinking of doing a destination bachelorette party or just have a Palm Springs getaway in your sights. If you’ve been there and have restaurant/activity recommendations, let me know in the comments!

Bodyweight Pyramid Workout Targeting Obliques

Since this is a pyramid workout and you’re going through it at your own pace, the quick video I made for it just demos the exercises rather than going through the whole thing in real time. As always, full description with pictures below!

We’re mixing a pyramid structure of reps with 20-second isometric holds. There are three exercises which will be performed on the right and then the left. The first two will be done using a pyramid of reps, the third exercise is just a side plank hold (20 seconds EVERY time). Your rep numbers start and 10 and get reduced by 2 each time through the circuit. So here’s the breakdown:

10 reps exercise 1 right / 10 reps exercise 1 left
10 reps exercise 2 right / 10 reps exercise 2 left
20 second hold right / 20 second hold left

8 reps exercise 1 right / 8 reps exercise 1 left
8 reps exercise 2 right / 8 reps exercise 2 left
20 second hold right / 20 second hold left

… continue until you get to 2 reps each …

Your goal is to complete this workout as fast as you can without sacrificing proper form. It’s better (and way more effective) to go slow and nail the correct form than to rush it sloppily.

Bodyweight Pyramid Workout Targeting the Obliques

Rotating Crunch to Side V Up

For these, you just alternate between a full-body crunch and a side v-up crunch on the target side, rolling from center to your side, back and forth. For the reps on the right, start laying on your left side with your left arm stretched outwards on the ground for support. For comfortable positioning, you want to be on the side of your butt rather than directly on the hip bone. Do a side v up, lifting your legs up straight to meet your right elbow and raised torso. Lower down and roll onto your back with arms overhead and legs straight out, hovering a couple inches off the floor (to make these challenging, try your best to never let your feet rest on the floor, even while rolling from side to side). From this position, do a full-body crunch, bending your knees in as you sit up through the torso, chest coming up and in to meet knees. Slowly release back down onto your back and roll over to your left side for your next side v up.

The side v up + full body crunch in center = 1 rep. You’ll do the given number of reps, rolling to the left hip for each side v up. You’ll then repeat, rolling to the right hip for each side v up.

Windshield Wiper Sliders in Plank

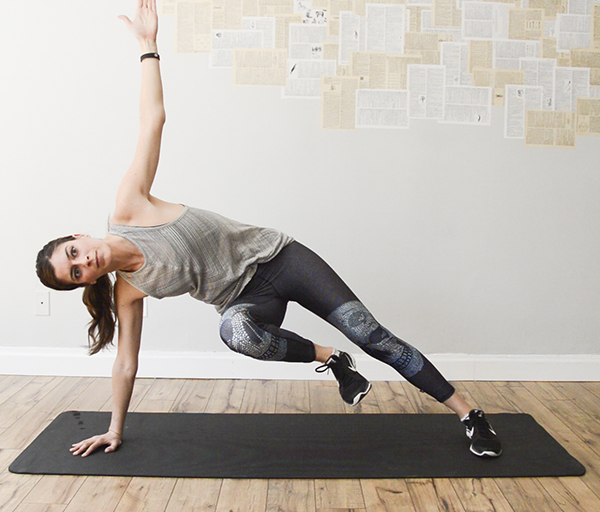
Start in a plank position, hands stacked under shoulders. From here, you’re going to crunch the right knee in towards the right wrist. This is your starting position. Keeping the knee in as close to the arm as possible (make physical contact if you can), slide the knee up towards the elbow. From there, swish it across to the left elbow (touch it if possible). Swish the knee back to the right elbow and then slide it back down to wrist height. That’s 1 rep.

Side Plank Bottom Knee Crunch Hold

In a side plank position with your bottom hand stacked under the shoulder, press your top foot into the floor for support and then crunch the bottom knee into your chest. Hold it there for 20 seconds. The key is to keep the hips stacked as you do this–don’t let the top hop roll forward!

MODIFY: If your wrists are burnt out from holding a high plank in the previous exercise, you can totally do this one on your forearm!

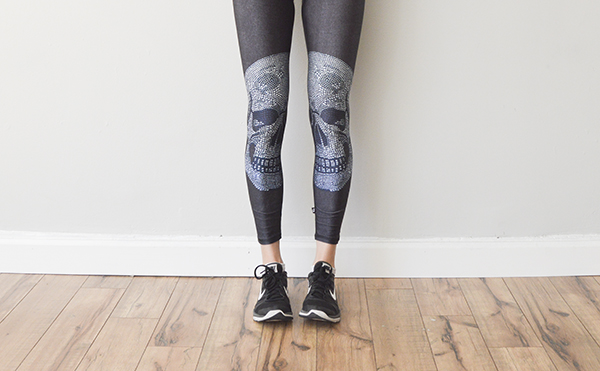
Terez skull leggings -- get 25% off with code nicole25

WEARING | leggings c/o Terez (get 25% off with code nicole25) // Athleta tank (old but you can shop their current tank selection here) // Nike sneakers

Side note: I LOVE the skull leggings I’m wearing in today’s post! If you look closely at the pattern it almost looks like someone beadazzled jeggings. Which actually sounds awful, but it’s not haha. You can get 25% off ANY Terez leggings or apparel with code nicole25.

signature

15-Minute Lateral Low Body Workout (Video)

15-Minute Lateral Low Body Workout (focus on abductors)

Wow my butt is feeling it after shooting this workout yesterday! 🙂

Today’s workout is going to focus on lateral movements and the outsides of our lower body (abductors). It’s great for everyone, but can be especially beneficial for runners. Running is a very forward-backward, single-plane activity so to prevent muscle imbalances, it’s good to mix in some workouts using lateral (side-to-side) movements. I loved megaformer workouts during marathon training for this reason–the lateral sliding on the machine is so good!

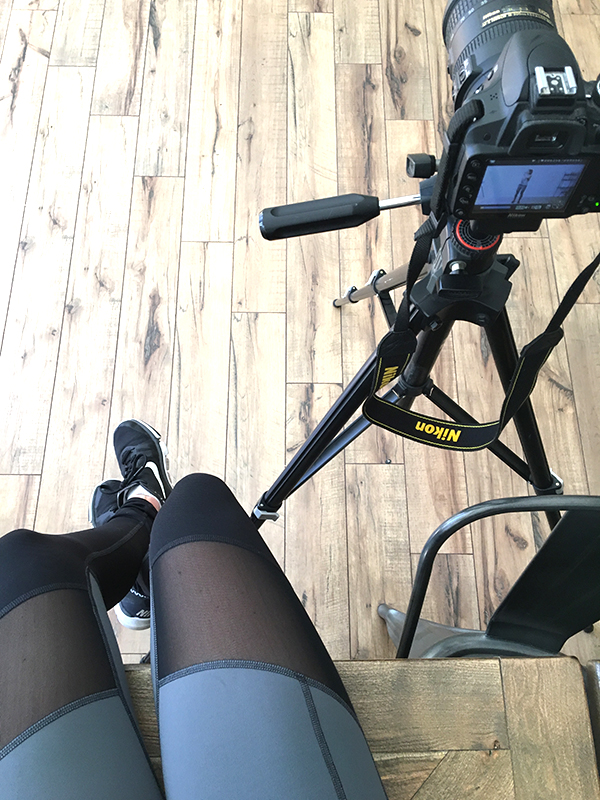
I teamed up with Iron Lily on this workout, so let’s first take a second to admire the leggings I’m wearing! Iron Lily is an LA-based women’s activewear line to which I was recently introduced. As a newer brand, the current collection is small, but I instantly was drawn to their leggings. The mesh panel, color blocking and visible seams are totally on trend, and the compression material makes them great for high-intensity workouts. If you like leggings that really hold everything in place, you’ll love these. And the waistband is wide and comes up high enough that the compression material is still flattering around your stomach. Iron Lily leggings

I’m wearing the Vanquish Leggings which retail at $106. It’s a higher price point (although definitely not as high as other brands I’ve seen!), but the quality is great and they’re made right here in the good ol’ USA, which I love. Check them out here!

15-Minute Lateral Low Body Workout

Watch the Video


This 15-minute workout is going to target your lower body using lots of lateral movements. So think abductors. We’re opening up the hips and forcing the outer thigh/side butt area to work. The 15 minutes is broken up into three exercise combos. After each 3-minute combo, you’ll do a 60-second cardio blast. No equipment is needed.

15-Minute Lateral Low Body Workout (focus on abductors)

Combo 1 | Curtsy Lunge + Curtsy Lunge Hold (Balance!)

30 seconds of movement + 10 seconds holding x6 (3 times each leg, alternating)

Curtsy Lunge | Start standing with feet hip-width apart. From here, sink down into your curtsey lunge: right foot stays planted on the ground and as you bend that right knee, reach your left foot behind it as far to the right as you can until it hovers off the ground. To modify, plant the ball of your foot on the floor for stability instead. From this deep lunge position, you’re going to press back up to standing, just lightly tapping your left foot to the floor before sinking back down into your next rep.

Curtsy Lunge Hold | Hold the bottom of your curtsy lunge and then try to hover the back left foot off the ground so that you’re balancing low on your right side.

Speed Skater 60 seconds

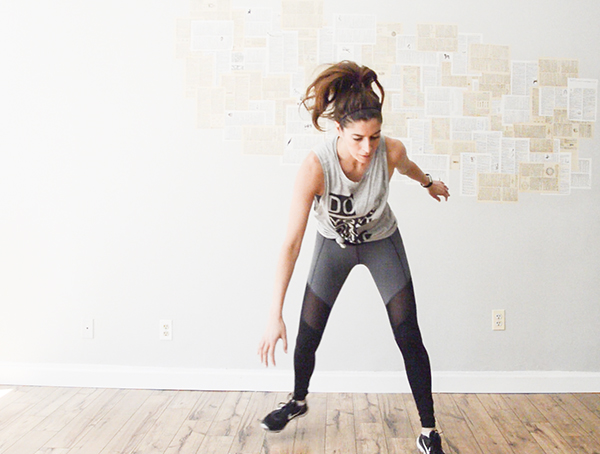
These are like side-to-side leaping curtsy lunges. Leap to the right, landing on your right foot and bending down to touch the ground by your foot with your left hand as you swoop your left foot behind the right (think of a curtsy). Come up, leaping left and reversing the move. Keep it going quickly, back and forth, trying to never let that back foot come to rest on the ground—keep the weight in the foot you land on.

Combo 2 | Hydrant Crunch with Lift + Pulses (Straight)

30 seconds of movement + 10 seconds pulsing x6 (3 times each leg, alternating)

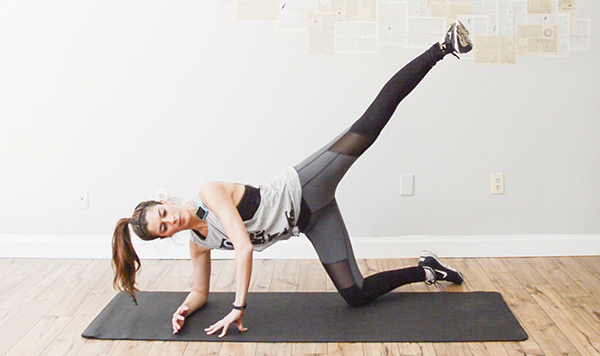
Hydrant Crunch with Lift | You’ll be in a stacked/open tabletop position for this one. To set up, get onto all fours and then lower onto your left elbow. Open up your right hip like a dog peeing on a fire hydrant so that your hips are stacked and you’re facing the side of the room rather than the floor. From here, you’re going to crunch the right knee in towards the right shoulder. Extend it back out straight and then lift it up as high as you can keeping the hips stable and lower. Repeat.

Straight Leg Pulses | Hold the leg out straight, thigh bone rotated open (knee and toes point to the wall, not the floor) and from there pulse up and down.

Speed Skater 60 seconds

Combo 3 | Sumo Squat Lifts + Pulse Wide

30 seconds of movement + 10 seconds pulsing x6 (3 times each leg, alternating)

Sumo Squat with Lift | This is a wide-stance squat with a lateral leg lift. Feet wider than hip-distance apart, squat down low. Shift your weight into the left side and then as you begin to straighten the left side and rise up, lift the right leg straight up and out to the side. Lower it, bringing your weight back to center in that deep squat. 

Wide Sumo Squat Pulses | Hold a wide squat and angle your toes outward, knees tracking in line with toes. From here, you’re going to pulse your legs out wide (think of pulling your knees towards the back of the room while you squeeze your glutes).

Speed Skater 60 seconds

And you’re done!

15-Minute Lateral Low Body Workout (focus on abductors)

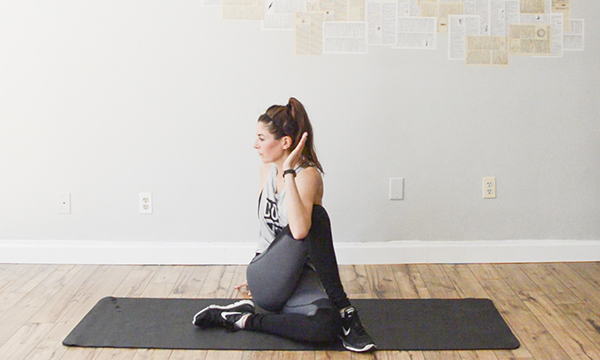
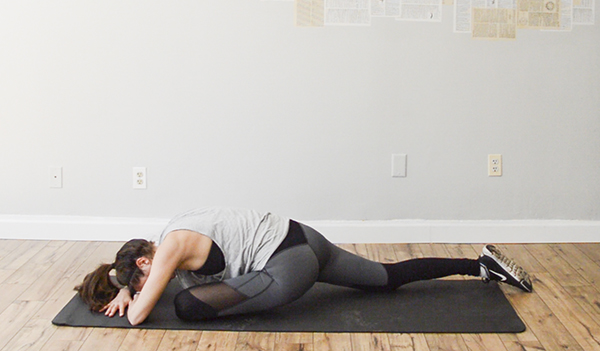
Good Stretches to Do after This Workout

These are two great stretch options for this particular workout:

15-Minute Lateral Low Body Workout (focus on abductors) 15-Minute Lateral Low Body Workout (focus on abductors)

WEARING | leggings c/o Iron Lily // tank c/o Reebok (old but similar here) // Nike sneakers

Let me know in the comments if you try the workout!

signature

Disclosure: This post was sponsored by Iron Lily. While I was compensated for my time, all opinions–as always!–are my own. I appreciate your support of the brands who make this blog possible! 🙂