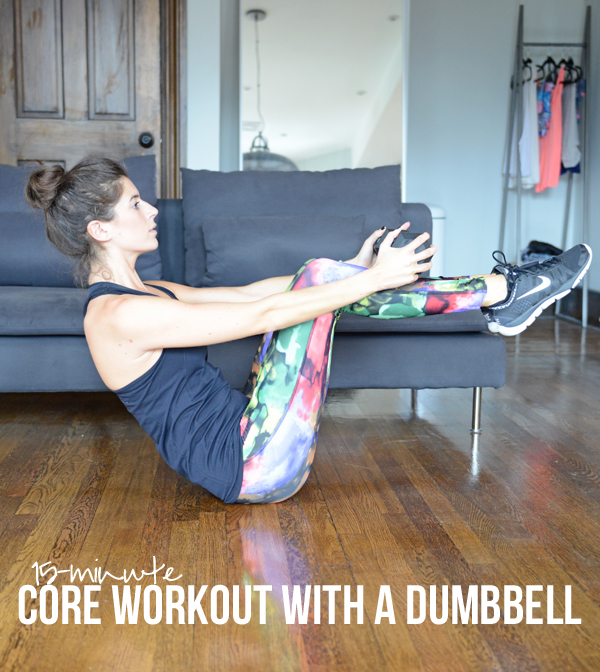
15-Minute Core Workout with a Dumbbell

15-Minute Core Workout with a Dumbbell | Pumps & IronI’m so proud of my bun in these pictures. For once my hair *almost* looks put together in a workout tutorial instead of the usual hair-sticking-everywhere-messy-slop-bun-pony-thing. This core workout with a dumbbell will take you only 15 minutes (15 minutes 30 seconds to be exact). If you’re a beginner or don’t have a weight handy, forget about the dumbbell and just do the exercises with your bodyweight. It’ll still be effective!

Note: This blog post was updated on 9/17/18 with the addition of a video. Originally published 10/22/15. 

15-Minute Core Workout with a Dumbbell


Equipment I Used

There are seven exercises in this circuit. You’ll do each for 30 seconds, moving from one right to the next (no rest). Once you’ve completed all seven, rest for 30 seconds before starting again from the top. You’ll go through the circuit four times total. If you’re advanced, try to get through two consecutive circuits before resting. If you’re a beginner, only go through the circuit twice (and add additional rest time as needed in between exercises or completed circuits). 15-Minute Core Workout with a Dumbbell | Pumps & Iron

Exercise Breakdown

For a preview of all exercises, see 1:18 in the above video.

  • Push Throughs | Try not to ever let your shoulders completely rest on the floor. Try to keep your heels on the floor the whole time.
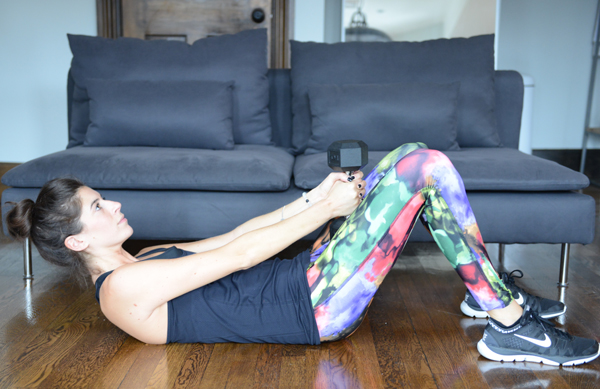
  • Full-Body Sit-Ups | The goal is to never bring the legs and/or weight to rest on the ground when you extend back out.
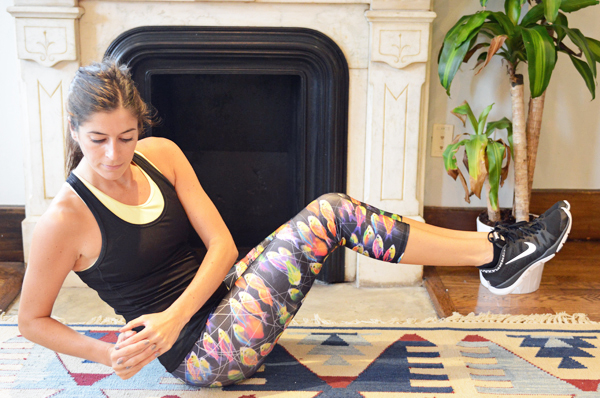
  • Rainbow Russian Twists | These are just like your traditional Russian Twists except you’ll extend your arms out straight instead of holding the weight tight in to your body.
  • Leg Lift to Toe Touch | Don’t let your low back arch up when you lower your legs—if it’s happening, modify by bending your knees or don’t bring your legs as low.
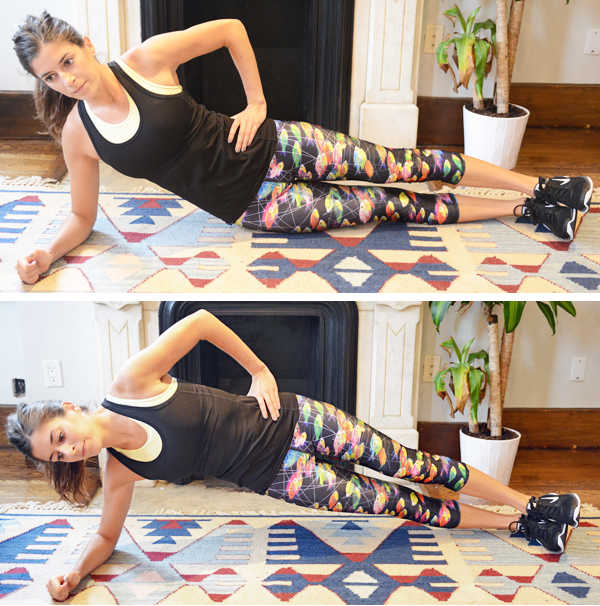
  • Weighted Side Plank Lifts | You can do this on a straight arm or forearm. In the video I opted for forearm. Do what works for you! You’ll alternate sides each time through the circuit. 
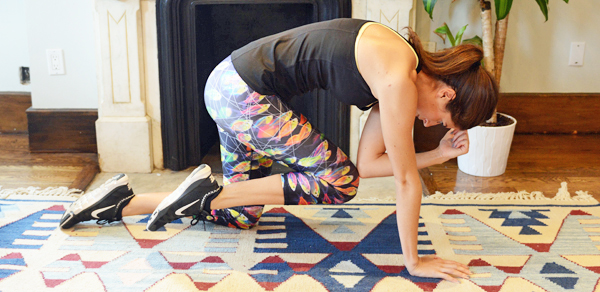
  • Mountain Climbers 
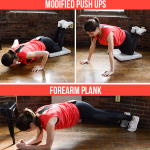
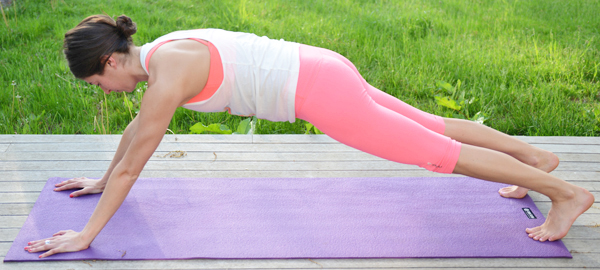
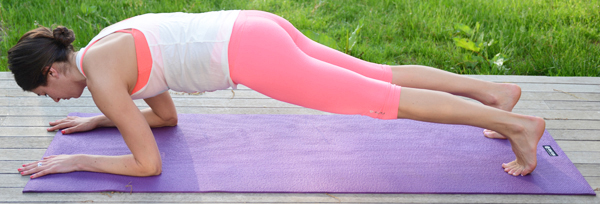
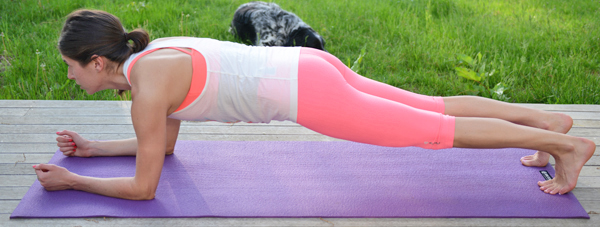
  • Forearm Plank Hold  

15-Minute Core Workout with a Dumbbell | Pumps & Iron

WEARING | tank: Fabletics // leggings c/o PRISM Sports (old but this print of theirs is super cute!) // sneakers: Nike

Have a great day!

xo Nicole
Beginner Core Workout (Emphasis on Obliques)

beginner-core-workout-at-homeChronic back pain, poor posture, improper form when doing low-body and arm exercises—all can be improved by strengthening your core. This workout would be a great one to combine with a longer cardio session or to do on a more restful day before/after a yoga class. I mean to imply that it’s easy; it’s simply quick and targeted.

Just like last week’s workout in the beginner series, don’t count it out if you’re a little more advanced. Just as there are always ways to modify exercises, there are also ways to advance them.

IMPORTANT NOTE: While this workout was originally published in 2015, I went back and shot a video for it in 2018. In the video, I decided to use longer interval lengths to give me a little more time to give verbal form cues. Same exercises, same everything else—we’ll just use intervals of 40 seconds of work and 20 seconds of recovery in the video instead of the 30/15 structure mentioned below.

Beginner Core Workout (Emphasis on Obliques)


Equipment I Used:

  • One medium weight (I would suggest 8-10lbs for true beginners, but use a weight that challenges you!)
  • Gymboss Interval Timer (there are lots of interval timer apps available for smart phones, too!)
  • Exercise mat

Set an interval timer for 20 rounds of 30 seconds of work and 15 seconds of rest. You’ll go through the following circuit of five exercises four times. Focus on one side of your body per round. In other words, your first time through the circuit, every exercise should be done on the right side. The second time through, do them all on the left. The only exception to this is the russian twist, which will target both sides of your body every time you preform it. Beginner Core Workout (emphasis on obliques) - this will take you just 15 minutes and includes detailed exercise descriptions with ways to modify and advance each move

Standing Side Bend

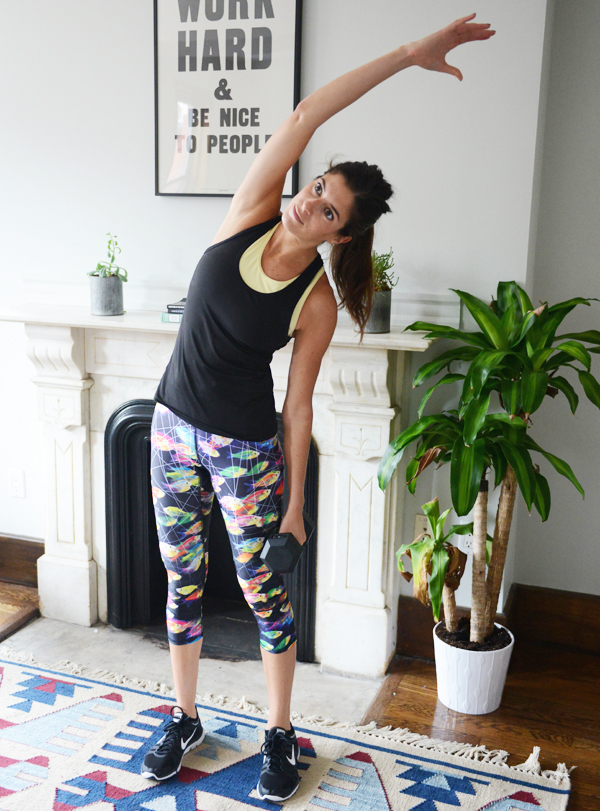
Stand with feet hip distance apart and a weight in one hand, other hand on hip. I typically use a 25-lb kettlebell for these. A 10-lb dumbbell is a great place to start, and for true beginners, you might even want to start lighter. Lean over to the side with your torso as you lower the weight towards the ground (try to get it at least to knee height, if not a little lower). Engaging the obliques, bring your torso back upright to starting position once you’ve gone as low as possible. That’s one rep.

Make sure that you’re bending to the side—not leaning forward or backward at an angle as you dip. Envision sliding the weight down the side of your leg to keep this alignment.

MAKE IT EASIER

  • Use less weight.
  • Perform the move seated, on either a bench or chair without arms.

MAKE IT HARDER

  • Use a heavier weight.
  • Extend the other hand overhead as you bend to the side.

Beginner Core Workout (emphasis on obliques) - this will take you just 15 minutes and includes detailed exercise descriptions with ways to modify and advance each move

Standing Bicycle Crunches

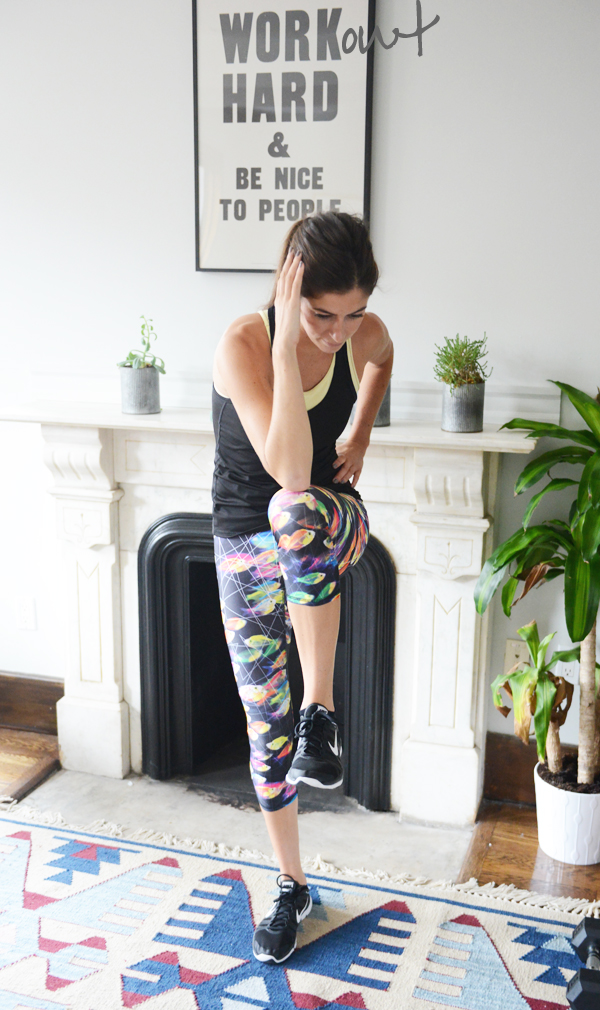
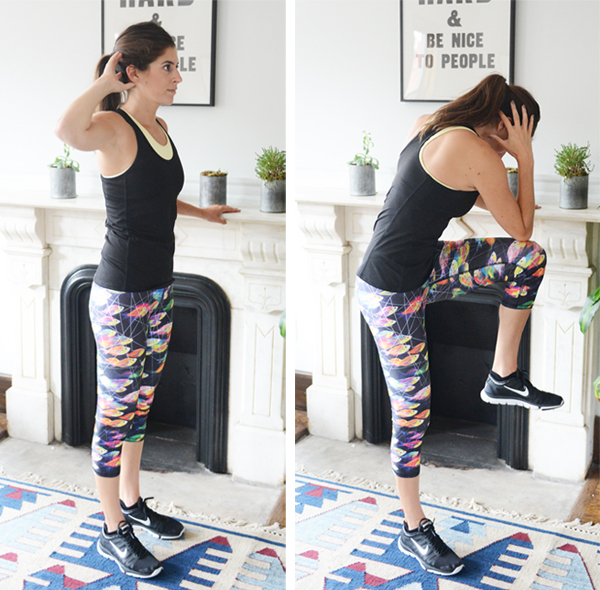
Start standing with feet hip’s width apart, one hand on your hip and the other lightly behind your head. Don’t pull on the back of your head; keep your chest open, roll the shoulderblade back and down and squeeze your upper back to maintain this wide elbow placement. From this starting position, your going to crunch that elbow down and across your body to touch the opposite knee, which you’ll bend and lift up towards it, squeezing your low abs. Don’t worry if you can’t make physical contact between the knee and elbow; focus on pulling you core in tight (like someone is punching you in the stomach) and just get them as close as possible. Carefully return to your starting position. That’s one rep.

MAKE IT EASIER

  • This one requires balance. If it’s too much, hold onto something with your bottom, non-crunching hand to steady yourself as you perform the exercise.

Beginner Core Workout (emphasis on obliques) - this will take you just 15 minutes and includes detailed exercise descriptions with ways to modify and advance each move

MAKE IT HARDER

  • Do it laying on the floor. Lay on your back like a traditional bicycle crunch, peeling your shoulders off the ground as you crunch up to meet the opposite knee. If you take this advancement, still crunch to the same side during a 30-sec work period, alternating each time through the circuit.

Tabletop Bird Dog Crunch

Start in a kneeling tabletop position with hands stacked directly under shoulders and knees under hips. Contract your abs to stabilize you as you outstretch your right arm in front of you and your left leg straight behind you. The extended limbs should be level with your hips/shoulders. This is your starting position. From here, bend the extended limbs, crunching the elbow in towards the knee. As you do this crunch, picture someone punching you in the stomach—contract the abs and round the spine up towards the ceiling, pulling the core in tight. Return to starting position, extending the right arm and left leg back out. That’s one rep.

Important form focus: Pay attention to your back—it should never sag down toward the ground. Look in a mirror when you’re in tabletop with your leg and opposite arm outstretched. Does your back look like a hammock hanging between your bum and shoulders? That’s not what you want; it probably means you aren’t engaging your abs. Think of pulling your bellybutton in towards your spine. Aside from the natural curvature of the spine, your back should be flat while in this starting position.

MAKE IT EASIER

  • Keep both hands on the ground. If you’re feeling too wobbly during the move, keep both hands planted firmly on the floor and just focus on crunching the knee in as you squeeze your abs.
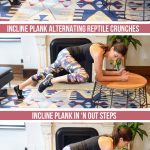
  • You’ll notice this is a recurring modification: If floor exercises don’t work for you because of limited mobility, bring the “floor” up to you. Instead of being on all fours, find a plank position on an elevated surface (bench, coffee table, etc.). Perform your crunches from here, possibly just crunching the knees in one at a time if incorporating the upper body isn’t working.

Beginner Core Workout (emphasis on obliques) - this will take you just 15 minutes and includes detailed exercise descriptions with ways to modify and advance each move

MAKE IT HARDER

  • Hover your knee. Instead of having your non-crunching knee on the ground, plant the ball of that foot onto the floor and lift the knee up a couple inches so that it’s hovering (otherwise your body is in the exact same position). You’ll feel that quad start to burn as it works to stabilize you through the crunches.
  • Do it in a plank. Instead of having your knees on the ground, hold a full plank position (balls of feet on the floor) as you crunch opposite knee to elbow.

Kneeling Side Forearm Plank Hip Lifts

Laying on your right side on the floor, plant your right forearm on the ground with the elbow stacked directly under the shoulder. Stack your left knee on top of the right. From here, contract your right sidebody as you lift your hips off the ground so that your bottom knee and forearm are now your points of contact with the floor. Pause at the top, really squeezing into the sidebody and pressing the hips as high as they’ll go. Slowly lower the hips back down to the ground. That’s one rep. 

MAKE IT EASIER

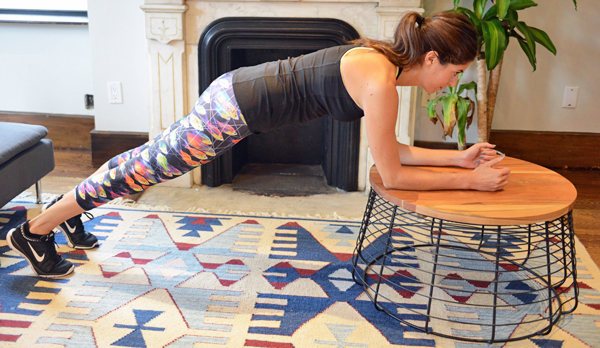
  • If limited mobility prevents you from doing floor exercises, put your bottom forearm on an elevated surface (bench, table) instead (feet will be on the floor instead of knees if you take this modification). From this incline side plank position, lift and lower your hips.

MAKE IT HARDER

  • Don’t rest your hips on the ground at the end of each rep. Lower them to a hover then contract the obliques to lift ‘em right back up.
  • Do it from your feet. Instead of having your knees be the point of contact with the floor, do these in a full plank position, feet stacked on the floor.

Beginner Core Workout (emphasis on obliques) - this will take you just 15 minutes and includes detailed exercise descriptions with ways to modify and advance each move

Russian Twists

Start seated with knees bent and heels planted on the ground. Lean back slightly (don’t slouch, keep your chest open) until you feel your abs sort of kick in and start working to support the angle of your torso. From this starting position, twist to one side, bringing your hands to the outer side of that hip; then repeat in the other direction. That’s one rep. Really twist at the waist—you want your chest to be totally facing whatever side you’re bringing your hands.

MAKE IT EASIER

  • Sit in a chair instead of on the floor. If you have limited mobility, getting all the way down to the floor for exercises can be really challenging. Don’t let that discourage you! Bring the “floor” up to you. Sit in a chair without arms and scoot forward enough on the seat so that you can still lean back slightly with your torso. Twist side to side from here. Since this will be easier than the floor, maybe you try holding a weight while you twist to keep the challenge. 

MAKE IT HARDER

  • Hold a weight in your hands as you do this.
  • Lift your feet off the ground. Instead of having your heels down for support, balance on your tailbone, hovering the feet off the floor as you twist side to side.

beBeginner Core Workout (emphasis on obliques) - this will take you just 15 minutes and includes detailed exercise descriptions with ways to modify and advance each moveginner-core-workout-5

The “Why” Behind This Workout

A strong core makes for a strong body. As your core strength improves, you’ll notice that you’re better able to perform low body and upper body exercises with proper form. So much of our ability to balance and move with coordination comes from having a strong core—after all, it’s where all our limbs are attached!

Speaking of this powerhouse muscle group …

It’s important to train all sides of your core, not just the “six pack.” Your core includes your obliques, back and all the connecting muscles. It’s important to move away from crunches and make sure you’re working your sides and backside in addition to the front. Think of your core as a girdle: If only the front side is strong, it’s not very effective at holding everything in, now is it?

Focusing on one side at a time is a challenging and effective way to train. By spending an entire circuit on the right sidebody before doing the whole circuit on the left will effectively work the targeted muscle group to its point of exhaustion. It’s the methodology used in Lagree Fitness (the megaformer class I teach), and I find it to be so effective and challenging.

Moving gradually from standing to floor moves makes the transitions easier for people with joint issues or who are carrying a significant amount of extra bodyweight. While some of these exercises are done on the floor, I’ve included modifications for staying a little higher up for all. One of the biggest challenges a beginner may face is all the fast position changes that often come with workouts: hopping from laying on your stomach to your feet; jumping from plank to a squat; getting up and down from the floor—it’s not always very joint friendly. This workout moves from standing, gradually down to the floor so that you only have to get down (and then back up) once per circuit round.

Beginner Core Workout (emphasis on obliques) - this will take you just 15 minutes and includes detailed exercise descriptions with ways to modify and advance each move

Shot in a Breather room (Gloucester St. #2) — I always get lots of questions about where the decor is from and unfortunately have no clue (although I wish this was my apartment haha). You can get a $45 credit on your first Breather booking with code PUMPIRON (they’re in NYC, Boston, San Fran, Montreal & Ottawa).

As always, let me know if you have any questions on form in the comments! I’ll do my best to answer quickly.

MORE RESOUCES FOR BEGINNERS: 

xo Nicole
Common Form Mistakes in Plank (+How to Fix Them!)

A lot of the core work at Btone (where I teach in Boston) is plank-based, so it’s by far the exercise I see the most. That means that along with the impressive planks, I’ve also seen just about every possible way one could imagine to do them incorrectly. And I don’t mean that condescendingly at all—I used to make a couple form mistakes in plank myself!

Planks seem simple, but like with most exercises, proper form is key for them to be effective. And since countless moves utilize this position in one way or another (push ups, burpees, mountain climbers, etc.), it’s an important one to get right. As a way to explain how to do them correctly, I thought it’d be helpful to go over some of the most common form mistakes in plank I see when teaching.

Common Form Mistakes in Plank

Common Form Mistakes in Plank (+How to Fix Them!) - Planks are a foundational exercise in many workouts. Check out these common form errors and learn how to fix them! #plank #planking #exercise #fitnesstips #exercisetips

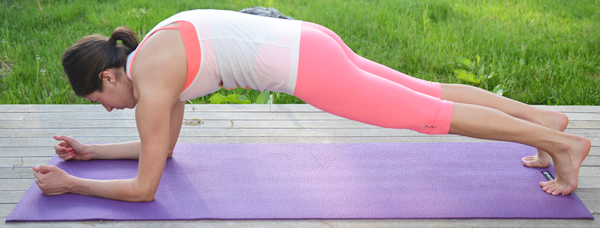
Pelvic Tilt (aka the Booty Pop)

Common Form Mistakes in Plank (+How to Fix Them!) - Planks are a foundational exercise in many workouts. Check out these common form errors and learn how to fix them! #plank #planking #exercise #fitnesstips #exercisetips

In this error’s defense, it does make you look like you’ve got some killer Kardashian-esque curves. I’M KIDDING. Don’t do this! This postural imbalance is common with a lot of people (not just when planking) because sitting down for long periods of time can cause a tightening of the hip flexors, making us tilt our pelvis and arch the low back. If you look back at some of my original blog posts (back in the days before the PT cert and teaching), you can spot me making this mistake here and there.

Correct It

You want to bring your pelvic bone back to neutral, so from this arched position, you would want to gently tuck the tailbone. I say “gently” because I don’t want you to come into a tucked position, just back to neutral. Think of drawing the low abs up and in, closing some of the space between the hip bones and bottom ribs. Knit the ribs together instead of letting the rib cage fan open.

Over-Engaged Chest

Common Form Mistakes in Plank (+How to Fix Them!) - Planks are a foundational exercise in many workouts. Check out these common form errors and learn how to fix them! #plank #planking #exercise #fitnesstips #exercisetips

This form error can be spotted by a rounding of the shoulders. It’s very common to have an overdeveloped frontside and a weak posterior body, so oftentimes we’ll overcompensate for a lack of strength in the back and core by propping ourselves up in plank using our chest (and only our chest). If you have a slight hunchback going in your plank, you may be doing this.

Correct It

If you tend to hunch, you may be going into your plank position with rounded shoulders, causing this rounding. Before getting into plank, try rolling your shoulders, opening up the chest, and sliding your shoulder blades down your spine. With this posture, enter the plank position. That way, your posterior (back) is active and not just your chest.

“Heavy” Spine (No Chest Engagement)

Common Form Mistakes in Plank (+How to Fix Them!) - Planks are a foundational exercise in many workouts. Check out these common form errors and learn how to fix them! #plank #planking #exercise #fitnesstips #exercisetips

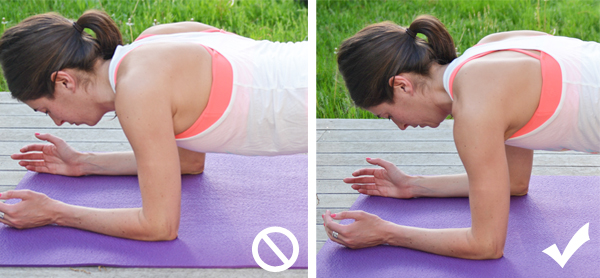
It’s hard to demonstrate with pictures while wearing a bra and shirt, but this one is essentially just the opposite of the over-engaged chest. In this form mistake in plank, you’re not engaging your chest at all. As a result, your upper back kind of droops down, spine hanging heavy between shoulder blades that are pinching slightly together. We’re trying to find a neutral upper back position, right in between the over-engaged chest and “heavy” spine.

Correct It

Common Form Mistakes in Plank (+How to Fix Them!) - Planks are a foundational exercise in many workouts. Check out these common form errors and learn how to fix them! #plank #planking #exercise #fitnesstips #exercisetips

To better demonstrate what’s going on, look at the above picture comparison. It’s a subtle difference, but these pics were taken from the exact same angle. On the left, you can’t see the full racerback of my tank & bra because my back is sunken low in between the shoulder blades (this is incorrect).

To fix it, picture you’re trying to fill the space between your shoulder blades. Engage your chest and press the floor away from you.

Lifted/Piked Hips

Common Form Mistakes in Plank (+How to Fix Them!) - Planks are a foundational exercise in many workouts. Check out these common form errors and learn how to fix them! #plank #planking #exercise #fitnesstips #exercisetips

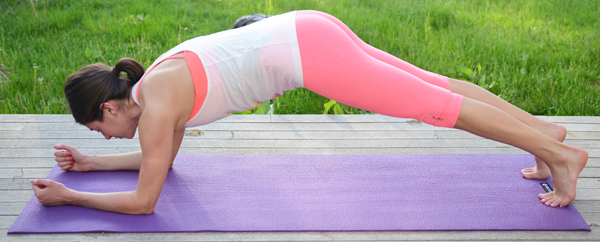
We tend to do this one when we start to tire holding a long plank. Don’t let your body come into this piked, upside-down “v” shape! When we do this, we’re shifting the distribution of our body weight and giving our core a little breather—not the point of the plank exercise.

Correct It

If your butt keeps creeping up into the air like this, think of holding your hips level with shoulder height (probably just below shoulder height if holding a high plank on your hands). From heels to crown of head should be one straight line.

Wrists/Elbows Not Stacked under Shoulders

Common Form Mistakes in Plank (+How to Fix Them!) - Planks are a foundational exercise in many workouts. Check out these common form errors and learn how to fix them! #plank #planking #exercise #fitnesstips #exercisetips

In high plank, I usually see the hands are pressed out a few inches in front of the shoulders. In forearm plank, I most commonly see the opposite, where the shoulders are ahead of the elbows. When you’re in a plank, you want whatever joint is on the ground (wrists if in high plank; elbows if in forearm plank) to be stacked directly underneath your shoulders.

I should note that there is a plank variation where you purposely have your hands on the ground as far in front of your shoulders as possible (“Superman Plank”)—I’m not talking about that. I’m talking about those slight weight redistributions we tend to do as we wiggle our way through a long plank hold.

Correct It

If your elbows are racked under your rib cage, shift your shoulders back. If your hands (or elbows) are out in front of you, shift your shoulders forward.

Under-Engaged Legs

Common Form Mistakes in Plank (+How to Fix Them!) - Planks are a foundational exercise in many workouts. Check out these common form errors and learn how to fix them! #plank #planking #exercise #fitnesstips #exercisetips

Think of all the ways you start to fidget when you’re holding a plank for a long period of time. Do you ever start to pedal your feet, bending one knee and then the next? Relaxing your knees and having bent legs changes the way our bodyweight is supported in plank.

Correct It

We associate planks with our core, but your legs are working as well! To correct this form mistake in plank, squeeze your quads as if you were trying to lift them off your knee caps. Squeeze your glutes as well.

Heavy Head or Craned Neck

Common Form Mistakes in Plank (+How to Fix Them!) - Planks are a foundational exercise in many workouts. Check out these common form errors and learn how to fix them! #plank #planking #exercise #fitnesstips #exercisetips

The human head is heavy, but you want to keep a neutral neck. Don’t let your head hang at your chest, but also don’t crane your neck so that your gaze is upward.

Correct It

Setting your gaze right in front of your fingertips usually ensures your neck is neutral. If you’re looking between your legs, your head is hanging too heavy. If you’re looking at yourself in the mirror in front of you, you’re craning the neck.

Planking Workouts

Now that you know the common form mistakes in plank to look out for, let’s practice doing the exercise correctly! I have plenty of plank-based workouts and challenges to try.7

7-Day 4-Minute Plank Tabata Challenge

Plank Workouts

Fellow PTs and fitness instructors—any other errors you want to add to this list? And, perhaps more importantly, any cueing tips you want to add for adjusting into correct plank form? 

xo Nicole