The Pros and Cons of ClassPass

The Pros & Cons of ClassPass - Considering a ClassPass membership? I've been one on and off for years and will break down all the pros & cons. #classpass #fitness #groupfitness

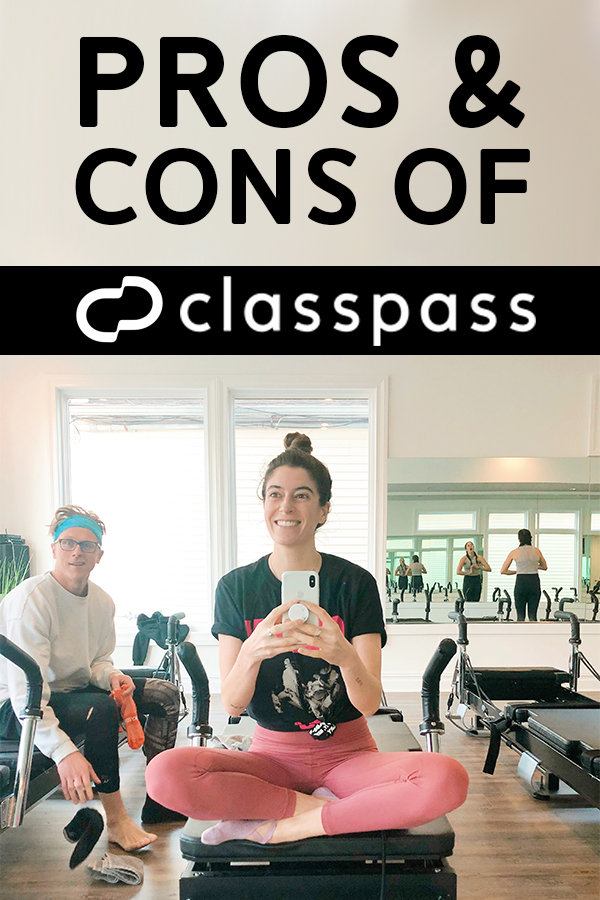
I have had an on-again-off-again relationship with ClassPass since it first came to Boston. Loved it, hated it, used it as a means to an end, dropped it in exchange for Equinox (you can read about my thoughts on that HERE), and am now really happy to be back on ClassPass. So as a self-proclaimed expert, let me break down the pros and cons of ClassPass.

Full discloser, I have worked with them a couple times on campaigns, promoting CP in exchange for free credit. I’m under no obligation to write this post or say certain things about them though. The following thoughts are all my own! 🙂

How Does ClassPass Work?

The service has changed a million times since its inception (as most new companies do). Currently, they use a credit system. A popular class at a peak time (before/after normal work hours) will cost you more credits than a less popular class at an off-time. These are the plan options:

  • 7 credits/month for $15
  • 27 credits/month for $49
  • 45 credits/month for $79
  • 85 credits/month for $139
  • 130 credits/month for $199

*Prices vary by city, these are for Boston.

You can go to any given studio as many times as you’d like during the month. However, at some studios, if you attend more than three classes, you’ll have to use more credits per class. If you live in Boston, most studios are on CP, with the exceptions of B/Spoke and SoulCycle (and maybe a couple I’m forgetting).

You can rollover up to 10 unused credits to your next month.

Pros and Cons of ClassPass

Let’s get into the finer details now. For anyone considering a membership, here are the pros and cons of ClassPass.

Pros of ClassPass

It’s the most cost-effective way to take group fitness classes at multiple studios.

This is the big selling point. With ClassPass, you pay $12-13 a class if you use your membership to its fullest (in Boston), compared to the $25-30 price tag you’d pay to drop into a studio. Now if you were to buy a membership at a studio, that price per class would be lower, but probably not $12-13.

Now, that $12-13 number only holds true if you’re strategically going to mostly lower-credit classes. A Barry’s class, for example, is going to cost you at least 14 credits. If you do the math, yes, you’re still saving but not a ton. So keep in mind which studios you’ll be visiting and at what times you’ll be working out when determining how much you’ll actually save.

It’s great if you just moved to a new city or are traveling to another city.

ClassPass is a great way to test out lots of different studios to see where you like best. If you find that you love several, continue the membership for variety of workouts. If you fall in love with one particular studio, you can always cancel you CP membership and join your favorite spot.

A ClassPass membership can be used at ANY ClassPass studio, so if you travel for work or are vacationing in a city with CP, you can use your membership there. I love this feature of ClassPass!

It’s perfect if you’re looking to supplement an existing workout routine.

Maybe you’re a runner and are just looking to cross-train a couple times a week. Maybe you already have access to a free gym at work and just want to take fun group classes on the weekend. Maybe you’re a fitness instructor, can already work out at your studio for free, and just want to visit others here and there. ClassPass is for you!

In fact, I think ClassPass is best suited for those looking to supplement an existing membership or at-home workout routine. Yes, you could absolutely use ClassPass for all your fitness needs—especially with it’s current structure. However, you’d have to be really strategic and take lower-credit classes so that you didn’t blow through your plan before the month is up.

Cons of ClassPass

If you want to workout more than 2-3 times a week at peak times/studios, you’ll need to supplement your ClassPass membership with at-home workouts or another gym/studio membership.

This is the flip side of my previous point in the “Pros.”

Back when there was an Unlimited option, ClassPass could completely replace your gym membership, allowing you to take a class every day of the month if you wanted to. Now it’s more of a supplemental thing because even with the new credit number system, you’re only going to be able to take 2-3 classes a week if you want to do popular classes. So yes, you save money on group fitness with ClassPass, but if you want to work out more frequently, you’ll need to supplement.

You can purchase additional classes at some studios through ClassPass for a slight discount, or pay for an outside gym/studio membership. But unless you’re supplementing with running and at-home workouts, prepare to pay in addition to your core CP membership.

Now, if you find classes in the 4-7 credit range that you love, then this might not hold true. You could probably buy one of the more expensive ClassPass plans and be set. For me though, my favorite classes are more like 8-14+ credits each.

Some studios block off their most popular class times to ClassPass users.

This is one of the biggest downsides for me. Yes, I have a weird job and can technically work out at any time of day. In theory, I’m the perfect candidate for ClassPass because a 9 or 10am class can work with my schedule. But I hate working out then! It’s 7AM or bust in my book.

Most people work roughly 9 to 5 and accordingly, the most popular class times at fitness studios are typically 6/7AM and 5/6PM. So you’ll notice that some studios don’t open those times to ClassPass or severely limit the number of spots CP users can take. The studio has no problem filling these peak times with their clients, so it makes sense.

Sometimes the class will be available to ClassPass users, but as it fills up, the number of credits required to take it increases. I’ve seen classes costing over 20 credits—basically the same cost as just buying a drop-in directly from the studio.

Some studios limit the number of ClassPass clients per class so you have to sign up for your favorite times a week in advance.

The allotted slots for ClassPass users can fill up fast at popular studios so you have to sign up right at 12 noon the week before the class in order to snag a spot. You can chance it and try to sign up last-minute, assuming someone will late-cancel the night before or day of, but I hate risking it. Set your alarms!

Variety is GREAT, but when you’re totally all over the place, you’re not going to see specific progress.

I’m a big proponent of switching up your workouts, but you can definitely spread yourself too thin. At my peak ClassPass usage when it was only $99 for UNLIMITED classes, I was all over the place with classes—yoga one day, bootcamp the next, barre, spin, boxing, pilates. It was fun to try new things for the first couple months but then I had the realization that I was just “meh” at a lot of things instead of really working to improve at the things I enjoyed most. Sure I was maintaining my fitness level just fine, but I wasn’t really seeing specific progress in any one modality. Of course not! You need to do something more than three times a month for that to happen.

You get charged $15-20 if you can’t make class.

If you cancel within 12 hours before the class starts, you’re charged $15. If you don’t late-cancel and just don’t show up, you’re charged $20. If you’re someone who has an unpredictable work schedule, this could add up quick. You could opt to book last-minute instead, but you run the risk of the class being full or maxed out with CP members.

Thoughts on ClassPass as an Instructor

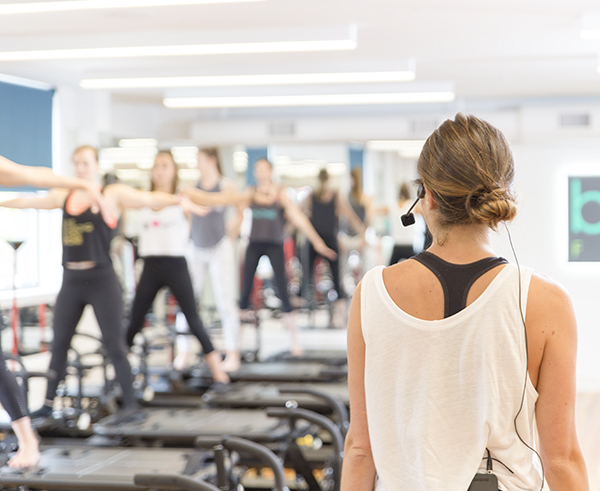
I’ve heard a lot of people say they feel a little bad/guilty or like a second-class citizen when they come to a studio on ClassPass because they’re not paying full price. I can’t speak for all instructors, but let me assure you that I do not think less of you as a client if you roll up to my class through CP. I get it—boutique fitness classes are expensive and there are just so many awesome studios out there. Yo, I’m a member, too! And I do genuinely love that by being on ClassPass, more people have access to this workout who might not have otherwise.

Like I mentioned earlier though, you’re not going to get the full benefits of the workout only coming two-three times a month. If you’re cool with that, so am I. I’d certainly rather you come a couple times a month than not at all! But if you’re feeling frustrated by lack of progress/results, don’t automatically discredit the method or your instructors. Now you also don’t need to come every day or five times a week, but if you commit to even just twice a week, you are going to see FAR better results than if you come just a couple times a month.

The whole anonymous review system on ClassPass is also not ideal for instructors. Feedback is important and I welcome both the good and bad because I truly care about teaching and want to constantly make my class better. Some of the “bad” reviews on ClassPass are constructive and helpful. Other reviews though … pretty sure the people leaving them would choose their words differently if they weren’t anonymous. And it’s especially frustrating because it’s impossible to have a fully formed opinion on a studio if you’ve only been to one class with one teacher. In my opinion, ClassPass users shouldn’t be prompted to leave a review until they’ve visited a studio three times.

$40 off Your First Month

If you want to give it a try after weighing the pros and cons of ClassPass, this referral link will get you $40 off your first month. They also do promotions frequently though so I’d check their homepage, too, just to double check the $40 off is currently the best deal.

Are you a ClassPass member? What your favorite and least favorite things about the service?

xo Nicole

A Quick (But TOUGH) Rowing + Weights Circuit Workout

A Quick (But TOUGH) Rowing + Weights Circuit WorkoutWant maximum ass kicking in minimum time? Incorporate sprints on the rower into your workout. Quick, killer row circuits are my go-to when planning classes using the row machine because they guarantee that I-hate-you glare from clients that turns immediately into that such-a-good-workout grin as soon as class ends.

Rowing Sprints + Weights Circuit Workout

Equipment I Used:

  • WaterRower GX (any row machine works!)
  • Set of 10-lb dumbbells
  • Exercise mat

Go through the following circuit four times, completing it as fast as you can without sacrificing proper form. You should be BEAT by the end. To give you some idea of timing, try to hit 2 min 30 sec or less with each of your 500m row sprints. The fastest times I’ve seen in class are 1:39 for the guys and 1:46 for the ladies. Your first sprint will most likely be your fastest (maybe your last one if you really empty the tank), but try to stay within 5-10 seconds of whatever you get on that first sprint when you get to your second, third and fourth rounds.

500 meter sprints are no joke! I usually hit right around 1:50 on my first one and then that creeps up to 2mins+ by the end. A Quick (But TOUGH) Rowing + Weights Circuit Workout

  • 500m Row Sprint
  • 10 Renegade Row to Push Ups | Start in a plank position holding dumbbells planted firmly on the ground beneath your shoulders (if this hurts your hands, place hands on the ground and just keep the dumbbells next to them so you can easily grab them for the rows). From this starting position, do a row on each side, first driving the right elbow up to the ceiling and then the left, lifting the dumbbell up close to the side of your body. Try to keep your hips level as you do this; don’t twist open towards the rowing side (having a wider stance with your feet will help accomplish this). After you’ve rowed each side, do a push up (lower to your knees for this if you need to modify. That’s one rep.
  • 10 Full-Body Dumbbell Crunches | Start laying on your back with legs outstretched and hovering a couple inches off the ground. Holding a weight in your hands, arms should be outstretched overhead and hovering as well. From this starting position, crunch up, bringing your knees in towards your chest as you lift your shoulder blades off the ground and bring the weight up and over towards your shins. Extend back out, lowering to starting position. The goal is to never bring the legs and/or weight to rest on the ground when you extend back out.
  • 10 Squat Thrust – Squat Jump Combo | Hold the dumbbells at shoulder height, feet about hip’s width apart and squat down, keeping your lower abdomen held in and sliding your bum and hips back and down. Once you reach your lowest squat, power up, driving your hips forward and engaging the glutes as you straighten your legs to stand. As you do so, press the dumbbells overhead into a shoulder press. Squat back down and this time perform a squat jump, keeping the weights at shoulder height. That’s one rep.

A Quick (But TOUGH) Rowing + Weights Circuit WorkoutWEARING | She’s A Warrior Leggings by MINKPINK c/o Shopbop // Athleta tunic tank (old but similar here) // Nike sneakers

My friends at Shopbop recently sent me the She’s A Warrior Leggings by MINKPINK that I’m wearing in today’s post and I’m obsessed with them! The print is so fun. Here’s a little styling inspiration for transitioning them from the gym to everyday wear (because leggings are legitimate pants if you ask me) …

She's a Warrior MINKPINK leggings via Shopbop minkpink-leggings-shopbop She's a Warrior MINKPINK leggings via Shopbop She's a Warrior MINKPINK leggings via Shopbop

Enjoy your Wednesday! I’m heading to Reebok HQ out in Canton for a tour, boxing class and shopping spree–um what?? Not a bad way to spend a humpday at all … 🙂

What’s your best time for the 500m row sprint?

xo Nicole

30-Minute Tabata Workout

30-Minute Tabata WorkoutHope everyone is having a great day so far! I was feeling ambitious and doubled up on classes this morning—a 6AM Btone followed by a 7:30 spin at B/Spoke. I was given a free month of FitReserve (similar to ClassPass but you can go to studios 4x a month and there are different membership/payment options), and was so excited to see B/Spoke on there. I went to my girl Steph’s class this morning and it kicked my butt per usual. I’ll go into more detail about FitReserve after I give it a full month’s test, but in the meantime you can get $50 off your first month if you sign up with THIS LINK.

Speaking of group fitness classes, I wanted to share a workout that is a truncated version of a tabata class I taught at BURN last month. I don’t regularly teach tabata, but I sub the class from time to time and always LOVE it! If you’re local and like to plan ridiculously far in advance, I’m also subbing it Thursday November 19th & December 3rd at 7:15pm. 🙂

Tabata Superset Workout

Equipment I Used:

  • 10-lb dumbbells
  • Gliders (or a dish towel)
  • Exercise mat
  • Gymboss Interval Timer

A tabata is four minutes long: 8 rounds of 20 seconds of work and 10 seconds of rest. For this workout, each tabata will consist of two exercises that you’ll alternate between: Exercise 1 for 20 seconds, rest for 10 seconds, Exercise 2 for 20 seconds, rest for 10 seconds, Exercise 1 for 20 seconds, etc. So even though there are eight rounds, you’ll only do each exercise four times.

Once you finish the first tabata, rest for 30 seconds (ish) and then move right onto the second tabata. In total, it will take you just over 30 minutes to complete the seven tabatas (taking rest into account). 30-Minute Tabata Workout

Tabata 1

  • Lunge Sliders (alternate) | My fellow megaformer addicts will recognize these as “carriage pulls.” I love finding ways to recreate mega moves off the machine! Start in a low lunge with your right foot forward, knee bent to 90 degrees and stacked over the ankle. The ball of your back left foot should be planted on a dishtowel or slider. To make these harder, hold dumbbells at your shoulders, otherwise just use your bodyweight. Hinge forward at the hips so that the weight of your torso is slightly forward, over the target right leg. This will allow you to keep your back foot light.From this starting position, slide your back left foot forward, bending the knee in and staying low on your right side. Slide it back out behind you into the starting position and continue crunching that back knee in and extending it out. The goal is to keep your weight in the right heel the entire time, staying low (think isometric hold for the right leg)—as you slide the left foot in, try not to shift your bodyweight into that foot (it’s tempting!). Another small note about form—try not to grip the ground with your right toes. If you keep the toes light and the weight back in the right heel, you’ll feel your glute kick in and really start working. It’ll also help protect your knee.
  • Jump Lunges | Start in a split-stance lunge: right foot in front, ball of left foot planted on the floor behind you. Both knees should be bent to 90 degrees, front knee aligned over ankle, back knee hovering just a couple inches off the floor. From here, push off your feet to jump up in the air, switching feet in mid-air and landing back in a lunge with left foot forward and right foot planted behind. Continue, alternating feet with each jump.

Tabata 2

  • Squat Thrusters | Hold the dumbbells at shoulder height, feet about hip’s width apart and squat down, keeping your lower abdomen held in and sliding your bum and hips back and down. Once you reach your lowest squat, power up, driving your hips forward and engaging the glutes as you straighten your legs to stand. As you do so, press the dumbbells overhead into a shoulder press.
  • Shoulder Shaper – Press Up Combo | Start with arms in goal post position: elbows bent at 90 degrees at shoulder height. From here, maintaining those 90-degree bends, bring your forearms together in front of your face. Holding your forearms close together (make the number 11 with them and picture your elbows are magnets), press your fists up towards the ceiling in front of your face. This might only be a few inches up—that’s fine (it’s tough!). Reverse the combination, lowering your elbows back down to shoulder height and then opening your bent arms back open to goal-post position, squeezing your shoulder blades together as you do. Elbows should stay at shoulder height or higher (during the press up) the entire time—let that burn build!

Tabata 3

  • Sliding Bear Crunch to Pike | Start in a plank position with your feet on a towel. Keeping your hips level with your shoulders, back flat, slide your feet forward, bending your knees in towards your elbows. Slide feet back out, straightening your legs into plank position. Now, keeping your legs straight, pike your hips up into the air, bringing your body into an upside down “v” shape. Try to keep your heels lifted as you do this, sliding on the balls of your feet. Once you hit your peak (if you have tight hamstrings, you may not be able to get your hips up very high—that’s ok!), slowly lower back down into plank position.
  • Hand Release Push Ups | Start in a plank position and begin to bend your elbows as if you were doing a push up, but instead lower your body all the way to the ground. From here, lift your chest and hands off the ground, squeezing your upper back. Lower your hands back down to the ground by your rib cage and press your body back up into a high plank position.

Tabata 4

  • Bent Row – Reverse Fly Combo | Start standing with feet about hip’s width apart, a dumbbell in each hand. Have a slight bend in the knees and hinge forward with your torso, keeping the abs engaged and sending your hips back behind you. Start by rowing your elbows back up behind you. Extend the arms back down and then perform a reverse fly: keep a soft bend in the elbows as you pull the weights out wide to the side, squeezing your shoulder blades together and engaging the back. Return back to starting position and do a row, alternating back and forth between the two.
  • Dumbbell Burpees with Thruster | Start standing, feet about shoulder-width apart, elbows bent and dumbbells held at shoulders. Squat down, bringing the weights to the ground by your feet and jump both feet back into a plank position, still gripping the dumbbells. Quickly jump your feet back up by your hands and shift the weight into your feet, bringing your torso upright into a low squat position with weights back at shoulders. From here, stand up, pressing weights overhead. Squeeze your glutes and thrust your hips forward as you do this. Lower the weights and go immediately into your next rep.

Tabata 5

  • Seated Leg Circles (alternate directions) | Start in a seated position with your fingertips lightly on the ground behind you for support. Extend your legs straight out. From here, keeping your legs straight, you’re going to circle them over to the side, up, down to the other side and back down to a hover. Think of your feet as the hands on a clock. At 6 o’clock, your torso will be reclined back at a hover; at 12 o’clock, you’ll lift and crunch your torso up and in, bringing your body into a “v” shape. Fair warning: these can be uncomfortable if you have tight hips (bend your knees slightly to make it more manageable). Alternate the direction in which you circle your legs each interval you do this exercise (clockwise, counter-clockwise, clockwise, counter-clockwise).
  • Full-Body Crunch with Dumbbell | Start laying on your back with legs outstretched and hovering a couple inches off the ground. Holding a weight in your hands, arms should be outstretched overhead and hovering as well. From this starting position, crunch up, bringing your knees in towards your chest as you lift your shoulder blades off the ground and bring the weight up and over towards your shins. Extend back out, lowering to starting position. The goal is to never bring the legs and/or weight to rest on the ground when you extend back out.

Tabata 6

  • Squat Jacks with Oblique Scoop | For the low body, think jumping jacks in a squat position. For the upper body, think paddling a canoe. This one can be like rubbing your stomach while patting your head, so don’t be frustrated if it feels uncoordinated at first—you can always eliminate the upper body movement and just hold the weight at your chest as you jump your feet in and out.Start in a low squat position with feet wide, weight in your heels, low abs engaged, hips back and a dumbbell held at your chest with both hands. Staying low in a squat, jump your feet in close together as you scoop the dumbbell down and around to the left of your left leg. As the weight comes up and back to center, jump your feet out wide again to the starting position. Repeat, this time scooping the dumbbell down and around to the right side of your legs as you jump them close together. The goal is to stay low in a squat as you jack your feet in and out, fluidly scooping the dumbbell side to side like a figure eight or canoe oar.
  • Lunge Stomps (alternate) | Shout out to Barry’s Bootcamp for introducing me to these! Start in a low lunge position with your right foot forward, knee bent at 90 degrees and stacked directly over your ankle. Ball of the left foot is planted on the floor behind you, leg is long but knee is soft. To make these harder, hold dumbbells at your shoulders; otherwise, just use your bodyweight (it’ll still be challenging—I promise!). From here, you’re going to press off the right heel as you shift your weight into the back left foot enough to lift your right foot off the ground, slightly kicking it forward in the air before landing back down in that starting low lunge position. The slight outward kick will help you land in a knee-safe position with the right heel stacked under the knee (you don’t want the knee to ever be farther forward than the toes).

Tabata 7

  • Mountain Climbers | These are like doing high knees in a plank position. Start in a plank, hands stacked underneath shoulders, core squeezing in tight (don’t let your low back sag or your butt stick up in the air). From this position, drive one knee at a time up towards your chest, like running horizontally. The pace on these should be quick.
  • Army Crawls | Put your feet on a towel and get into a plank with your forearms at the end of an exercise mat. Army crawl your way up the length of the mat, one forearm in front of the other, maintaining the plank position as you slide forward. When you can no longer go any farther forward, reverse the motion, crawling your forearms backward towards the starting edge of the mat. As you move, try to keep your hips level in a plank. They’ll want to dip side to side with each step of the forearms; use your core strength to stabilize them. Beginners: you can do these from your knees, just make sure to add an extra towel for padding.

30-Minute Tabata Workout

WEARING | leggings: Booty by Brabants // tank: H&M (old but similar here) // bra c/o WITH // sneakers: Nike

signature

SHOP A SIMILAR LOOK: