Beginner Series: 20-Minute Full-Body Workout with Cardio

Beginner Workout - 20 minutes, full-body, little to no equipment required, and perfect for doing at homeWhere my newbies at??! Today’s (and the five Tuesdays’) post is for you. I’m going to get super detailed with exercise breakdowns, modifications, and ways to make everything harder when you’re ready to take it up a notch. We’re going to focus on foundational movements (squat, lunge, push up, etc.) and mix in a little cardio. Even if you’re not a beginner, you could always advance the exercises and get a great workout in! I’ll go over all that.

Beginner Series: 20-Minute Full-Body Workout with Cardio

Equipment I Used:

  • Light set of weights (optional)
  • Chair
  • Gymboss Interval Timer (there are lots of interval timer apps available for smart phones, too!)
  • Pen & paper for recording rep numbers.

Set an interval timer for 20 rounds of 40 seconds of work and 20 seconds of rest. You’ll go through the following circuit of five exercises four times. At the end of each work interval, write down the number of reps you were able to complete of the exercise in the 40 seconds. Do this for each round. As you tire toward the end of the workout, challenge yourself to stay within a couple reps of what you got the first time through. Here are some rep goals so you have an idea of what to shoot for: target-rep-numbers

Don’t get hung up on these rep numbers. They’re to motivate and challenge you, not to discourage you. Do the best you can do, and next time you try this workout, focus on improving from your previous numbers. Never sacrifice proper form to get high numbers.Beginner Workout - 20 minutes, full-body, little to no equipment required, and perfect for doing at home

Squat, Stand and Press

Start seated in a chair with knees bent at a 90-degree angle and feet flat on the floor. Sit upright (shoulder blades rolled down and back, tailbone tucked and core engaged) and hold two dumbbells at your shoulders. I’m using 10-lb dumbbells here, but I’d recommend 5-8 lbs to start. If you’re a true beginner, don’t use any weights. Master the movement and then grab some dumbbells.

From this starting position, hinge forward slightly from your hips, shifting your weight into your heels as you begin to stand. Activate your glutes and press your hips forward as you stand upright. From here, press the weights overhead, making sure not to shrug your shoulders up toward your ears as you do.

Reverse the movement: Lower the weights to shoulder height and begin to squat down, sliding your hips and bum back as you bend your knees and lower to a seated position in the chair. That’s one rep.

MAKE IT EASIER

  • Ditch the weights. Just do bodyweight squats into the chair and when you stand back up, reach overhead.

MAKE IT HARDER

  • Use heavier weights.
  • Ditch the chair. Squat down low, still sending your hips and bum back and down as if there were a chair seat to catch you, and then power up, squeezing your glutes and pushing your hips forward to a standing position.
  • Make it explosive. Instead of breaking it into two movements (squat then press), initiate the overhead press as you power up from the bottom of your squat. Only do this once you’re comfortable squatting without a chair.

Lunge to Torso Twist

Start standing with arms held straight in front of you. From there, lunge forward, stepping your right foot in front of you as you bend both knees to opposing 90-degree angles. Holding this low lunge, twist your torso to the right, keeping arms straight as you do (you always twist over the front leg). You want your whole upper half moving as one unit on this—imagine your waist is a wet towel that you’re wringing out as you twist. Reverse the sequence, twisting back to center and pushing off that front right foot to return back up to standing. That’s one rep.

MAKE IT EASIER

  • Hold on to a chair with your left hand as you do it to help with balance.

Beginner Workout - 20 minutes, full-body, little to no equipment required, and perfect for doing at home-lunge-modification

MAKE IT HARDER

  • Hold a dumbbell in your hands as you do this (you’d still keep arms outstretched and straight).

Incline Burpee

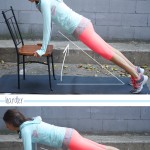
Changing the angle of your body can make exercises harder or easier, so this is just a modified version of your standard burpee. Start standing in front of a chair or bench (bench/flat surface is best), feet about shoulder-width apart and arms overhead. Swoop down, bringing your hands to the chair and planting them firmly underneath your shoulders. Jump both feet back into an incline plank position. Do a push up, lowering your chest towards the chair seat/bench and keeping your body in that straight plank position. It doesn’t have to be a full push up; if you’re a true beginner, even just lowering a couple inches and then pressing back up to plank is a great place to start. Jump your feet back up by the chair and stand upright, bringing your arms overhead to your starting position. That’s one rep.

MAKE IT EASIER

  • Eliminate the push up.
  • Instead of jumping your feet back into plank, step them one at a time.

beginner-at-home-full-body-workout-14

MAKE IT HARDER

  • Jump up in the air to finish each rep instead of just standing upright.
  • Use a lower chair/bench (or bring your hands all the way down to the ground!).

Jumping Jacks

Chances are you don’t need a written description of a good ol’ jumping jack, but I’m doing it anyway. Start standing with your feet a couple inches apart and your arms down by your sides. Keeping your knees soft (we never lock out the knees when doing a jumping move–think of landing softly), jump your feet out wide as your swing your hands out wide and up overhead. Immediately jump your feet back together as your hands come back down by your sides. That’s one rep.

LOW-IMPACT OPTION: Jumping might not be in the picture right now. For a low(er)-impact alternative, march in place instead of doing the jumping jacks. Pump your arms as you drive one knee at a time up into the air, engaging your core as you do.Beginner Workout - 20 minutes, full-body, little to no equipment required, and perfect for doing at home

The “Why” Behind This Workout

I told you I was going to get detailed in these posts. I really do think that for beginners, learning about exercise is just as important as the actual exercise–knowledge is power, baby!

Using a chair will help you master proper squat form. One of the biggest form errors with squats is sticking your knees out farther than your toes instead of sitting back into the position as you lower. Having the seat of a chair to catch your bum will get you comfortable with sliding your hips back, shifting your weight into your heels, and keeping those knees stacked over your ankles.

Mixing in some single-leg work (lunges) improves balance. Fitness isn’t just about your body’s strength; you have to work on improving range of motion (flexibility), agility and balance, cardiovascular endurance, etc. All these factors work together, and improving one will help improve the others.

Foundational exercises improve your body’s ability to function in everyday life. The key word with movements like squats, lunges, overhead presses and burpees is functional. These are all movements you do in everyday life! Sitting down in a chair; getting up from a seated position; bending down to pick something off the floor; lifting things above your head to put them on a top shelf; walking up the stairs–the list goes on.

Interval training is effective and gives you a way to track improvement (counting reps). Interval training improves your body’s ability to recover (with respect to cardiovascular and muscular recovery). The first time you do this workout, you might find your rep numbers dramatically dropping with each round because the 20 seconds of rest time won’t feel long enough toward the end. If you continue to incorporate this type of training into your workout routine, you’ll find your body becomes better able to recover from the cardiovascular and muscular strain of the work intervals, improving your performance (especially in those later rounds!). This will be reflected in steadier (and higher!) rep counts. Beginner Workout - 20 minutes, full-body, little to no equipment required, and perfect for doing at home
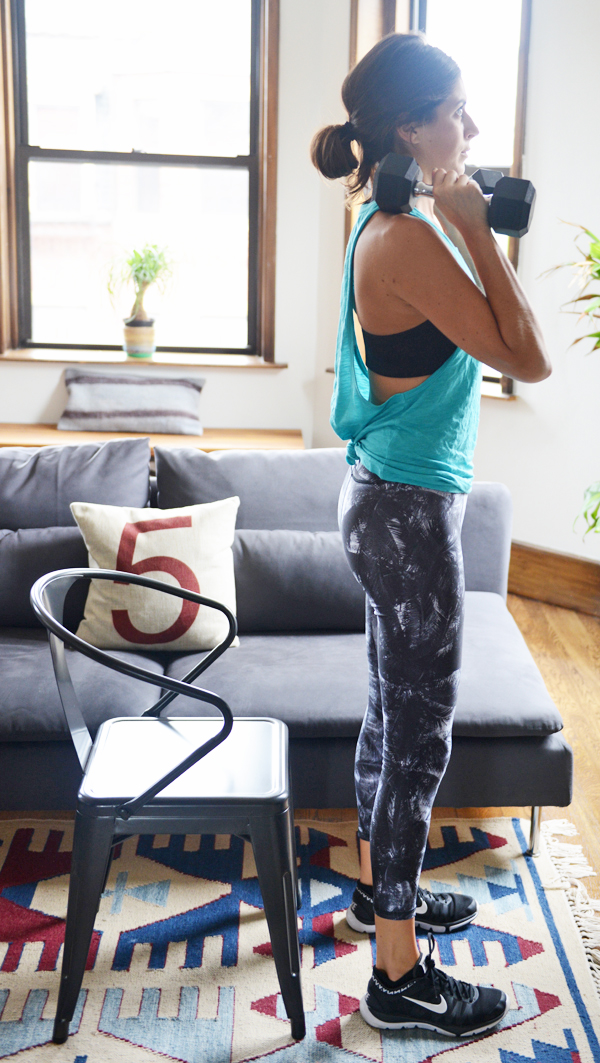
WEARING | tank: Alo Yoga c/o Carbon38 // leggings: Zara Terez c/o Carbon38 // sports bra: Nike c/o Kohl’s // sneakers: Nike

SHOT in a Breather room (Gloucester St #2) — you can get an hour of room rental time fo’ free if you sign up using the code PUMPIRON

Alrighty, I’ll have another beginner workout for you next Tuesday! You can look forward to an upper body workout, lower body workout, two core workouts and a cardio workout. Happy sweating!

signature

Workout Tips for Beginners

Workout Tips for BeginnersAs I mentioned in a post last week, I’m going to dedicate every Tuesday for the following month or so to beginner workouts. I figured it be helpful to kick it off with some general tips for those just starting out with a fitness regimen. Everyone’s starting place is different, so I’m basing these tips off the most common challenges I see beginners face during workouts. They may or may not apply to you.

I want to emphasize that nothing replaces working with a professional in person when you’re a beginner. Going to the gym/studio can be intimidating when you’re just starting out, but working 1-on-1 with a trainer, or even attending a class where you can get some personalized attention from a group fit instructor, is very helpful. I do my best via the internet to make your at-home workouts safe and effective, but it can’t replace having a pro there with you in person to check your form and create individualized routines. Ok obligatory safety disclosure aside, let’s get to the good stuff! 😉

Workout Tips for Beginners

The biggest changes don’t come from working out; they come from improving your diet.

This isn’t technically a workout tip, but it’s so important for everyone to understand that all the sweating in the world can’t undo the damage of an unhealthy diet. If Person A eats healthy in reasonable portions and doesn’t workout and Person B overeats and eats unhealthily but hits the gym for an hour a day, I guarantee you that Person A is the overall healthier human (and probably looks it, too).

Before you add in impact, you want to make sure you have a good stable base and your form down pat.

In other words, skip the jumping at first. Instead of jump squats, just do regular squats until you’re comfortable with the form. If stepping into low positions (lunges, etc.) also feels too difficult, try holding onto a rail or chair as you do these moves so that you can stabilize and support some of your bodyweight. Always start in a stable environment before slowly incorporating instability to challenge you (single-leg moves, stability balls, etc.).

Use a mirror!

If you’re working with a trainer or taking a group fitness class, you have someone else with their eyes on you, but if you’re at home, it’s up to you to keep your form in check. Sometimes things feel correct, but when you see yourself in action it’s like oh jeeze, that is not how it’s done. I still have these moments all the time when I’m looking at pictures I’ve shot for the blog, and it’s been a huge help in correcting my form. Even if you don’t do the entire workout in front of a mirror, practice each exercise in front of one.

If mobility is an issue, use an elevated surface instead of the floor.

Push ups, burpees, mountain climbers—any exercise that calls for you to bring your hands to the ground can be made easier by bringing the “ground” closer to you. Especially if you have a history of knee issues or a significant amount of weight to lose, moving quickly from standing positions to floor positions can be extremely difficult. If you bring your hands to bench instead, you wont’ have to bend down as low and the inclined angle will make the exercise more manageable.

Speaking of mobility, don’t forget to stretch!

Being fit isn’t just about strength and cardio. You want an unhindered range of motion so that you can effectively perform various exercises. What we think of as traditional stretching (holding a static stretch for 30 seconds) should be done after a workout. Before working out, focus on active moving stretches (arm circles, hip circles, etc.). SMR (foam rolling) can be used before and after a workout. If you have a particularly tight area that will limit your range of motion during a workout, it can be helpful to target it beforehand. Personally, the majority of my foam rolling is done post-workout and/or before bed.

Warm up.

Don’t jump right into a workout, especially if you’ve spent the rest of your day up until then being relatively sedentary. Active stretching, SMR if necessary, and then 5-10 minutes of light cardio (power walk around the block, jog on a treadmill, hit up the stairmaster, ect.) should do the trick.

Recovery is necessary for growth—don’t neglect rest days.

It’s not uncommon to start seeing results and then almost get anxiety at the thought of missing a workout because you don’t want that progress to stop. And it’s understandable—there’s a good reason exercise is addictive! It makes you happy, energized, enabled, empowered and attractive. But remember, you’re doing this to help your body function at its best, not punish it. Your body needs time to repair itself so that your workouts will continue to be effective—you might actually notice a stall in progress if you over-train. Again, everyone is different, but here’s some general rest advice: Take one true rest day a week, and another easier day where maybe you just do some light yoga and go for a long walk.

Be excited, not discouraged!

I’m not just trying to be nice and make you feel better—being a beginner is the best. I know it can feel overwhelming because you have so far to go, but often the biggest and fastest progressions happen when you’re at ground zero. Every workout brings a challenge and a change.

Other helpful posts for beginners:

Fellow instructors and trainers—what additional advice would you give to a beginner?

signature

A Small-Space AMRAP Workout (Perfect for Dorm Rooms)

Small-Space AMRAP Workout (perfect for dorm rooms and small apartments!)This workout requires no equipment, very little space, and is quiet for those with downstairs neighbors or sleeping roommates/family members. It’s great for small apartments or dorms, even though I know most colleges have a student rec center/gym. I remember the two weeks before Halloween and Spring Break were always a NIGHTMARE at UNC’s student rec center (revealing costumes and bikinis on the brain…) so I would avoid the gym and do workouts in my bedroom.

Small-Space AMRAP Workout

This workout is broken up into three 3-minute AMRAPS. AMRAP stands for as many round/reps as possible, so you’ll be pushing your hardest through the 3 minutes to get through the exercise sequence as many times as you can. Keep track of how many rounds + reps you get through. Once you’ve done all three AMRAPS, repeat the entire thing and try to beat your scores from the previous attempt.

There are multiple exercises in each AMRAP, but they flow together like one continuous sequence, each focusing on a different muscle group. Set a timer for 3 minutes and hustle! Small-Space AMRAP Workout (perfect for dorm rooms and small apartments!)

AMRAP 1 | CORE + UPPER BODY

Do the following exercise flow as many times as you can in 3 minutes.

Inchworm to high plank >> 2 reptile push ups (1 to each side) >> Lower to forearm plank>> 6 hip dips (3 to each side) >> Walking plank back up to high plank >> Inchworm back to standing

Inchworm to high plank | Start standing with arms overhead. Fold forward keeping legs straight, bringing your hands to the ground. Walk your out until they’re stacked underneath your shoulders with your body in a plank position.

2 reptile push ups | You’ll do two push ups. During the first one, hover your right leg and crunch your right knee in towards your right shoulder as you lower towards the ground. Press back up and repeat on the left.

Lower to forearm plank and do 6 hip dips | Lower onto your forearms, one arm at a time, and then alternate dipping your right hip towards the ground and then the left hip towards the ground for a total of 6 dips. Think of tracing an arc with your hips; the top of the arch is plank (don’t pike your hips up any higher than that).

Press back up to high plank and inchworm back to standing | Reverse the movement by pressing back up to high plank one hand at a time and then walking your hands back towards your feet (keeping legs as straight as possible) and standing up, hands overhead.

AMRAP 2 | RIGHT LEG + GLUTE

Do the following exercise flow as many times as you can in 3 minutes.

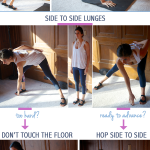
Lunge forward + pulse 5 times >> Lunge backwards + pulse 5 times >> Do 5 front kicks, stepping back into that lunge each time >> Squat down and pulse 5 times

Lunge forward and pulse 5 times | You’re doing a pivoting lunge on the right leg, so even though it seems counterintuitive, you want to lunge your left foot forward. At the bottom of your lunge, pulse up an inch and down an inch 5 times. Push off that front foot and …

Lunge backwards and pulse 5 times | Land with your left foot now behind you (right foot has stayed stationary). At the bottom of that lunge pulse 5 times.

5 back lunges to front kicks | From that lunge position, shift yoru weight into that front right heel and straighten the right leg as you kick your back left leg straight up in front of you. As it comes back down, swing it back behind you, landing right back in that low lunge. Repeat a total of 5 times.

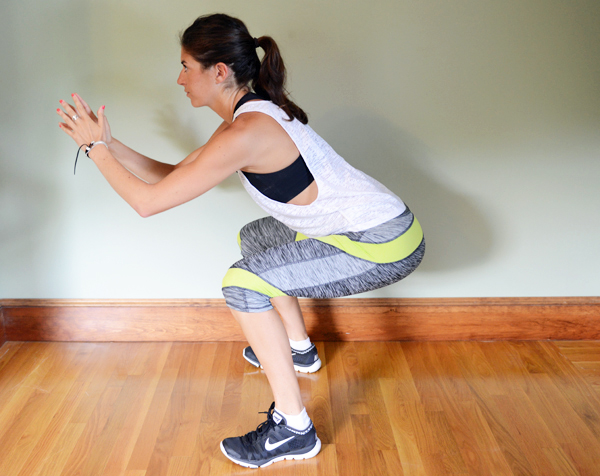
5 squat pulses | After your fifth kick, instead of landing back in a lunge, bring that left foot next to the right foot (hip’s width apart or a little wider) and sink down into a low squat, weight in your heels. Pulse up an inch and down and inch five times.

You’ll then step your left foot forward and start right from the top.

AMRAP 3 | LEFT LEG + GLUTE

Same thing you just did on the right!

Remember, you’re doing those three AMRAPs twice. Keep track of how many rounds/reps you get through the first time through and then try to match or beat those numbers the second time through. Rest 30-60 seconds between AMRAPs.

Small-Space AMRAP Workout (perfect for dorm rooms and small apartments!)

WEARING | Colosseum Tank / Soybu Leggings / Nike Sports Bra / Nike Sneakers all c/o Kohl’s

How do you plan to #MakeYourMove as you head back to school?

Tag your social shares with #MakeYourMove and follow Kohl’s on Twitter for more inspiration!

signature

This post is sponsored by FitFluential on behalf of Kohl’s.