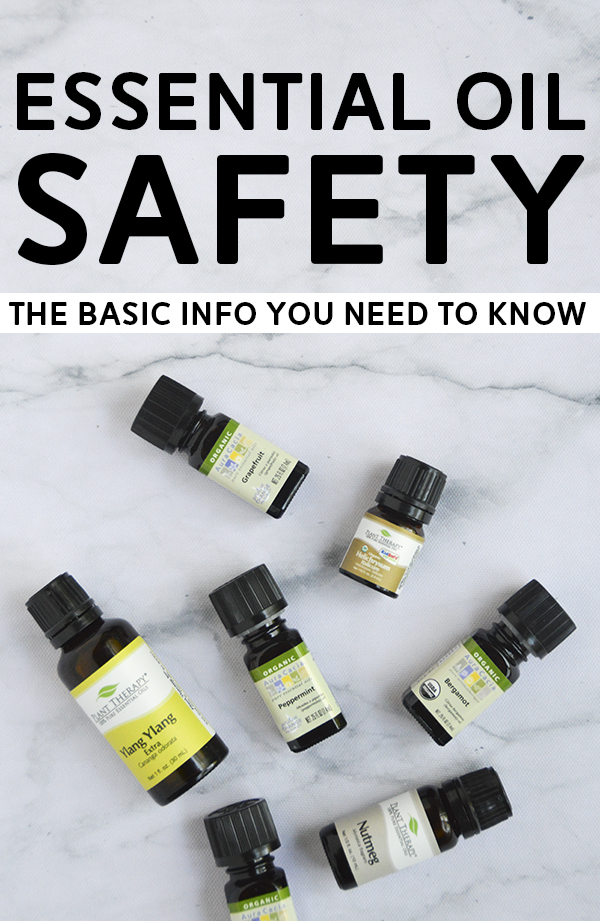
Today is the final post of my EOs 101 series before we jump into the fun stuff. We’re talking all things essential oil safety. When I share blend recipes on the blog, I’ll give detailed information about dilution percentages, application frequency and safety precautions for that specific blend, so for today’s post, we’re going to stick to the basic foundational safety information you need to know.
If you’re interested in learning more, Robert Tisserand’s Essential Oil Safety is the holy grail on the topic. That being said, it’s a deep dive into essential oil science, so not exactly a necessary read if you just want to diffuse some oils to make your apartment smell pretty. 😉
Speaking of Tisserand, he has a partnership with the essential oil retailer Plant Therapy. So even if you prefer a different brand of oils, I highly recommend PT’s website as a safety resource. If you have questions regarding a specific oil, find it on Plant Therapy and read up on the safety considerations, suggested usages, and more.
Essential Oil Safety: How & How Much to Use
The two primary ways in which we apply essential oils therapeutically are topically through the skin and inhalation. They can be administered orally when done under the supervision of a medical professional also trained in clinical aromatherapy, but I do not recommend it otherwise. I’ll elaborate later in this post.
There are a couple exceptions, however, that I’ll quickly touch upon here and will elaborate on in future posts. If you’re nauseous, you can put a drop of Peppermint essential oil on a sugar cube and suck on it. Similarly, for sore throat issues, a drop or two of essential oils can be added to a lozenge. Notice I say *a* drop or two. We’re talking small amounts added to a carrier (sugar cube, lozenge) and slowly consumed via sucking. If you’re working with a qualified practitioner who is having you take higher doses via capsule under careful instruction, that’s awesome. But if you’re just experimenting with essential oils at home, stick to other modes of application.
All that being said, don’t panic or anything if you get a drop or two in your mouth—not a big deal unless you have an allergy.
Topical Application
You always want to dilute essential oils before applying to your skin, except when putting on a small area for an acute condition like a burn, infection, bug bite or pimple (a dab of Tea tree oil on zits is my jam!). If you’re applying via hydrotherapy (a bath), it’s safe to just add the essential oils to the water, but it’s more effective if you use a dispersing agent like epsom salt or even milk (otherwise the oils won’t mix as well throughout the water).
You dilute essential oils in carriers, which are typically vegetable, nut, seed, or infused oils (rosehip seed oil, jojoba, sweet almond, olive oil, etc.). The percentage to which you dilute the blend depends on the purpose of the blend and person being treated. I’ll go over those details any time I share a specific blend recipe. But to give you an idea, most essential oil lotions and massage oils are only 1-4% essential oil, with the rest being carrier. If treating an acute condition affecting a small area, that percentage could be more like 10%+. A little goes a long way and more is not more when it comes to efficacy. In fact, sometimes an essential oil can have the opposite of its intended effect when used in too high a concentration.
When applying to your skin, don’t use too close to your eyes. If you do get essential oils in your eyes, wash them out with whole milk or wick away from the eye with a vegetable oil.
Inhalation
While topical applications are typically the best method of administration for physical ailments (sore muscles, infections, skin issues, cramps, etc.), inhalation is best suited for emotional, mental and spiritual purposes. And that being said, there are of course instances like sinus infections and respiratory issues where it’s the ideal application for physical aid as well.
If you’re using a diffuser, the method most of us are familiar with, 8-10 drops of essential oil/s is usually perfect. That will depend on size and amount of water it holds, but works for most standard diffusers that hold around 100mL. You don’t want the scent diffused in the room to be overpowering (remember—more is not more!), so it’s usually best to utilize your diffuser’s intermittent feature if it has one. If your diffuser only dispenses in a steady stream, put it on for 15 minutes at a time, doing so every hour or so.
Use these timings as a general guide—size and ventilation of the room will cause this to vary. And it’s more so about efficacy of the therapy than a safety hazard to diffuse oils for extended periods of time. If you leave your diffuser on while you go to work, for example, you’re by no means coming back to a toxic apartment.
Ingestion
This is a highly debated topic: Should you take essential oils orally? As I mentioned, yes, there is a safe way to ingest them. But no, unless you’re woking with a medical professional and clinical aromatherapist specifically trained in this, you should not.
When taken orally, a significantly higher percentage of the essential oil will reach circulation (vs inhalation or topical application). This means a significantly higher percentage will reach your liver for processing.
Another safety consideration is that many essential oils have strong antibacterial properties. So you can potentially mess up the balance of your good gut bacteria if you’re not taking them properly.
Finally, on the other end of it, stomach acidity and the enzymes in the intestines can destroy the essential oil constituents that make them effective in the first place.
Sensitizations & Allergies
If you’re allergic to a plant or fruit, you’ll most likely be allergic to its essential oil. Especially if you have a history of allergies or skin sensitivities, you should perform a skin patch test before putting an essential oil in a blend. Put a drop of the oil on a cotton ball and swipe it on the inside of your arm by your elbow. In 15-20 minutes check the area (you can put a bandaid over it while you wait). If there’s redness or itching, you have a sensitization or allergy to that oil.
It’s also important to keep in mind that if someone is sensitized to a chemical component in an essential oil, they’re more likely to also have an adverse affect with other essential oils high in that component. Also make sure you’re using quality, pure—organic if possible—essential oils (read this post for more info on identifying these). Sometimes an allergic reaction isn’t to an essential oil but to a chemical or preservative used in growing and/or packaging it.
If you’re using the same oils frequently for an extended period of time, you’ll be more susceptible to developing a sensitization. This is especially true if it’s a concentrated blend being applied to the same area in chronic conditions (for example, a twice-daily arthritis rub for your hands). To avoid this, rotate the oils blends that you’re using.
Pregnancy, Kids, Older Populations
The main thing when creating blends for children, an elderly person or a pregnant woman is to use a lower dilution, especially for topical applications. Typically a 1% dilution instead of the standard 2% dilution you’d use for most body oils and lotions. Inhalation is not age dependent, but you shouldn’t expose kids under two to strong oil odors, so it wouldn’t hurt to use fewer drops.
If pregnant, it’s important to understand that the placenta is a membrane like any other in that essential oils can penetrate it (same goes with lactating mammary glands). So the essential oils you use on your body will also reach your fetus. And during pregnancy, your sense of smell is heightened. So you might find that 8-10 drops in a diffuser is too overpowering. Use fewer to keep the scents subtle.
The following essential oils should be avoided during pregnancy:
- Aniseed
- Basil
- Camphor
- Clove
- Cinnamon
- Hyssop
- Lemongrass
- Nutmeg
- Origanum
- Savory
- Tarragon
- Thyme
The following essential oils should be avoided during the first trimester:
- Cajupet
- Caraway
- Clary sage
- Fennel
- Juniper
- Marjoram
- Melissa
- Myrrh
- Niaouli
- Patchouli
- Rosemary
It should be noted that if you have a history of miscarriages, it may be best to avoid all essential oils in your first trimester. Don’t stress if you walk into a room with an essential oil diffuser running by any means, but it may be advised to avoid regular application.
There are lots of oils that are safe and very useful during pregnancy. I’ll do a whole blog post on that eventually!
Pets
You can safety use aromatherapy on dogs and horses is. It not recommended for cats or small animals (birds, gerbils, etc.) because their livers can’t metabolize the chemical constituents in the essential oils.
Now, before all the cat owners freak out—I have seen studies being done regarding certain essential oils safely used with cats. This is not my area of expertise and my training advises against it, but you may want to do your research after finishing this blog post.
With dogs, you want to dilute oils well before application. Here are guidelines by size:
- Dogs under 25 lbs: 0.25 – 0.5%
- 25-50 lbs: 0.5 – 0.75%
- Over 50 lbs: 0.75 – 1%
Don’t give a full-body massage with oil blends unless applied in a shampoo and washed off.
Now onto inhalation. Because their sense of smell is so much better developed than ours, we’re going to use way fewer drops in our diffuser. 1-2 drops per 100mL in a diffuser (most diffusers are around 100mL), for 1-10 mins every few hours is recommended.
Cautionary Essential Oils
The following essential oils may be potentially hazardous with regular continued use:
- Almond (bitter)
- Birch
- Camphor
- Cedar leaf
- Cinnamon
- Fennel
- Hyssop
- Mustard seed
- Parsley seed
- Pine
- Wintergreen
- Wormseed
There may be risks of neurotoxicity with the following oils, but it’s really only of concern if using large amounts or if you have nervous system problems. You’ll see Peppermint and Lemon on the list—I use these all the time! They’re great for most people. But, if you do have existing nervous system ailments, use the following with caution or avoid:
- Lemon
- Peppermint
- Pine
- Sage
- Hyssop
- Phenolic oils
The following oils can have convulsant effects (again, this typically pertains to extended use in individuals with preexisting conditions):
- Hyssop
- Camphor
- Mugwort
- Sage
- Wormwood
- Thuja
Don’t use Rosemary if epileptic.
There are also a few essential oils that can have psychotropic effects (= they affect mood/behavior or are even hallucinogenic). It may sound more like a fun Saturday night than a safety precaution, but it’s worth noting the following 😉 :
- Nutmeg – Nutmeg contains myristicin which increases levels of serotonin and gives a euphoric feeling, but this applies more to ground nutmeg than the essential oil.
- Thujone-rich oils – Thujone is an active ingredient in cannabis (weed—I feel awkward calling it “cannabis” but I’m trying to sound professional here haha) and it has a similar effect in oils containing it.
- Anethole
Some essential oils (mostly citruses) can have a phototoxic effect. This means they induce a skin reaction in the presence of strong sunlight. The following are wonderful essential oils, just don’t apply a blend containing them to your skin prior to going outside on a sunny summer day.
- Bergamot
- Lemongrass
- Lime
- Orange
- Angelica root
- Cumin
- Lemon
- Grapefruit
- Tangerine
Also avoid using these oils regularly on moles, melanoma or any other skin cancers.
Those are some basic safety guidelines to keep in mind when using essential oils in your every day life. I’ll go into specifics with every blend I post and essential oil I profile in the future so if you’re left with some questions, fear not. (Or just ask them in the comments section!)
And for anyone who missed the rest of this EOs 101 series:
- What Are Essential Oils? What Do They Do? How?
- What to Know When Choosing an Essential Oil Brand
- How to Store Essential Oils + Shelf Life Info
xo Nicole
I’m a Certified Holistic Aromatherapist via the Institute of Integrative Aromatherapy. All information shared in this post is from the IIA Certification Course manuals and coursework, my own independent studies, as well as the following books (which I recommend if you’re interested in learning more about essential oils and aromatherapy!): Aromatherapy: A Holistic Guide to Natural Healing with Essential Oils by Valerie Gennari Cooksley, RN, The Complete Guide to Aromatherapy by Salvatore Battaglia and Essential Oil Safety by Robert Tisserand.
