Med Ball Core Workout

Med Ball Core WorkoutDisclosure: This post was sponsored by Target® C9 through their partnership with POPSUGAR Select. While I was compensated to write a post about Target® C9, all opinions are my own.

You may recall that earlier this summer I got the chance to team up with Target® to wear a couple pieces from the new Target® C9 collection in this “No Rest” Tabata Workout. Well today we’re teaming up again, this time to share some of my favorite ways to enjoy the end of summer/early fall with friends while staying active.

The weather this time of year (at least in New England) is THE BEST for taking your workouts outdoors. Some of my favorite ways to actively enjoy the changing seasons include:

Running along the Charles River

Since his hand surgery, running is one of the few exercises my boyfriend can do, so we’ve started to go for runs together around the city. With the warm—but not oppressive—weather this time of year, it’s the perfect workout (and company!).running-charles-river

Hiking at my parents’ place in Maine

My parents’ second home in Maine is on a ski mountain and a lake, so the hiking is GORGEOUS as summer turns to fall. Last time I was visiting, my brother and I went for a morning hike up one of the mountains and it was the perfect way to start the day.HIKING-IN-MAINE

Taking my favorite P&I workouts outside

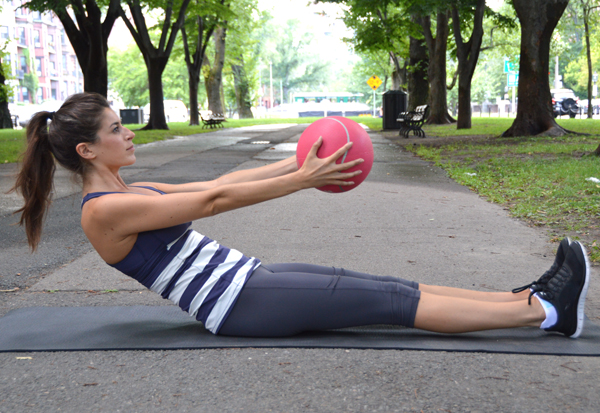
I try to shoot the majority of my workout tutorials outside because of the optimal lighting, but I actually do a fair amount of them outdoors as well! Most recently, I took this Med Ball Core Workout outside. I should add, however, that while I shot it in the middle of Comm Ave with the sprinklers going off, I did it in the privacy of my old back patio area. C’mon now, I’m not that awkward… 🙂Med Ball Core Workout
Med Ball Core Workout

Equipment I Used:

You’ll do each of the 8 exercises for 30 seconds. Move right from one exercise to the next. Once you’ve completed them all, rest for 30 seconds, and then start right from the top. Complete 4 rounds in total. This workout will take you just under 20 minutes to complete. If you’re new to working out, you can start by completing just two or three rounds, and work your way up to four.

I set my interval timer for 35 rounds of 30 seconds of work and 0 seconds of rest. This accounts for the rest intervals and will make the timer beep at you every 30 seconds, signaling you to move onto the next exercise. You could also just watch the clock.

Med Ball Core Workout

  • Table Top Sit-Ups: Start laying on your back holding the medicine ball overhead in both hands (it should be hovering off the ground). Feet should be lifted, knees bent at about 90 degrees. From here, sit up, bringing medicine ball up overhead and in front of you, and place it carefully on your shins. Let go of it, returning to the starting position without the ball in your hands (it’s balancing on your legs still). Sit up, this time grabbing the medicine ball from your shins and bringing it back down to starting position with you. Continue to alternate: one sit-up with med ball, one sit-up sans med ball while it balances on your shins.
  • Russian Twist: Start seated, holding the med ball in both hands at your chest, feet lifted off the ground with your knees bent. Lean back slightly, core engaged, balancing on your tailbone. Twist to one side, bringing the med ball to the outer side of that hip; then repeat in the other direction. Really twist at the waist—you want your chest to be totally facing whatever side you’re bringing the ball.
  • Leg Lift Toe Touch: Lay on your back with arms stretched overhead, holding on to your medicine ball (it should be hovering a couple inches off the ground—don’t let it rest on the floor). Feet should also be hovering a couple inches off the ground; pull your belly button in towards your spine and press the low back against the ground in this position. From this starting position, lift both legs up so that toes are pointing towards the ceiling, keeping legs straight. Then bring the med ball up to meet them, crunching up as you lift the ball overhead, reaching towards your toes (it’s ok if you can’t physically touch them, just focus on lifting your shoulder blades off the ground as high as possible). Return upper body to starting position and then lower legs to starting position.
  • Plank Roll Out (RIGHT): Start in a plank position, right hand on a medicine ball, left hand on the ground. Slowly roll your right palmàwristàforearm over the top of the ball. As you reach forward like this, you’ll need to bend your left elbow, lowering the body (but still keeping strong plank form!). Reverse the motion, rolling right forearmàwristàpalm and straightening your left elbow back to starting position as you do.
  • Plank Roll Out (LEFT)
  • Sit ‘n Toss: Lay on your back with arms stretched overhead, holding on to your medicine ball (it should be hovering a couple inches off the ground—don’t let it rest on the floor). Lift the medicine ball forward as you sit up, keeping arms straight, and lift it straight above your head as your body comes into upright sitting position. Bring ball into chest and toss up into the air. Catch and slowly lower to the ground, bringing ball back overhead behind you.
  • Plank Jump Jacks: Start in a plank position with hands on the medicine ball. Jump both feet up towards the outside of the ball and then quickly back to a plank. Then jump feet out to the sides (like a horizontal jumping jack) and quickly back together. That’s one rep. When doing the “jack” part of this move, try to hold a strong plank alignment with your upper body—don’t let your butt pike up into the air or hips sag downward.
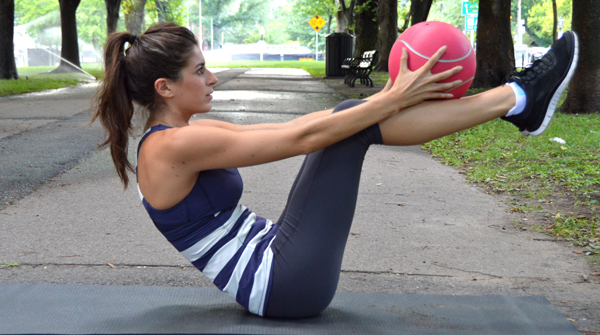
  • Boat Pose Leg Scissors: Start in boat pose holding the medicine ball at your chest. For boat pose, you balance on your tailbone, leaning back slightly, legs and upper body lifted in a “v” shape. To do this, engage your core (I think of trying to squeeze my belly button and spine together). If you’re a beginner, instead of keeping your legs straight, bend the knees (but still keep those feet lifted!). From here, you’re going to scissor your legs, one foot on top of the other, alternating back and forth. For an added challenge, scissor them up and then down (one foot on top of the other for a few scissor kicks, and then reverse the direction, one foot below the other for a few scissor kicks).

Enjoy this workout—and time of year!

xo Nicole

What to Expect from Your First Lagree Fitness Class

What to expect from your first Lagree Fitness class (and intro to the Megaformer and more!)I get a lot of questions about the class I teach at Btone—especially on Instagram from people wanting to know what that weird contraption is I’m always taking selfies on (the Megaformer). Is it Pilates? Is it ok for beginners? Is that machine stolen off the set of 50 Shades? What the heck is going on with this workout??

To start, it’s called Lagree Fitness. And while it’s based on Pilates, it’s so, so much more (I’ll explain later). Lagree Fitness studios are continuing to pop up in major cities throughout the states (and world!), so while it’s not as widespread as, say, yoga, there is a chance you can find this amazing workout near you. If you go to the Lagree Fitness website there’s an online studio locator, or try Googling “Lagree Fitness [your city]” or “megaformer [your city].”

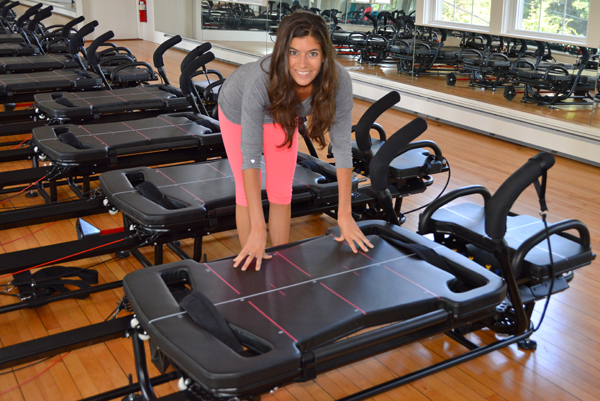
All studios will be different and have their own policies and atmosphere, but here is a general description of what you can expect from your first Lagree Fitness class. Bear with me through these painful Wannabe Vanna White pictures… 😉

The Basics

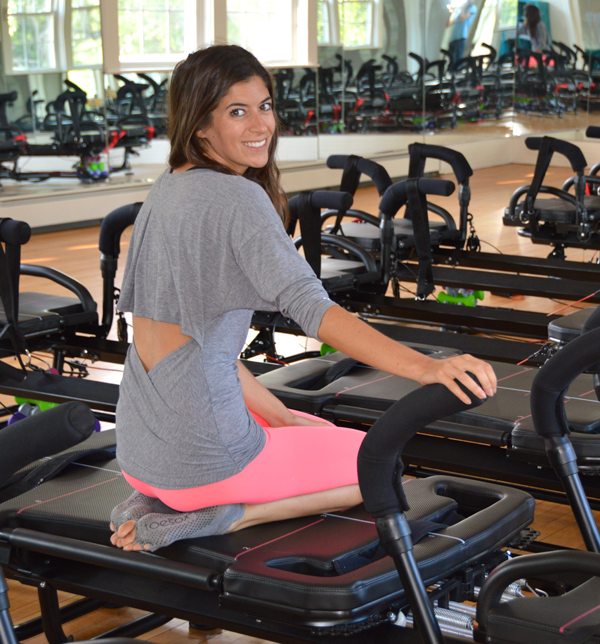
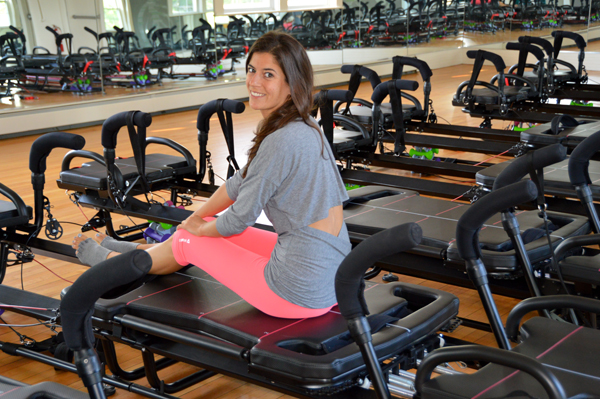
What to expect from your first Lagree Fitness class (and intro to the Megaformer and more!)Most classes are 40-50 minutes in length. If it’s your first time, arrive at least 10 minutes ahead of class so that the instructor can give you an intro to the machine. The workout is done barefoot or wearing grippy studio socks (some studios require these). I wear socks or sneakers when I teach, but personally prefer to do the workout barefoot. As highlighted by this lovely instagram, my pinkie toes are just simply not made for toe socks. 🙂 I’d also recommend wearing leggings or at least longer shorts because you get into some funky positions for exercises. Leave the booty shorts at home—trust me.

It takes a couple classes to get totally comfortable with the machine, so don’t be discouraged if you feel like you’re fumbling through transitions your first couple classes. The instructor will explain all the exercises, but I think it’s helpful to also pick a machine in the middle of the room for your first class. This way you can easily look around at the other students if you’re not sure which strap/handle bar/foot position/etc. you’re supposed to be using.

The Workout

What to expect from your first Lagree Fitness class (and intro to the Megaformer and more!)Lagree Fitness is all about those slow twitch muscle fibers. These are our fat-burning muscle fibers and also our smaller muscle fibers (fast-twitch are larger in diameter), so this workout is perfect for that whole “lean, toned” look. It pains me a little to write a sentence like that, because of course body type, genetics, etc., etc., plays into how our bodies look and react to exercise, but from a strictly physiological level, you are working the muscle fibers that take up less space. Let’s leave it at that. 🙂

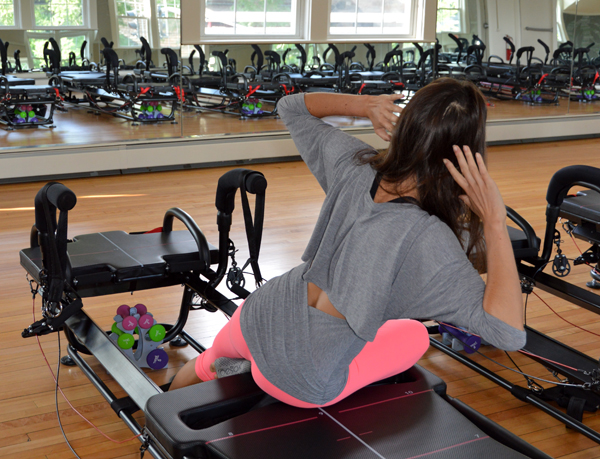
We work one muscle group at a time to achieve effective muscle stimulation, so this means you’ll focus on abs, left leg, right leg, arms (in some order) completely before moving onto the next. In general, each exercise is done for about 1 minute or 2 minutes for lower body exercises. In that time, it’s not about getting in as many reps as possible—you want to keep the pace slow, controlled and steady. Remember, we’re working those slow-twitch fibers!. When we move from one exercise to another, the goal is 0 seconds wasted in transition time. That’s of course not always possible, but we make transitions as quick as we can—absolutely no break time is built into this workout! Most of this is the instructor’s responsibility in planning a class that flows well, but it also means you shouldn’t dillydally in between moves.What to expect from your first Lagree Fitness class (and intro to the Megaformer and more!)

While you might not be drenched in sweat after class, this workout also has cardiovascular benefits—you’ll feel that heart rate increase. To clarify, sometimes I leave class a sweaty mess, and other times I finish class and, with a quick touchup, could go right on with the rest of my day without needing to shower. I think it depends on the temperature of the studio, the routine, and on if you tend to sweat a lot or not. It’s certainly not an indicator of whether you got a great workout or not—some sweatless classes kick my ass!

The Megaformer

What to expect from your first Lagree Fitness class (and intro to the Megaformer and more!)The megaformer shown in all these pictures is the M3 model. There are a few versions of the machine, and the ones at your studio might look a little different, but the basic functions are all the same. At your first class, your instructor will give you an intro to the Megaformer which will be much more productive than a typed explanation, so I’ll just stick to the basics.

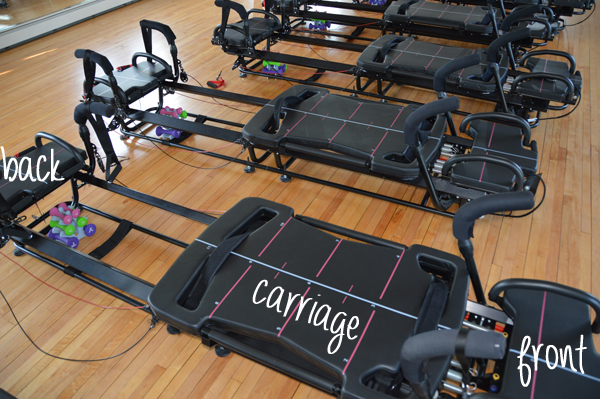
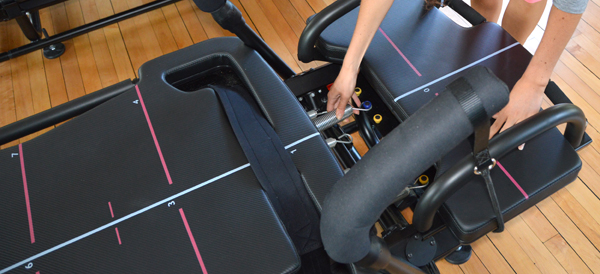
The middle bulk of the machine is called the carriage, and it moves back and forth on a spring system. More springs = more resistance. The more springs (and larger the springs), the harder it is to move the carriage away from the front platform. The less springs (and lighter the springs), the harder it is to move the carriage back towards the platform if our bodyweight is on it. Also, lighter resistance will make you feel less stable on the carriage. Classes are designed to minimize transition time, so you’ll probably only have to change the springs a couple times throughout class (or maybe not at all if the instructor does it for you while you’re in an exercise).

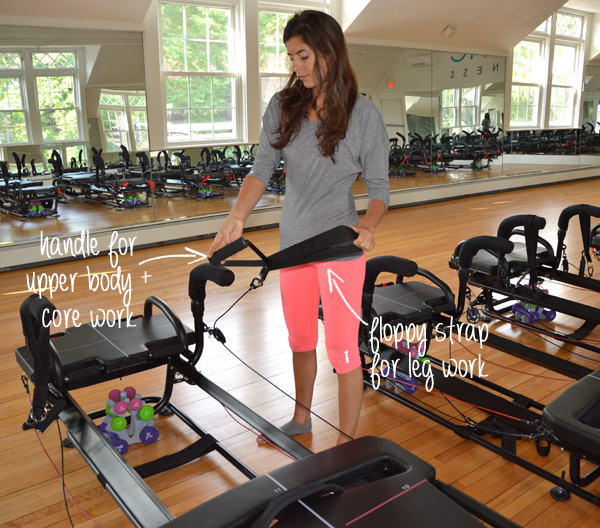
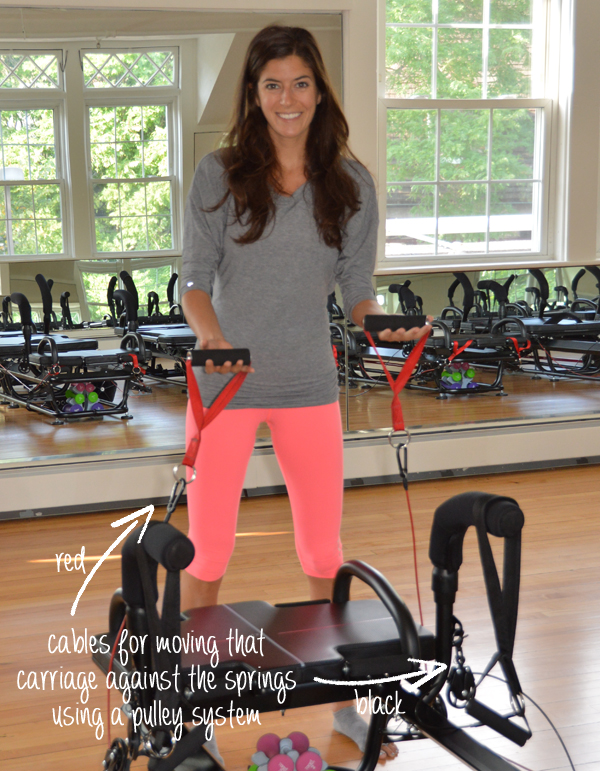
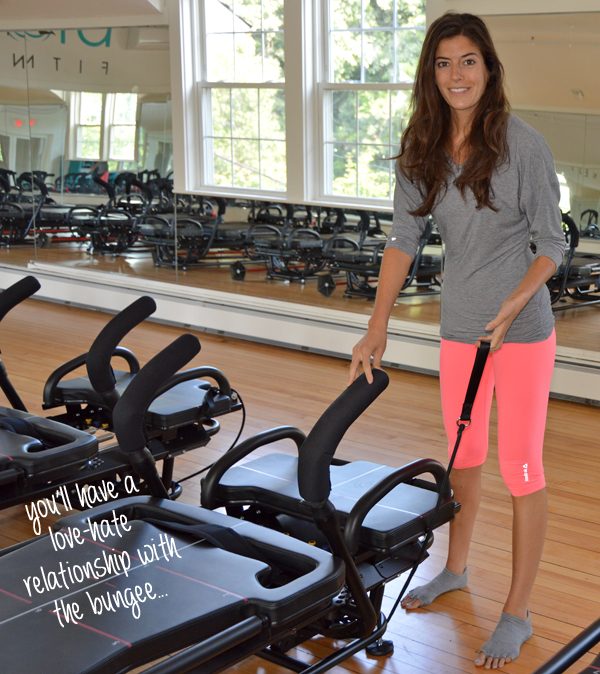
What to expect from your first Lagree Fitness class (and intro to the Megaformer and more!)We can move the carriage in tons of different ways, and most (not all) the exercises really come down to just that: moving the carriage! There are two sets of cables, which allow us to move the carriage on a pulley system, so we’ll often grab those with our hands or hook the floppy black strap around our feet. There are also eyelet holes and straps on the carriage for grabbing/hooking onto with our hands and feet. We can also move that carriage by pressing against or holding onto the front or back handlebars. These handlebars can be moved into several positions to accommodate different exercises. There’s also a bungee cord (which I fully credit for this firmer booty I now have), a floor strap, and different rails and hand rollers on the platforms (of the M3) to give you hand position options.

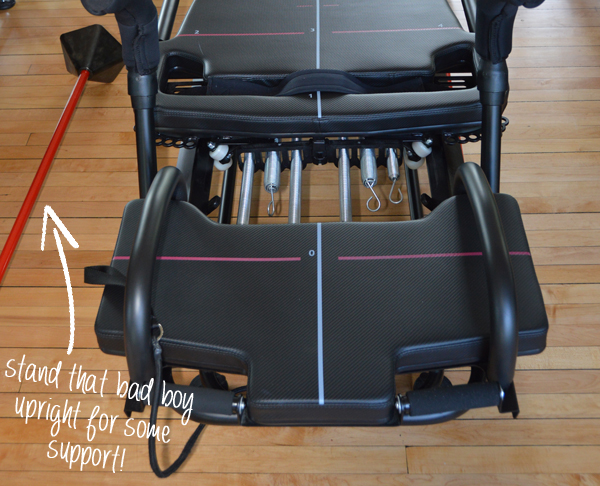
What to expect from your first Lagree Fitness class (and intro to the Megaformer and more!)Sometimes we increase the difficultly of exercises with hand weights (this is also a way to incorporate upper body work while we do legs), and we have a pole that can be used to help with balance during some of the exercises. Using the red pole is not a sign of weakness at all—it can allow you to get a fuller range of motion out of some exercises. Especially your first class, don’t be afraid to use the pole when the option is given by the instructor!

How Your Body Will Feel

What to expect from your first Lagree Fitness class (and intro to the Megaformer and more!)This is a low impact workout and easy on the joints, but don’t be fooled—it’s INTENSE. During class, it’s normal for the muscle group you’re working to shake—in fact, that’s good! Trust me, as you continue to advance in this workout, you will live for that shake (as twisted as that sounds). The more advanced you become, the less frequently you’ll get “the shakes,” but even after the countless classes I have under my belt, certain exercise combos will come up and BOOM—shaking like a leaf. I love it! Because we work one muscle group at a time, taking it to that furthest point of effective stimulation, you’re nearing muscle failure (that sounds scarier than it is). It will feel harder to balance and control the movement of the exercise with shaking, but fight through it (easier said than done, I know).

While I find the shaking is most common during lower resistance exercises that require more balance and stabilization, it’s a slightly different sensation I feel when we load on the resistance—burning. Again, this is good and normal! There is a difference between being uncomfortable and being in pain—you’re going to be uncomfortable quite frequently in class. 🙂

I would say the two most common instances of that uncomfortable feeling bordering into pain (especially with newer students), is with the wrists and low back when doing the ab/oblique work. These will become less of an issue as you strengthen your core and wrists (and soon not an issue at all!), but if you have pre-existing problems with either area, say something to your instructor before class. They will give you tips and modifications for making the ab work easier on the wrists (switch up hand positions, come to your forearms, etc.) and show you how to protect the back (slight tilt with the pelvis as you pull the bellybutton in towards the spine, stacking knees under hips to modify, etc.).

What to expect from your first Lagree Fitness class (and intro to the Megaformer and more!)How will you feel after class? Amazing. Well, after your first class you might be thinking what the hell just happened—but in a good way. You’ll probably be sore the next day or two—more so if you’re not used to workouts emphasizing slow-twitch muscle fibers like this. At first, you may only want to come once or twice a week (depending on your fitness level), and from there, just listen to your body. I’d say most people come two-three times a week, but there are also those who prefer to come almost every day. Just make sure to give your body the rest it needs. Personally, I end up doing the workout two-four times a week (I don’t do the workout when I teach). As you know, I love switching it up, so I’m mixing in all types of fitness during the week along with those two-four Lagree classes.

The Benefits of Small Class Size

Aside from the workout itself, one of my favorite things about Lagree Fitness is the small class size. There are usually about 10 machines (give or take a few) in a studio, so you never feel lost in a crowd. If you’re confused or not sure how to get into one of the exercises, the instructor will notice and be able to come right over and help you out.

I think small class size also helps create a community feel. Especially given the enthusiasm (obsession even), that many people have for this workout, you’ll start recognizing familiar faces in class, will get to know the instructors, and will start to feel part of this awesome, motivating community. Of course if that’s not what you’re looking for, you can still be in and out strictly for the kickass workout.

Final Thoughts

If your first class is anything like my first, expect to feel humbled (in a good way!). I (thought I) was in great shape when I walked into Btone for my first class, but was shaking like a leaf by the end; unable to get through some moves without taking a break; and could not make it down a flight of stairs for two days afterward. The workout was just so unlike anything I was doing at the time, and my body was challenged in ways it never had been—I was immediately hooked!

Prepare to find your latest addiction. Lagree Fitness isn’t cheap (small studio classes out there typically aren’t), but it’s worth it. Most studios offer some sort of introductory offer so that you can try it without a huge financial commitment, and then from there, if you purchase larger class packages, you’ll end up saving and bringing the overall price per class down.

What to expect from your first Lagree Fitness class (and intro to the Megaformer and more!)

WEARING | top: c/o Ellie  (use code nicoleperr20 to get 20% off your first order!)  // leggings: c/o Reebok

If you’re in the Boston area, Btone has studios on Newbury Street and in Lexington, Wellesley (where these pics were taken) and Sudbury. If it’s your first time, you can buy three classes for the price of one ($30). Every instructor has a slightly different style, and every class the routine is different, so it’s great you can try out three different classes as a newbie. I teach Monday & Thursday early mornings and Sunday mid mornings in Boston, and Thursday nights in Wellesley. My schedule might change a little in the fall, and I’m frequently subbing for other instructors at random times, so check the schedules for my name (I’m the only Nicole)—I LOVE meeting readers in class! I also do the workout all the time, so if you can’t make it to mine, maybe I’ll be on the megaformer next to you in another instructor’s class.

Jeeeeze I must really love this workout because I just wrote a flippin’ NOVEL. 🙂

Have you tried Lagree Fitness before? What was your first class like? Any tips for newbies you’d like to add? Leave a comment!

signature

The Spinning Instructor Certification from Mad Dogg Athletics (Overview/My Thoughts)

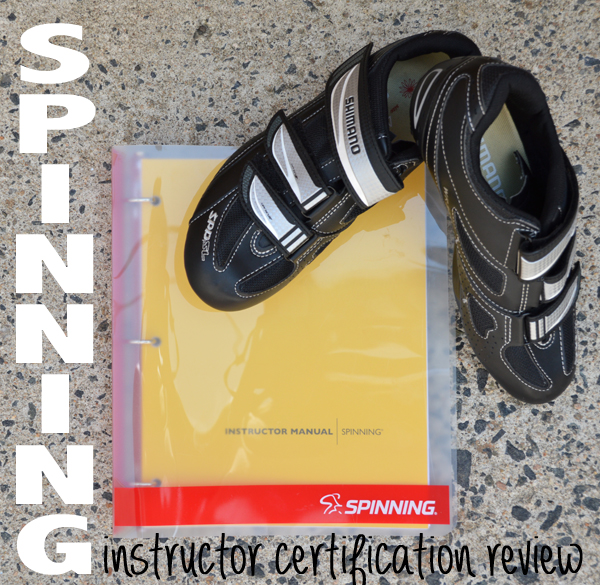
Review of the Mad Dogg Spinning Instructor Certification ProgramMan I feel like this post was years in the making! I talked about getting certified FOR-EH-VER (The Sandlot voice). Over Memorial Day weekend, I finally bit the bullet and went to a Mad Dogg Spinning® certification workshop, and then this past week I took the exam online to finish things up. I know, I know, my procrastination skills are impressive. Please hold your applause.

Before I get into all the details, I just want to remind you all of the difference between Spinning® and indoor cycling/”spin” so we’re all on the same page. I did a whole post about it HERE, but to summarize: Spinning® is based on outdoor cycling—anything you wouldn’t do on a road bike, you wouldn’t do on a stationary bike in a Spinning class. It’s what most people associate with traditional “spin”/spinning classes. Indoor cycling (also called “spin”) is this new wave of stationary bike workouts (think Soul Cycle) where you’re riding to the beat of the music (maybe not all the time), changing positions a lot, maybe even dancing a bit, doing push ups on the bike, and might have some hand weight upper-body portions as well. 

If you don’t feel like reading through this whole post, here’s your two-sentence summary: If you want to teach traditional Spinning classes, this is a great program led by passionate and uber-informed master instructors—I highly recommend it. If you want to teach indoor cycling (the new trend in stationary bike fitness that involves a lot of movement, choreography, and upper body portions of the workout), it’s not worth the cost—don’t do it.

Why I Chose Mad Dogg Athletics/To Get Certified at All

Even when I was sure I wanted to start instructing, I went back and forth a lot about whether getting certified was even necessary. I had a lot of fitness professionals and current instructors tell me it was a waste of money and I shouldn’t do it. That advice, coupled with the facts that I already had group fitness experience under my belt from teaching at Btone, had this blog as a major fitness resume booster, aaaand have friends who just happen to own a spin studio…well, let’s just say things were stacked in favor of me not taking a certification course.

Ultimately though, I don’t just want to be a kickass instructor, I want to be an accredited, knowledgeable instructor. As a fitness professional, I am always trying to absorb as much information in the field as possible, and I figured if nothing else, I would learn proper form on the bike, safety/set-up tips, and the “WHY” behind stationary bike workouts. I like leading an awesome workout and then being able to explain why it was good for your body, why I had you move your body in those certain ways, and how things can be modified to accommodate both beginner and advanced students.

So why Mad Dogg Athletics? And why Spinning® when I knew I would be teaching indoor cycling? Well, I couldn’t really find any other program (at least not in the New England area) that looked even half as legit. It was pretty much my only option. Plus, after creeping around online and looking at the bios of some of my favorite instructors in Boston, the majority of them seemed to have all gone through Mad Dogg (even those not teaching a traditional Spinning program).

The Logistics of the Spinning Instructor Certification Program

The certification program costs $325. You sign up for a training session near you by going to the Spinning website and entering your zip code to see what’s closest and works with your schedule. After signing up, you’ll receive a text manual in the mail. They suggest you read through Phase 1 of it before your workshop.

The hands-on training session lasts all day (nine hours), and during it you’ll be on and off the bikes, working with a Spinning Master Instructor to go over proper form on the bike as well as hit the big topics covered in the manual. You probably spent ¾ of the time doing the classroom-esque learning, and the remaining hour and a half to two hours on the bikes. The first time you’re spinning is for a “form ride” and the second time is an actual class lead by your instructor (that’s the last thing you do during the day).

They emphasize heart rate a lot during the training, and it’s suggested you bring a heart rate monitor with you to the workshop. I went out and bought one just for that reason, but I would say it wasn’t totally necessary—so don’t worry if you don’t have one.

After the workshop is completed, you have 1 year to take the exam (it’s online, but also located in the back of your manual in case you’d rather mail it in for grading). Although you have a year, definitely just take it right after the workshop. It’s 50 questions, some multiple-choice and some True/False. It’s super easy considering it’s open-book, and definitely not something to stress over. The real meat of getting certified is in the all-day workshop—not the test.

If you attend the workshop and pass the test (80% and above is passing), you’re officially a Spinning® instructor, and get your certificate mailed to you after the exam.

My Experience Getting Certified

First off, the Master Instructor who led our training workshop, Angie Scott, was AWESOME. Super passionate about the program, an experienced cyclist, incredibly knowledgeable—she rocked. I went in totally on Team Indoor Cycling, but as class went on, I actually found myself reaching for the Spinning Kool-Aid(!!). It was a total testament to Angie.

As someone who’s never worked out on a bike that isn’t stationary (aside from leisurely bike rides), I found it fascinating to listen to Angie talk about the world of cycling and triathlons. Even though it’s not something I personally have an interest in doing, I just love learning about any and all things related to fitness. In the Spinning program, you don’t do anything on the stationary bike that you wouldn’t do outdoors, and I loved learning all the rationale behind it. A good example is sprinting. In indoor cycling classes you frequently sprint with very little resistance on the wheel so you can move your feet as fast as possible. In Spinning, you always have resistance on the wheel because in a cycling race, the person who pedals the fastest at the highest gear wins a sprint. Never would have thought of it like that before the certification program.

We also worked a lot with heart rate monitors, which I’ve never done before, and I loved learning about the ways you can use them to train smarter and more efficiently. I will say though, when I wore mine while riding the bikes, I found myself staring at my wrist the entire workout instead of just enjoying the class. That’s exactly what happens to me when I go to Flywheel and stare at the Torq board the whole effing class. It takes something away from the experience for me, so while I can’t see myself using one personally, it was great getting more familiar with a tool that could help me more efficiently train others.

To sum up the day: My initial skepticism turned into enthusiasm within the first hour of the workshop, but I still left feeling conflicted. Spinning or indoor cycling? Is there a happy medium? Can I teach indoor cycling classes while still incorporating some of the stuff I learned from the Spinning program? I think the answer is yes. I also think that at the end of the day, my passion for stationary bike workouts was born when I took my first indoor cycling class—that’s where my heart is, and despite the positive experience with the Spinning program, that’s what I want to teach. 

Final Thoughts—Was It Worth $325?

For me personally, even though I loved the workshop, I have to say (with hesitation) “no.” But that’s because I ultimately don’t want to teach the Spinning® program. I like indoor cycling/”spin” classes—everything to the beat of the music, changing positions a lot, dancing around on the bike, adding in some upper body work—they’re so much fun! And I do think they are safe, as long as you keep the choreography within reason and emphasize proper form. That being said, if you’re an outdoor cyclist, triathlete, or just love traditional Spinning classes, then I would highly recommend Mad Dogg and this certification program. I love that it’s so hands-on, and if the other Master Instructors are anything like Angie, you’ll learn a ton.

Some things gained from the program that I’ll certainly use in my spin classes are the proper bike setup techniques; info about heart rate monitors and how to use them to better improve your training; and guidelines for proper form in each of the bike positions and execution of moves. Other than that though, I think what has prepared me most to teach is just the fact that over the last couple years, I’ve probably taken 500 classes with tons of different instructors at tons of different studios and gyms—everything from Soul Cycle to someone’s living room. I’ve learned what I like, what makes a great class, and picked up on instructing techniques from those rockstar teachers who make you leave class wanting to be them (you know the ones, right??).

So again, if you want to teach Spinning®, this program is great and a total must-do. If you want to teach indoor cycling/”spin”, however, it’s not really necessary (although some gyms might want you to have a certification so you look official on paper as well as on the bike). I recommend you take a ton of classes (especially at the studio you want to teach at!), practice your ass off, work on your cardiovascular stamina, put together an epic playlist, and be familiar with the basics of proper form on the bike. The certification doesn’t hurt, of course, but it’s not very applicable to this new trend in stationary bike workouts. 

Any instructors out there go through Mad Dogg? What are your thoughts?

signature