What an Overhead Squat Assessment Can Reveal about Muscle Imbalances (Try It at Home!)

The Overhead Squat Assessment - what it reveals about muscle imbalances and how you can use it to effectively trainHope everyone had a great weekend! I spent a night on the Vineyard, had a wedding shower on the Cape, and then headed back to Boston Saturday evening to finish up a fun weekend. Summer is the best.

Since there seemed to be a lot of interest around the runner’s assessment I had done at the Micheli Center a couple months ago, I thought I’d spend some time going over other ways you can spot muscle imbalances. The NASM personal trainer certification course spends a lot of time on this since knowing your personal weaknesses is crucial for effectively training to correct them. It won’t replace having a professional assess you, but an overhead squat test is something you can do right at home or the gym to get a general idea of which muscle groups need strengthening and where you should be spending extra time stretching.

How to Do an Overhead Squat Assessment

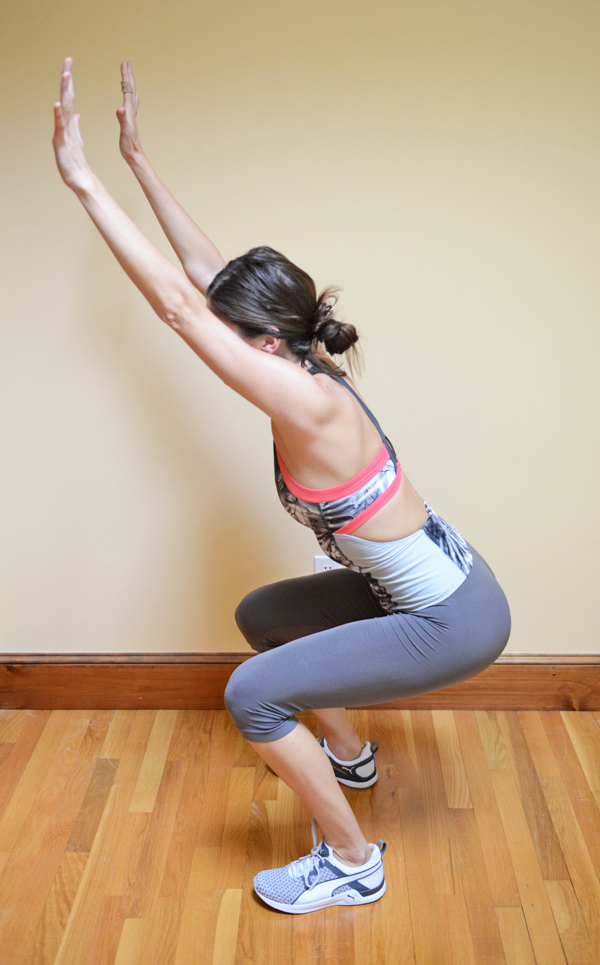
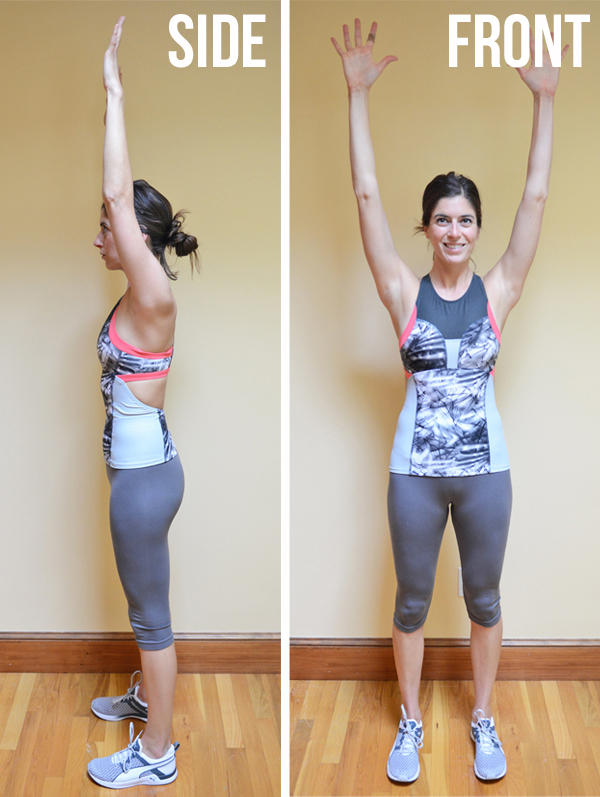
Start standing with feet shoulders-width apart, toes pointed straight ahead. It’s best to do this barefoot (sorry, totally spaced out when taking the pictures). Raise your arms overhead with elbows extended and palms facing forward. The Overhead Squat Assessment - what it reveals about muscle imbalances and how you can use it to effectively train
From this starting position, squat down to about chair height. Hold the bottom position while a friend takes a picture of you from the front and side. Repeat this a couple of times so that you have a good representation of what your form looks like at the bottom of the squat. You could do this in front of a mirror as well, but seeing your side form might be a little tricky. The Overhead Squat Assessment - what it reveals about muscle imbalances and how you can use it to effectively train
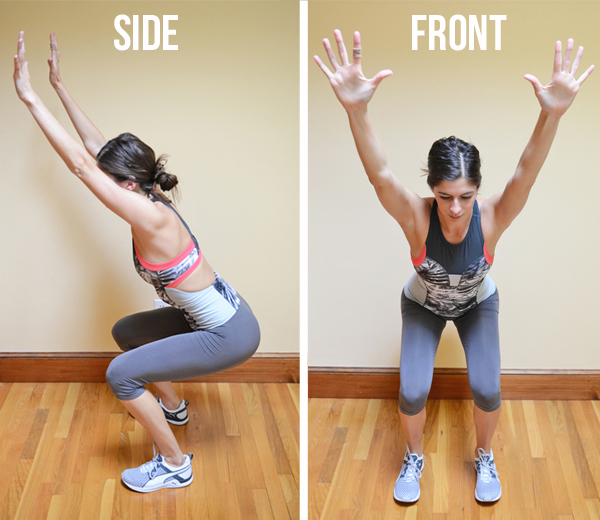
STOP READING HERE IF YOU’RE GOING TO DO THE ASSESSMENT ON YOURSELF. If you read all the details on how to and not to do the squat, it’ll be hard to see what your body naturally does because you’ll be overthinking everything. Go have a friend take a picture from the front and side of you doing the squat and then continue reading and compare the pictures.

What to Look for: Front View

I’ve tried to include a general description of where some of the less-familiar muscles are located, but if you’re unsure of any, just ask me in the comments or get your Google on (seeing anatomy pictures is the most helpful in understanding where these muscles are attached in the body).

Correct Form

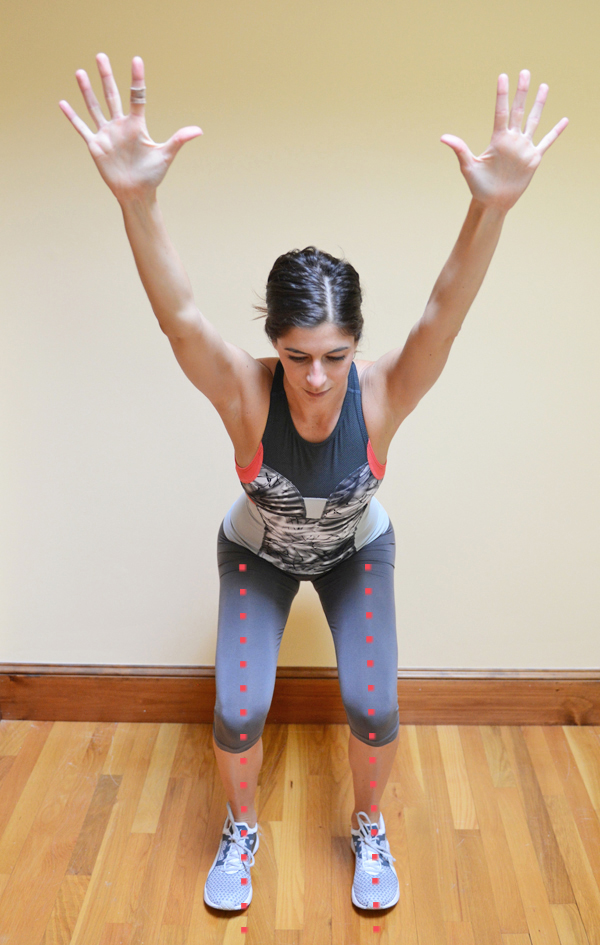
From the front, you should pay close attention to the lower body alignment. The feet should remain straight and the knees should track in line with the foot. The Overhead Squat Assessment - what it reveals about muscle imbalances and how you can use it to effectively train
Form Compensations + What They Mean

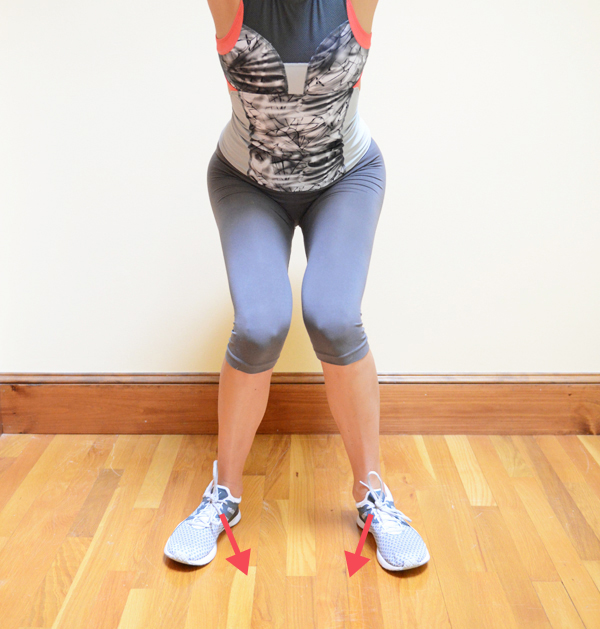
From the front, observe if the knees move inward and if the feet flatten and/or turn out to the sides. As you read through the ways our body compensates for imbalances, keep in mind that overactive (tight) muscles need to be stretched (SMR with foam roller or tennis ball, static stretching, etc.) and underactive muscles need to be strengthened. You can’t effectively stimulate the underactive muscles if range of motion is restricted, so it’s important to spend time stretching tight areas in addition to building up strength.

Knees Move Inward (Knock Knees) The Overhead Squat Assessment - what it reveals about muscle imbalances and how you can use it to effectively train
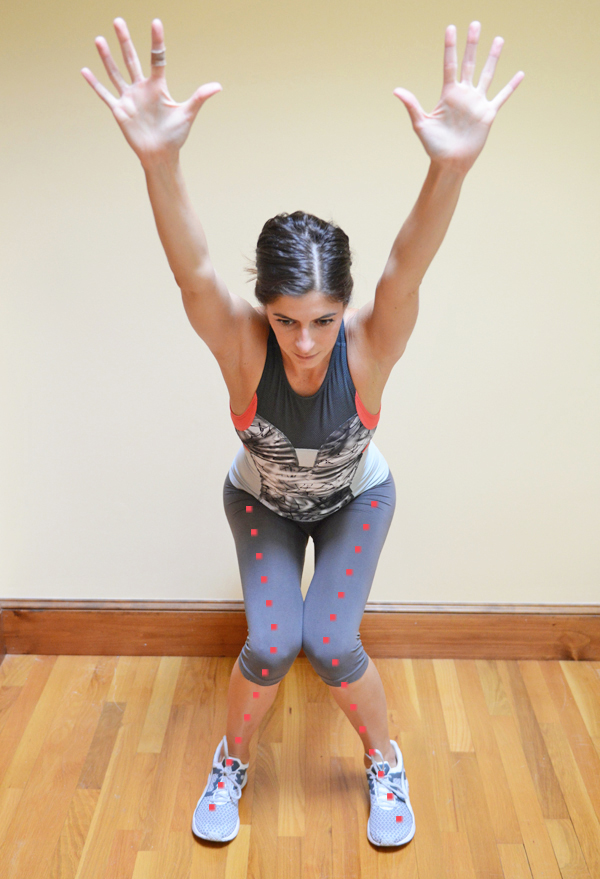
  • Overactive muscles: adductors, TFL, biceps femoris-short head (backside of the knee/hamstring), vastus lateralis (front/outside of quads)
  • Underactive muscles: glutes (medium/maximus), vastus medialis (front quad/top of knee)

Feet Turn Out and/or Flatten The Overhead Squat Assessment - what it reveals about muscle imbalances and how you can use it to effectively train The Overhead Squat Assessment - what it reveals about muscle imbalances and how you can use it to effectively train
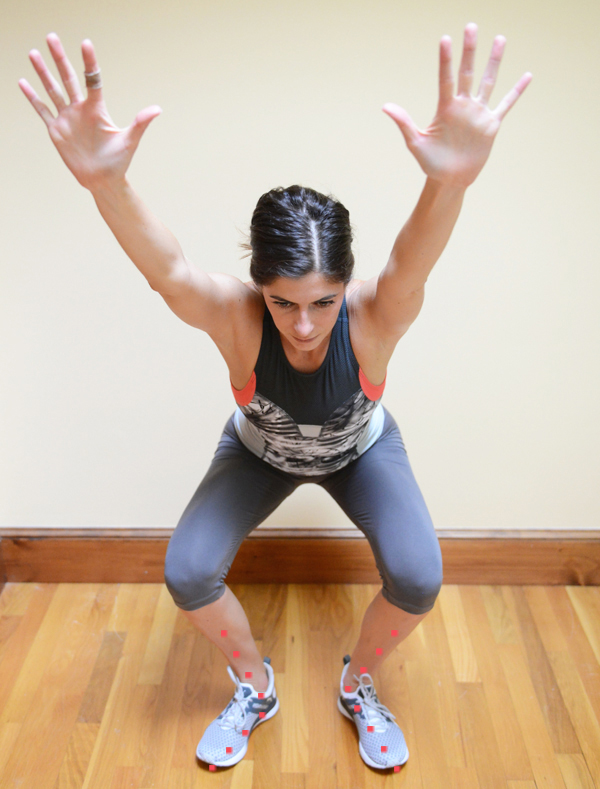
  • Overactive muscles: soleus & lateral gastrocnemius (calf), biceps femoris-short head (backside of the knee/hamstring)
  • Underactive muscles: medial gastrocnemius, medial hamstring complex, gracilis & sartorius (wrap on the inside of the thigh/knee from pubis to tibia), popliteus

What to Look for: Side View

Correct Form

The arms should stay in line with the torso. The tibia (shin) should also stay in line and parallel with the torso. The Overhead Squat Assessment - what it reveals about muscle imbalances and how you can use it to effectively train
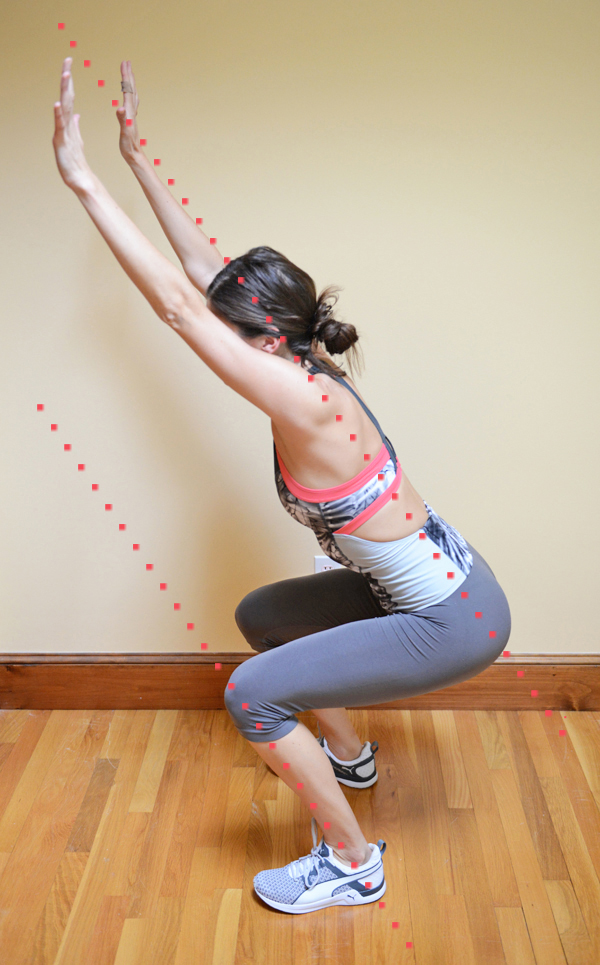
Form Compensations + What They Mean

Low Back Arches The Overhead Squat Assessment - what it reveals about muscle imbalances and how you can use it to effectively train
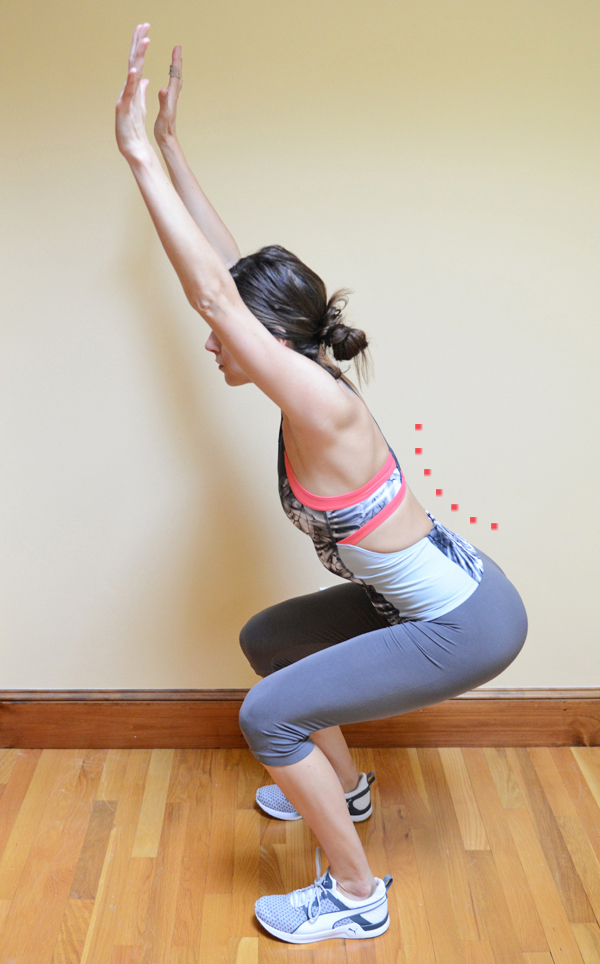
  • Overactive muscles: hip flexor complex, erector spinae (muscles along the spine), latissimus dorsi
  • Underactive muscles: gluteus maximus, hamstring complex, intrinsic core stabilizers (transverse abdominis, multifidus, transversospinalis, interval oblique, pelvic floor)

Forward Lean The Overhead Squat Assessment - what it reveals about muscle imbalances and how you can use it to effectively train
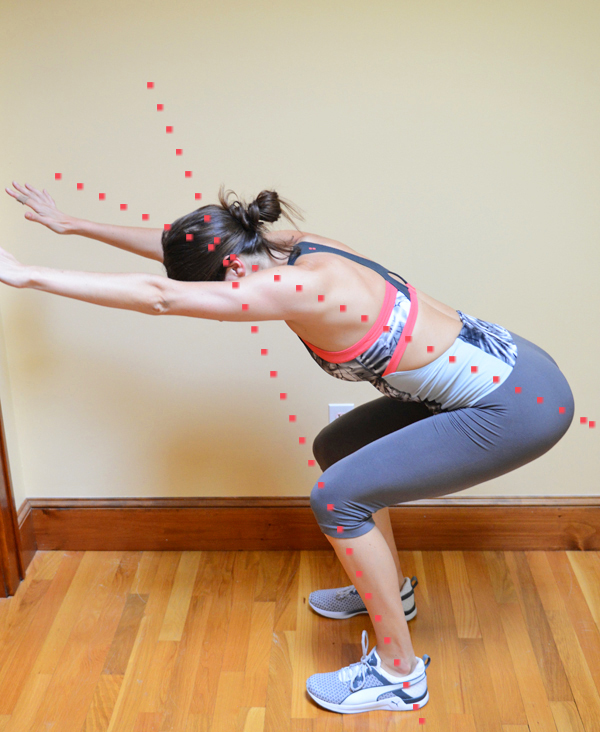
  • Overactive muscles: soleus & gastrocnemius (calf), hip flexor complex, abdominal complex
  • Underactive muscles: anterior tibialis (front-outside of shin), gluteus maximum, erector spinae

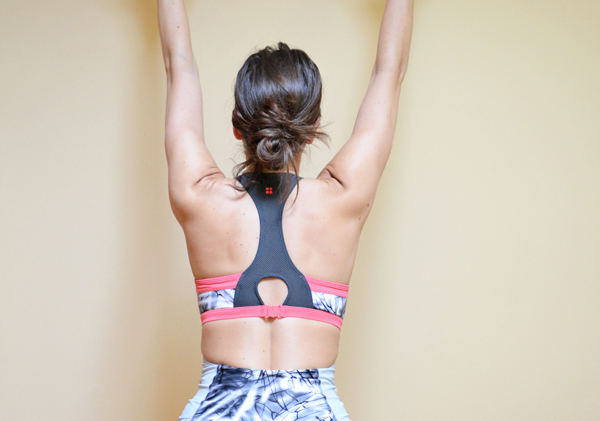
Arms Fall Forward The Overhead Squat Assessment - what it reveals about muscle imbalances and how you can use it to effectively train
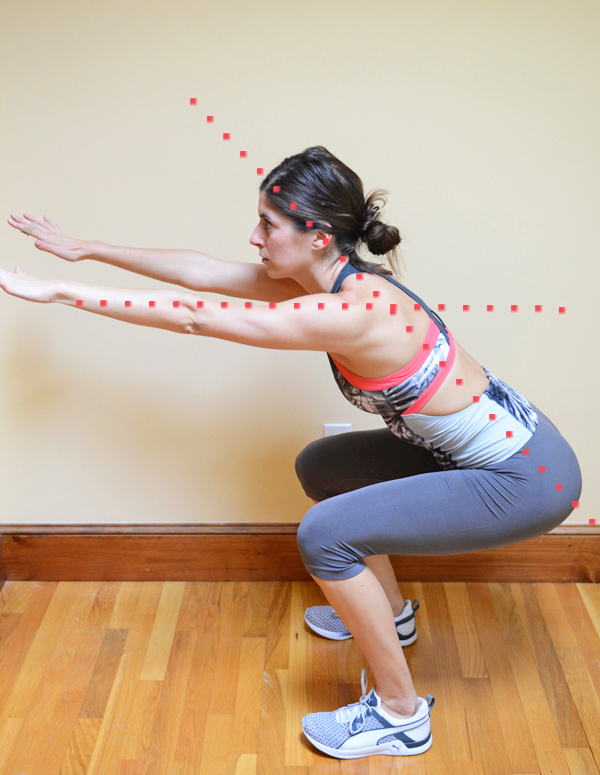
  • Overactive muscles: latissimus dorsi, teres major (backside of armpits), pectoralis major/minor
  • Underactive muscles: med/lower trapezius, rhomboids (in between shoulder blades/upper back), rotator cuff

So again, in order to effectively strengthen the underactive muscles, you need to spend time stretching and releasing the overactive ones. If, for example, you have an overactive, tight TFL, it’s going to inhibit you from effectively firing up your hamstring and glutes. It’s all connected!
The Overhead Squat Assessment - what it reveals about muscle imbalances and how you can use it to effectively trainWEARING  | tank c/o Sweaty Betty // leggings: Champion // sneakers: c/o Puma

And before I end, isn’t this top cute?! Confession: it’s actually a bathing suit. My friends at Sweaty Betty sent it to me and I love it but don’t think I’d realistically wear it to the beach because I’m a big “if you can’t tone it, tan it” believer when it comes to my midsection (LOL). Luckily, thanks to my small boobs, I think it totally passes as a workout tank for low-impact stuff like yoga, Pilates & barre.  That’s what I’m telling myself anyway…

Alright–happy squatting! If you try out the assessment, let me know what you notice about how your body compensates for existing muscle imbalances. signature

SHOP A SIMILAR LOOK:

Info in this post was learned during my PT training through NASM. This is the textbook I used for reference.

What I Learned from Getting a Runner’s Assessment

running-form-assessmentI feel like the theme of April has been running—and not just because of the marathon. A couple weeks ago I had a really fun opportunity to get a runner’s assessment done at the Micheli Center for Sports Injury Prevention. It was awesome! I learned a ton, so fair warning—this post may turn into a novel.

As I’ve mentioned before on the blog, I used to run just about every day but recently it’s fallen to the wayside because it wasn’t feeling good. I had problems with Achilles tendonitis flair-ups from running which I pretty much resolved by switching to a minimalist sneaker, but then I found that my feet would hurt me if I did anything over 6 or 7 miles. I become frustrated and couldn’t see the point in doing something that seemed to be beating up my body. I still run here and there and in shorter bursts, but nothing like I used to (which is sad because I loved running—it was my favorite form of “me time”).

micheli-center-runners-assessmentI did the Running Injury Prevention Quick Start Program, which is a private hour-and-a-half session that identifies inefficiencies in your running gait by evaluating posture, cadence, foot strike, stride, flexibility, movement patterns and muscle imbalances. Based on all that, you then receive instruction on how to improve your running form, and which exercises/stretches will help strengthen and stretch the necessary muscles.

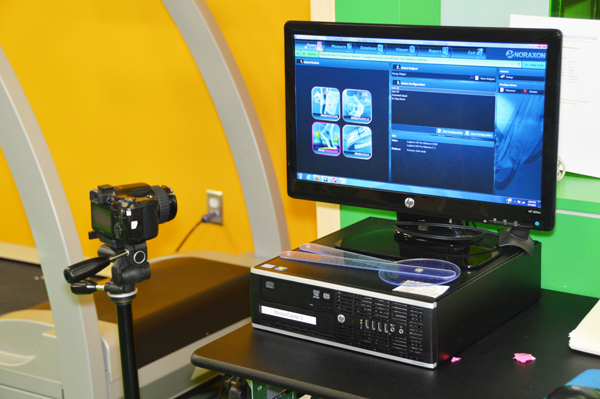
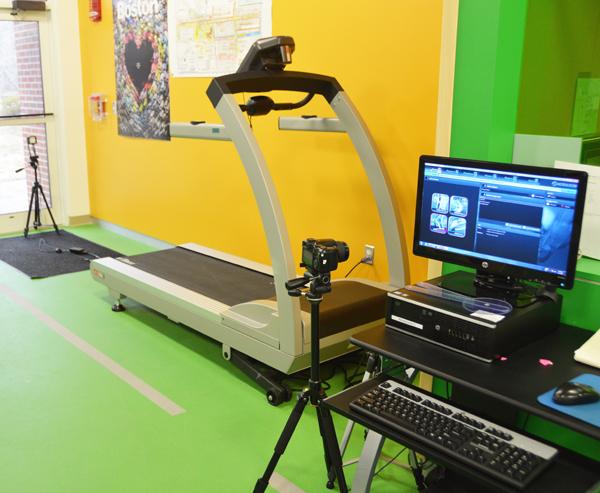
You start by answering some basic questions about your running history and getting flexibility and strength measurements. Next up, video is taken of you performing a single-leg squat test and running on a special treadmill equipped with force plates. The treadmill and camera are synced to a computer so that you can watch yourself afterwards (awkward haha) and have your specialist talk you through what you’re seeing. The final part of the assessment is spent going over exercises, stretches and running form corrections that are catered to your individual needs.

I gained a ton of insight from my assessment—not just as a (former?) runner, but as a personal trainer. Even though it was a while ago that I got certified, it was crazy how much this runner’s assessment made things click for me. NASM focuses a lot on imbalances and how to strengthen and stretch the right muscles to correct them. I had a good understanding before, but now that someone has walked me through an assessment of my own muscular imbalances, I feel like I see it with a whole new clarity. It was so beneficial! Why haven’t I done something like this sooner??

Major Takeaways from My Runner’s Assessment

15+ years of tap dancing has had a big impact.

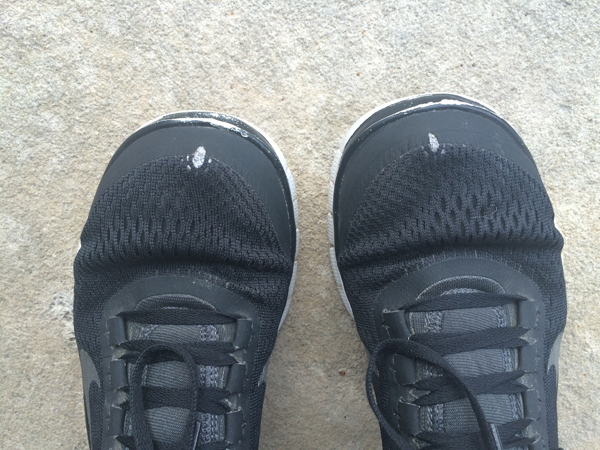
About five minutes into my assessment, my Injury Prevention Specialist, Jen, was like “did you dance growing up?” That obvious. Tap dancing is 90% on the balls of your feet and constantly having my heels lifted has resulted in ridiculously tight calf muscles, shortened Achilles tendons (hence the tendonitis flair-ups I’ve suffered from!), and perma-lifted toes (the top of my foot is tight). Think of what a foot looks like when it’s in a high heel—that’s essentially the shape my foot just naturally wants to assume at all times. I actually lift my toes so much when I run that I usually get holes in the tops of my sneakers! shoe-toe-holes

Things I need to do to correct my tap dance imbalances:

  • Stretch out the top of my foot. I can do this easily by scrunching my toes and rolling the top of my foot onto the ground.
  • Foam roll the f**k out of my calves. The F bomb is necessary—when Jen rolled out my caves for me it was literally like I had marbles underneath my skin. After SMR I need to make sure to statically stretch the calves as well.
  • Use a resistance band to isolate the shin. I over-use the top of my foot and toes when flexing my foot rather than engaging my shin to lift it. Jen showed me how to flex my foot against a resistance band while keeping my toes scrunched would force me to pull using the shin area rather than the top of my foot.
  • Reduce the angle of my foot when I heel strike the ground running. Jen explained that it’s not necessarily a terrible thing that I’m a heel striker when I run, but that it shouldn’t be such a dramatic heel-first landing. If I stop pulling up with my toes so aggressively, the angle with which my foot hits the ground won’t be as bad (and I won’t get holes in the tops of my shoes anymore).

I need to strengthen my hamstrings and glutes/abductors.

When we tested the strength of various muscles during the assessment, it turned out that my quads are much stronger than my hamstrings. To put it in perspective, it should be a 4:3 ratio (quad strength to hamstring strength) and mine is more like 3:1. Just as important as strengthening those muscles is stretching my hip flexors so that their tightness doesn’t inhibit me from activating the glutes and hamstrings properly. I need to do some major TFL foam rolling!

Jen showed me a bunch of resistance band exercises to help with this and I’m going to share a workout inspired by them on the blog soon.

My legs are staying too straight as I run and as a result I’m over-stepping.

running-assessmentAn over-step means that my heel is hitting the ground in front of my knee. I sort of leap as I run instead of creating a smooth pedaling motion with my legs. To fix this, I need to lift my knees a little higher when I run—by adding more of a bend, my foot will hit the ground in a supportive position underneath my knee rather than ahead of it. In the assessment, they had me start by sort of marching in place and then gradually speeding it up into a run in order to practice this.

I think part of the reason I leap when I run is because I was always told to “lengthen my stride” when playing sports and running cross county in high school. Jen confirmed it’s something they hear a lot. She said to compensate for the couple inches I’m losing in my stride by not over-stepping, I just need to pick up my cadence. The Micheli Center suggests a cadence of 170-180 steps per minute (for longer distance running) and right now I’m at 161.

I need to engage my lower abs when I run to prevent a pelvic tilt.

This is something I’ve been working on for a while in other forms of fitness and everyday movements to help prevent low back pain. But I didn’t realize I was doing it while I ran, too (duh—figures I am!). It’s a common postural imbalance and something I’m always reminding my students of in class—engage your low abs! I think of it as pulling up on a pants zipper—take out any over-arching of the low spine by tucking your tailbone and pulling the lower abdomen in. I know, ladies, your butt does not look as cute when you do this, but trust me, your body (especially your low back) will thank you. 😉 runners-injury-prevention-assessment

As far as running shoes go, I should find one with a neutral sole (an even thickness from toes to heel).

While the Micheli Center doesn’t make specific shoe recommendations because there are so many options out there and a lot of it has to do with personal preference, they did suggest I stick to a sole of even thickness because I strike with my heel. I should stay away from shoes that are thick at the heel and gradually get thinner towards the toes.

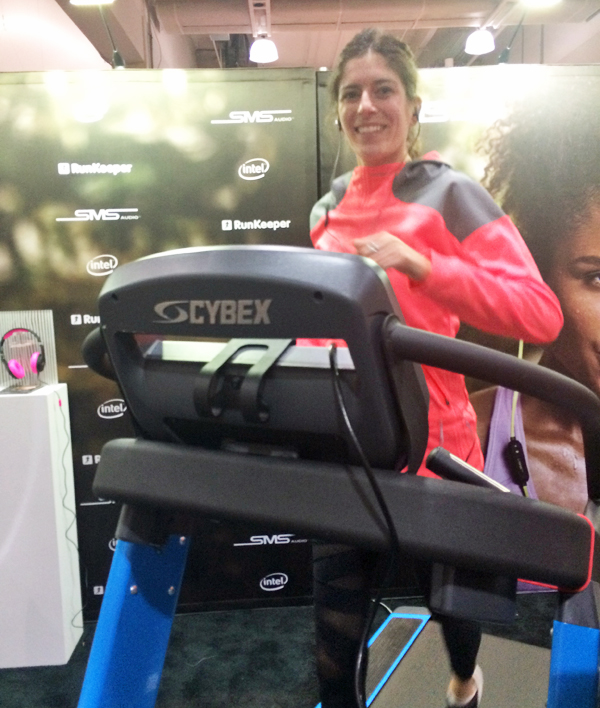
With all these takeaways, my next challenge is to integrate all this knowledge into my running form without over-thinking it. This past weekend, I hung out at the Intel and SMS Audio booth at the Boston Marathon Expo and was demo-ing their BioSport headphones on a treadmill. It got to the point where I had to just shut off my brain because I found my mind racing with tips from my runner’s assessment: Stop pulling up with your toes so much. Am I over-striding? Lift your knees higher. Engage your abs. Is my heel strike too aggressive?

boston-marathon-expoOveranalyzing on the treadmill aside, the Expo was a lot of fun—even though I’ve lived in Boston for five years now, it was actually my first time attending! There were countless exhibitors and an overwhelming number of things to see and try. All the excitement actually made me a little sad I wasn’t running the marathon. Next year?? During my time at the Intel & SMS Audio booth, we shot a bunch of video footage so I’ll be sure to keep you posted if I get any face time in the final cut. I tend to dramatically talk with my hands (it’s the Italian in me haha) so I’m guessing I produced a solid blooper reel. And there’s still a chance to win your own pair of BioSport heart rate monitor headphones coming Sunday! In the meantime, you can listen to the playlist of workout favorites Intel has put together on Spotify here.

But back to my assessment—I’m now trying to just focus on one thing at a time. To start, lifting my knees a little higher when I run. Next, those dang tap dancing toes ripping holes through my shoes.

If you’re in the Boston area and interested in a runner’s assessment, you can get more info at the Micheli Center’s website. The quick start program I did is $90 and I’d highly recommend it!

Have you had this type of assessment done before? What’d you learn?

signature 

What to Expect from Your First Lagree Fitness Class

What to expect from your first Lagree Fitness class (and intro to the Megaformer and more!)I get a lot of questions about the class I teach at Btone—especially on Instagram from people wanting to know what that weird contraption is I’m always taking selfies on (the Megaformer). Is it Pilates? Is it ok for beginners? Is that machine stolen off the set of 50 Shades? What the heck is going on with this workout??

To start, it’s called Lagree Fitness. And while it’s based on Pilates, it’s so, so much more (I’ll explain later). Lagree Fitness studios are continuing to pop up in major cities throughout the states (and world!), so while it’s not as widespread as, say, yoga, there is a chance you can find this amazing workout near you. If you go to the Lagree Fitness website there’s an online studio locator, or try Googling “Lagree Fitness [your city]” or “megaformer [your city].”

All studios will be different and have their own policies and atmosphere, but here is a general description of what you can expect from your first Lagree Fitness class. Bear with me through these painful Wannabe Vanna White pictures… 😉

The Basics

What to expect from your first Lagree Fitness class (and intro to the Megaformer and more!)Most classes are 40-50 minutes in length. If it’s your first time, arrive at least 10 minutes ahead of class so that the instructor can give you an intro to the machine. The workout is done barefoot or wearing grippy studio socks (some studios require these). I wear socks or sneakers when I teach, but personally prefer to do the workout barefoot. As highlighted by this lovely instagram, my pinkie toes are just simply not made for toe socks. 🙂 I’d also recommend wearing leggings or at least longer shorts because you get into some funky positions for exercises. Leave the booty shorts at home—trust me.

It takes a couple classes to get totally comfortable with the machine, so don’t be discouraged if you feel like you’re fumbling through transitions your first couple classes. The instructor will explain all the exercises, but I think it’s helpful to also pick a machine in the middle of the room for your first class. This way you can easily look around at the other students if you’re not sure which strap/handle bar/foot position/etc. you’re supposed to be using.

The Workout

What to expect from your first Lagree Fitness class (and intro to the Megaformer and more!)Lagree Fitness is all about those slow twitch muscle fibers. These are our fat-burning muscle fibers and also our smaller muscle fibers (fast-twitch are larger in diameter), so this workout is perfect for that whole “lean, toned” look. It pains me a little to write a sentence like that, because of course body type, genetics, etc., etc., plays into how our bodies look and react to exercise, but from a strictly physiological level, you are working the muscle fibers that take up less space. Let’s leave it at that. 🙂

We work one muscle group at a time to achieve effective muscle stimulation, so this means you’ll focus on abs, left leg, right leg, arms (in some order) completely before moving onto the next. In general, each exercise is done for about 1 minute or 2 minutes for lower body exercises. In that time, it’s not about getting in as many reps as possible—you want to keep the pace slow, controlled and steady. Remember, we’re working those slow-twitch fibers!. When we move from one exercise to another, the goal is 0 seconds wasted in transition time. That’s of course not always possible, but we make transitions as quick as we can—absolutely no break time is built into this workout! Most of this is the instructor’s responsibility in planning a class that flows well, but it also means you shouldn’t dillydally in between moves.What to expect from your first Lagree Fitness class (and intro to the Megaformer and more!)

While you might not be drenched in sweat after class, this workout also has cardiovascular benefits—you’ll feel that heart rate increase. To clarify, sometimes I leave class a sweaty mess, and other times I finish class and, with a quick touchup, could go right on with the rest of my day without needing to shower. I think it depends on the temperature of the studio, the routine, and on if you tend to sweat a lot or not. It’s certainly not an indicator of whether you got a great workout or not—some sweatless classes kick my ass!

The Megaformer

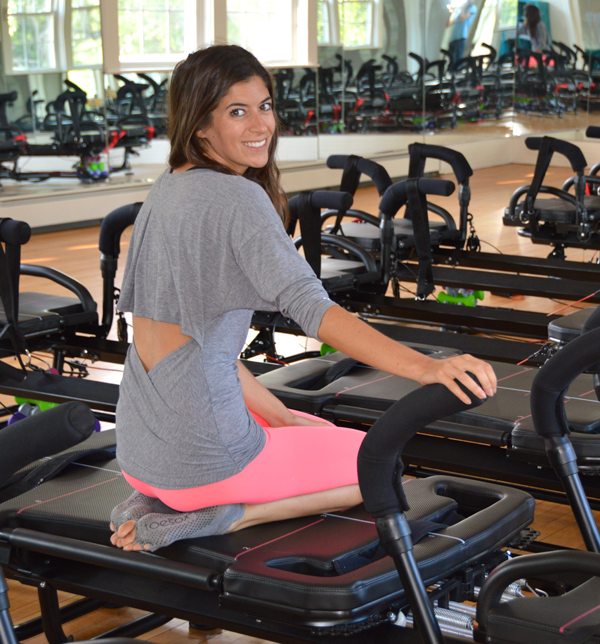
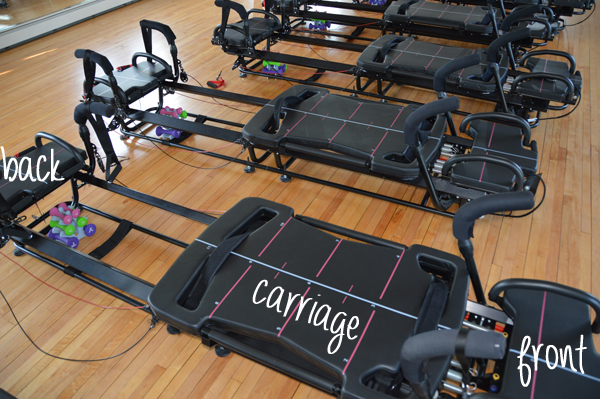
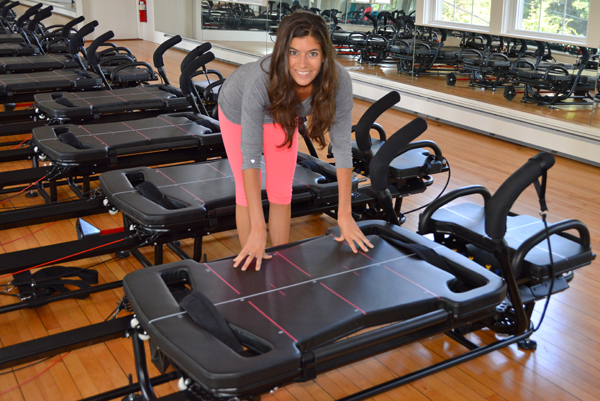
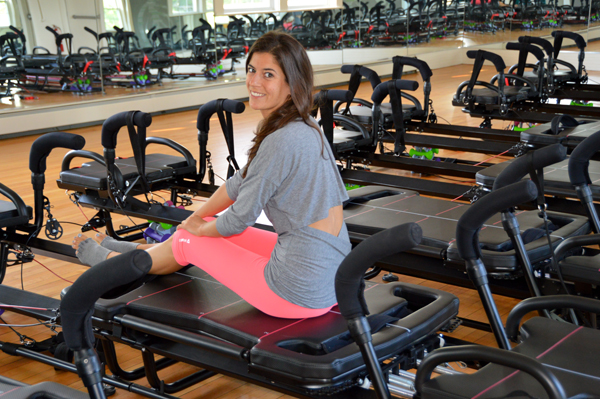
What to expect from your first Lagree Fitness class (and intro to the Megaformer and more!)The megaformer shown in all these pictures is the M3 model. There are a few versions of the machine, and the ones at your studio might look a little different, but the basic functions are all the same. At your first class, your instructor will give you an intro to the Megaformer which will be much more productive than a typed explanation, so I’ll just stick to the basics.

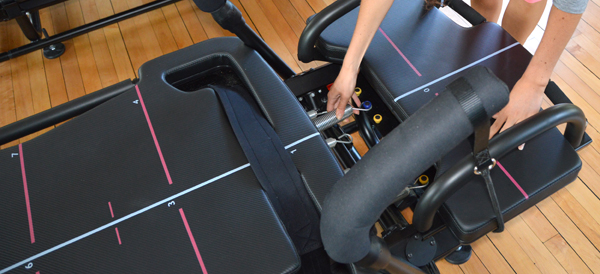
The middle bulk of the machine is called the carriage, and it moves back and forth on a spring system. More springs = more resistance. The more springs (and larger the springs), the harder it is to move the carriage away from the front platform. The less springs (and lighter the springs), the harder it is to move the carriage back towards the platform if our bodyweight is on it. Also, lighter resistance will make you feel less stable on the carriage. Classes are designed to minimize transition time, so you’ll probably only have to change the springs a couple times throughout class (or maybe not at all if the instructor does it for you while you’re in an exercise).

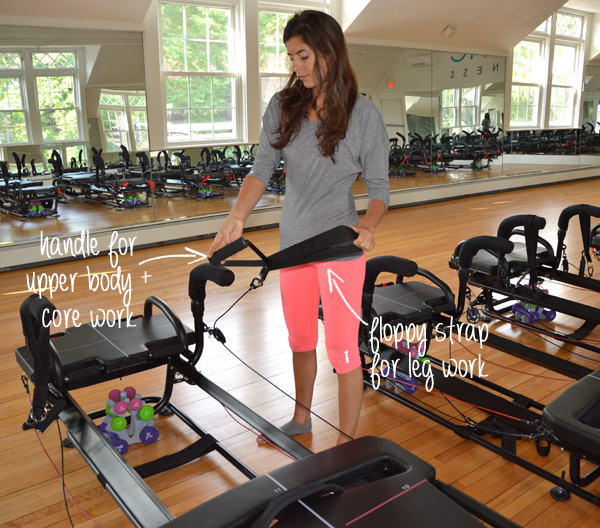
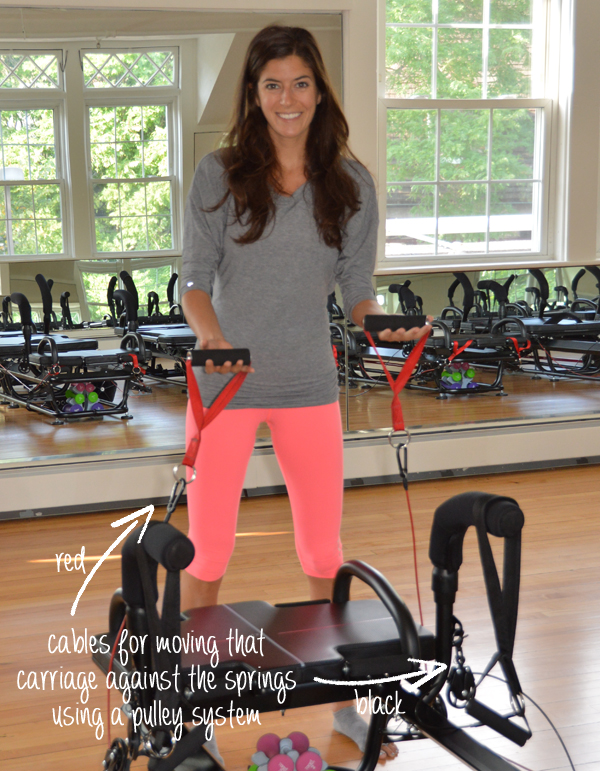
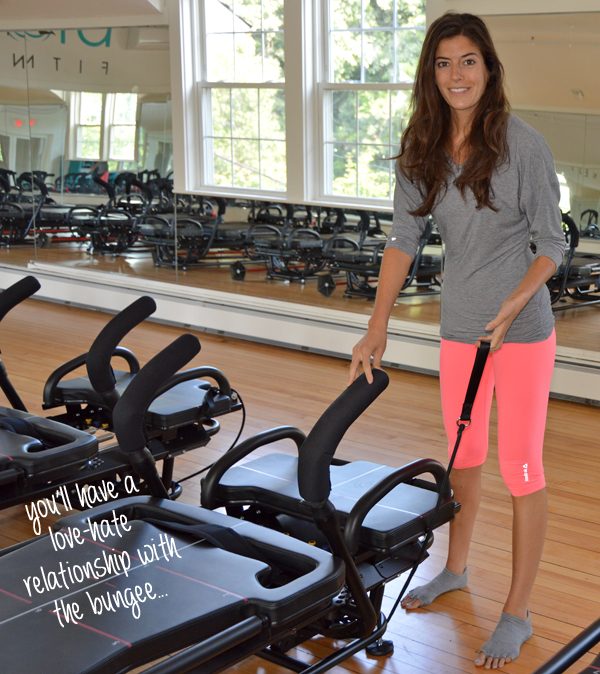
What to expect from your first Lagree Fitness class (and intro to the Megaformer and more!)We can move the carriage in tons of different ways, and most (not all) the exercises really come down to just that: moving the carriage! There are two sets of cables, which allow us to move the carriage on a pulley system, so we’ll often grab those with our hands or hook the floppy black strap around our feet. There are also eyelet holes and straps on the carriage for grabbing/hooking onto with our hands and feet. We can also move that carriage by pressing against or holding onto the front or back handlebars. These handlebars can be moved into several positions to accommodate different exercises. There’s also a bungee cord (which I fully credit for this firmer booty I now have), a floor strap, and different rails and hand rollers on the platforms (of the M3) to give you hand position options.

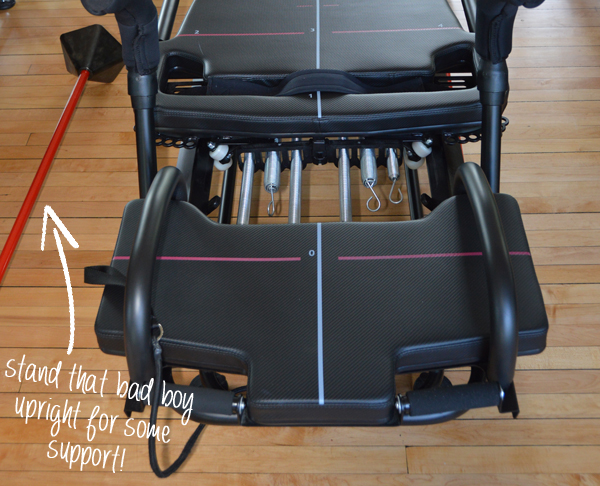
What to expect from your first Lagree Fitness class (and intro to the Megaformer and more!)Sometimes we increase the difficultly of exercises with hand weights (this is also a way to incorporate upper body work while we do legs), and we have a pole that can be used to help with balance during some of the exercises. Using the red pole is not a sign of weakness at all—it can allow you to get a fuller range of motion out of some exercises. Especially your first class, don’t be afraid to use the pole when the option is given by the instructor!

How Your Body Will Feel

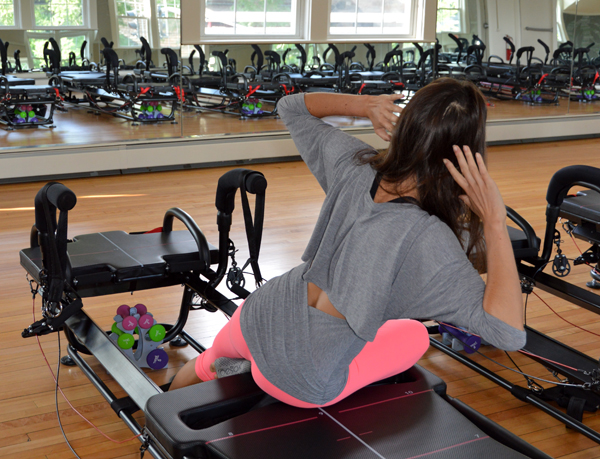
What to expect from your first Lagree Fitness class (and intro to the Megaformer and more!)This is a low impact workout and easy on the joints, but don’t be fooled—it’s INTENSE. During class, it’s normal for the muscle group you’re working to shake—in fact, that’s good! Trust me, as you continue to advance in this workout, you will live for that shake (as twisted as that sounds). The more advanced you become, the less frequently you’ll get “the shakes,” but even after the countless classes I have under my belt, certain exercise combos will come up and BOOM—shaking like a leaf. I love it! Because we work one muscle group at a time, taking it to that furthest point of effective stimulation, you’re nearing muscle failure (that sounds scarier than it is). It will feel harder to balance and control the movement of the exercise with shaking, but fight through it (easier said than done, I know).

While I find the shaking is most common during lower resistance exercises that require more balance and stabilization, it’s a slightly different sensation I feel when we load on the resistance—burning. Again, this is good and normal! There is a difference between being uncomfortable and being in pain—you’re going to be uncomfortable quite frequently in class. 🙂

I would say the two most common instances of that uncomfortable feeling bordering into pain (especially with newer students), is with the wrists and low back when doing the ab/oblique work. These will become less of an issue as you strengthen your core and wrists (and soon not an issue at all!), but if you have pre-existing problems with either area, say something to your instructor before class. They will give you tips and modifications for making the ab work easier on the wrists (switch up hand positions, come to your forearms, etc.) and show you how to protect the back (slight tilt with the pelvis as you pull the bellybutton in towards the spine, stacking knees under hips to modify, etc.).

What to expect from your first Lagree Fitness class (and intro to the Megaformer and more!)How will you feel after class? Amazing. Well, after your first class you might be thinking what the hell just happened—but in a good way. You’ll probably be sore the next day or two—more so if you’re not used to workouts emphasizing slow-twitch muscle fibers like this. At first, you may only want to come once or twice a week (depending on your fitness level), and from there, just listen to your body. I’d say most people come two-three times a week, but there are also those who prefer to come almost every day. Just make sure to give your body the rest it needs. Personally, I end up doing the workout two-four times a week (I don’t do the workout when I teach). As you know, I love switching it up, so I’m mixing in all types of fitness during the week along with those two-four Lagree classes.

The Benefits of Small Class Size

Aside from the workout itself, one of my favorite things about Lagree Fitness is the small class size. There are usually about 10 machines (give or take a few) in a studio, so you never feel lost in a crowd. If you’re confused or not sure how to get into one of the exercises, the instructor will notice and be able to come right over and help you out.

I think small class size also helps create a community feel. Especially given the enthusiasm (obsession even), that many people have for this workout, you’ll start recognizing familiar faces in class, will get to know the instructors, and will start to feel part of this awesome, motivating community. Of course if that’s not what you’re looking for, you can still be in and out strictly for the kickass workout.

Final Thoughts

If your first class is anything like my first, expect to feel humbled (in a good way!). I (thought I) was in great shape when I walked into Btone for my first class, but was shaking like a leaf by the end; unable to get through some moves without taking a break; and could not make it down a flight of stairs for two days afterward. The workout was just so unlike anything I was doing at the time, and my body was challenged in ways it never had been—I was immediately hooked!

Prepare to find your latest addiction. Lagree Fitness isn’t cheap (small studio classes out there typically aren’t), but it’s worth it. Most studios offer some sort of introductory offer so that you can try it without a huge financial commitment, and then from there, if you purchase larger class packages, you’ll end up saving and bringing the overall price per class down.

What to expect from your first Lagree Fitness class (and intro to the Megaformer and more!)

WEARING | top: c/o Ellie  (use code nicoleperr20 to get 20% off your first order!)  // leggings: c/o Reebok

If you’re in the Boston area, Btone has studios on Newbury Street and in Lexington, Wellesley (where these pics were taken) and Sudbury. If it’s your first time, you can buy three classes for the price of one ($30). Every instructor has a slightly different style, and every class the routine is different, so it’s great you can try out three different classes as a newbie. I teach Monday & Thursday early mornings and Sunday mid mornings in Boston, and Thursday nights in Wellesley. My schedule might change a little in the fall, and I’m frequently subbing for other instructors at random times, so check the schedules for my name (I’m the only Nicole)—I LOVE meeting readers in class! I also do the workout all the time, so if you can’t make it to mine, maybe I’ll be on the megaformer next to you in another instructor’s class.

Jeeeeze I must really love this workout because I just wrote a flippin’ NOVEL. 🙂

Have you tried Lagree Fitness before? What was your first class like? Any tips for newbies you’d like to add? Leave a comment!

signature